How to install and setup eclipse ADT plugin?
After the setup of Android Environment variable, now its time to setup eclipse ADT Plugin.
What is ADT and Use in Android Automation?
Android Development Tool (ADT) is a plugin for the Eclipse IDE.
ADT helps in providing the strong environment to integrate with android application development.
In Android Automation through appium, ADT plays a crucial role it help in the integration of eclipse with mobile device and smooth execution of script on mobile application. Lets understand to setup ADT plugin step by step.
Steps to install and setup ADT in eclipse are below:
Step1) Open the eclipse IDE to your local system.
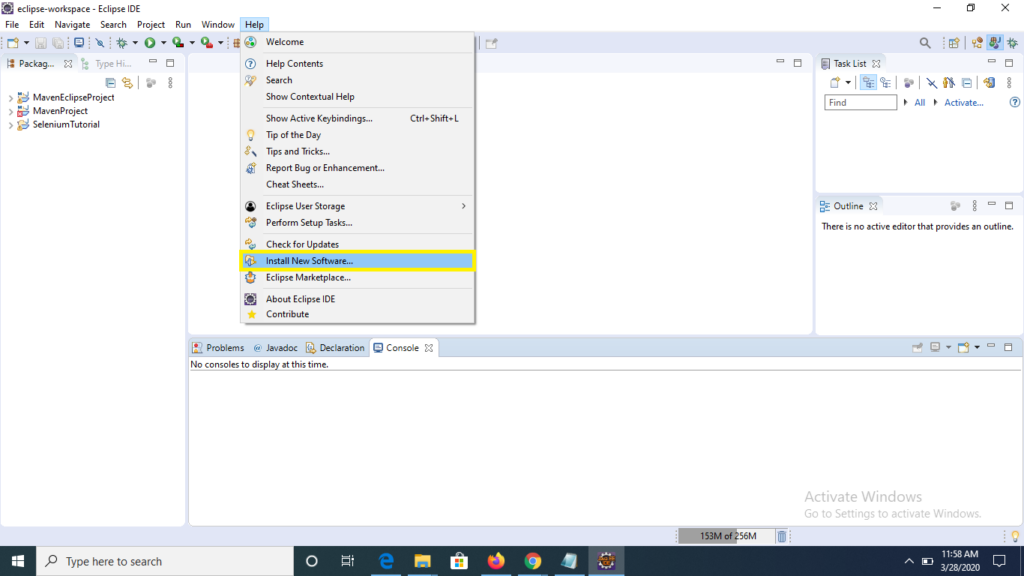
Step 2) Click to Help menu at top on eclipse IDE window and select “Install New Software” option for list.
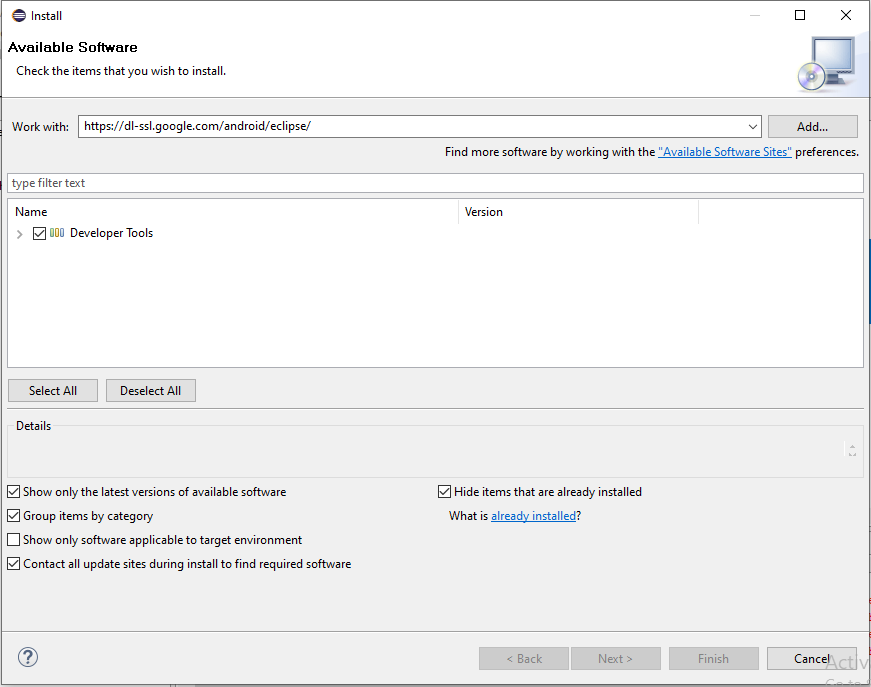
Step 3) On “Available Software” window, provide the ADT installation url as -> https://dl-ssl.google.com/android/eclipse/ under works with: text field also check the check box for Develops tool and click to Next button
Step 4) Click to Next and Next till the last window and ADT plugin gets installed.
Step 5) Now close your eclipse and re-start your system, so that the changes gets reflected on the system.
Result-> Following the above steps we are now have integrated our eclipse IDE with Android, this will help in the creation and execution of mobile automation scripts.
Connect Us at Facebook-> https://www.facebook.com/code2test/?modal=admin_todo_tour