Home » cypress-tutorial
Category Archives: cypress-tutorial
How to interact Hidden Element in Cypress
Previous Topic, We have learned locating HTML element in previous Topic. In this session we will be going through How to interact Hidden Element in Cypress.
How to interact Hidden Element in Cypress?
Cypress has the capability to handle hidden elements. In many applications we come up with a scenario where a submenu gets visible on mouse over to the menu option. In other words the submenu gets visible on taking the mouse pointer over the main menu.
For handling such hidden elements. The elements can be invoked using, Cypress has the command (invoke[‘show’])
Lets take an example to under in depth:
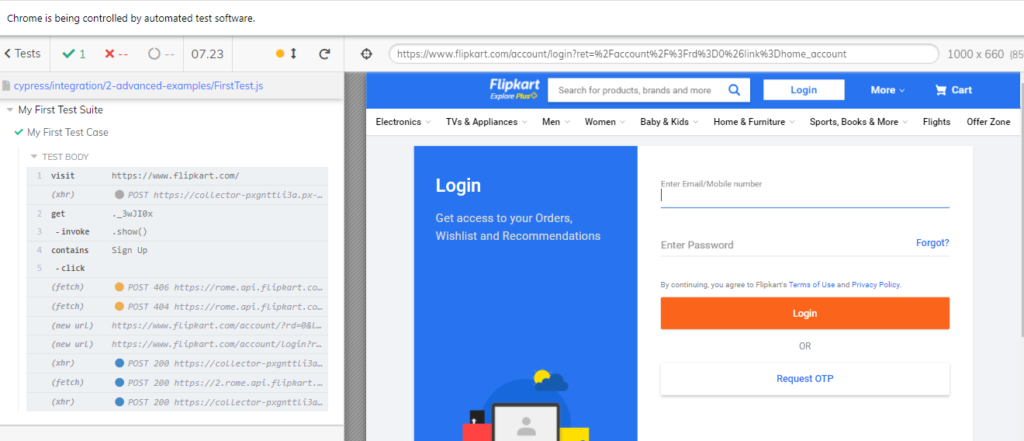
In the below screenshot, We took example to Flipkart website. On mouse over or hovering to Login menu, SignUp submenu get displayed.

However taking the mouse curser to some other location the Sign Up submenu gets disappeared.
Below is the code to handle such scenario using JQuery show:
///<reference types="cypress" />

describe('My First Test Suite', function(){
    it('My First Test Case', function(){

   // launch URL
   cy.visit("https://www.flipkart.com/");
   // show hidden element with invoke
   cy.get('._3wJI0x').invoke('show');
   //click hidden element
   cy.contains('Sign Up').click();

})

})
Expected Output:
Other way of handling Hidden Element in Cypress
Cypress do have other way of handling such hidden methods. In this method we just use click method and pass {force:true} to it. The command looks like click({force:true})
///<reference types="cypress" />

describe('My First Test Suite', function(){
    it('My First Test Case', function(){

   // launch URL
   cy.visit("https://www.flipkart.com/");
   //click hidden element
   cy.contains('Sign Up').click({force:true});

})

})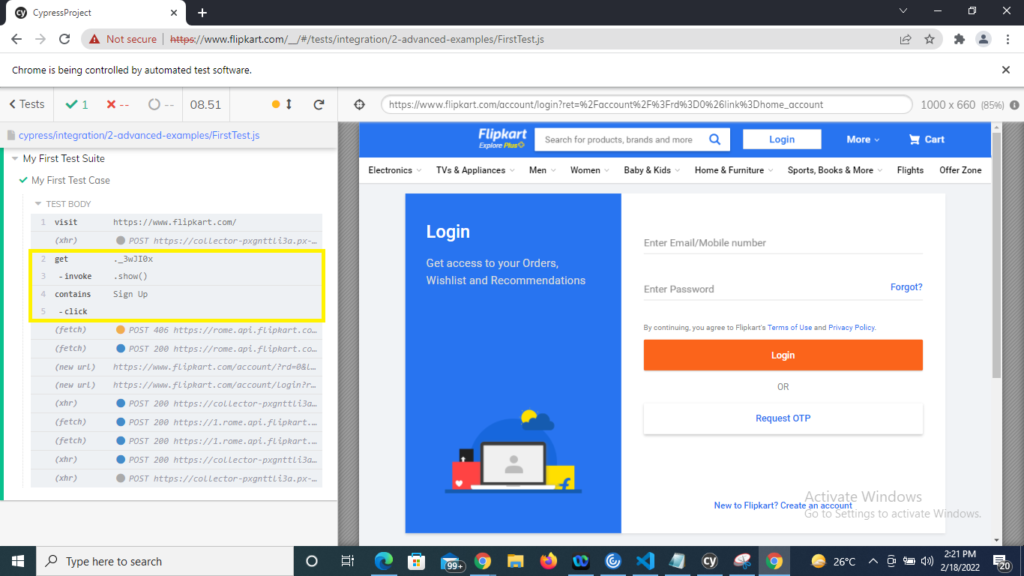
In the log we see that hidden elements are observed by Cypress and clicked.
How to Locate HTML Elements Using Cypress Locators
Previous Topic , In this tutorial we are going to learn How to Locate HTML Elements Using Cypress Locators. Along with locating elements from Cypress Test Runner with sample example.
How to Locate HTML Elements Using Cypress Locators
Locators plays an important role in automation of web-based applications. The locators identify that the GUI application which is under test, what type of elements is that either its textbox, Button , checkbox etc. As we are working on Cypress it supports only CSS selector. Therefore we will be using CSS selector in all over Cypress automation coding part.
As CSS (Cascading Style Sheets) can be written in multiple ways. Using Id, Class using attribute name and value pair. Above all for more details we can expand the CSS selector in different ways to perform.
Let discuss in depth why and how to create locators taking the example of Facebook login window to make it more simple.
How to Locate HTML Elements Using Cypress Locators?
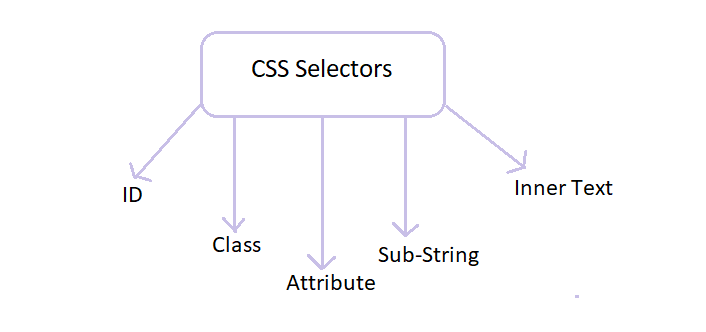
Different Locators with examples
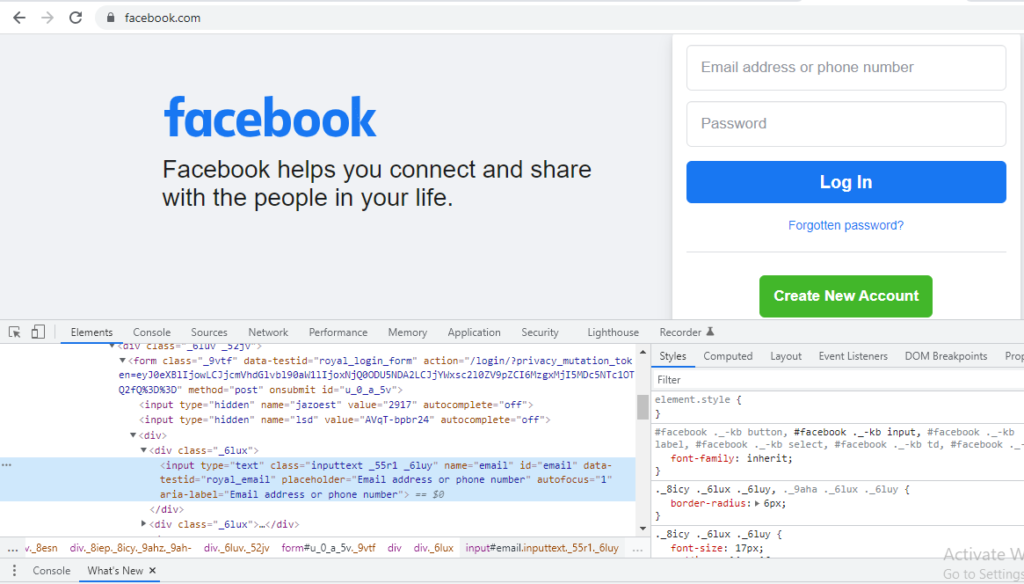
1) CSS Selectors ID:
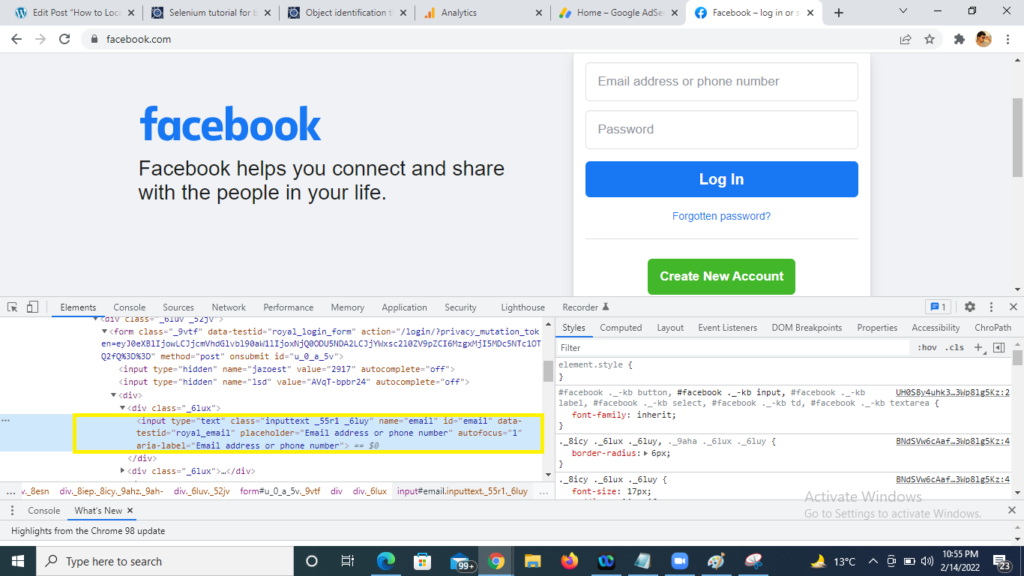
In the above image , we have highlighted the Email address of Facebook login page and we see the HTML on the bottom highlighted in yellow. In CSS the Id attribute is denoted by prefix ‘#‘. The syntax is as below:
| Syntax | Description |
| TagName#ValueofIDAttribute | TagName= HTML tag for which we are looking to create locator #= Hash sign, its the prefix of class ValueofIDAttibute= class value for element being accessed |
Therefore the locator will be: input#email
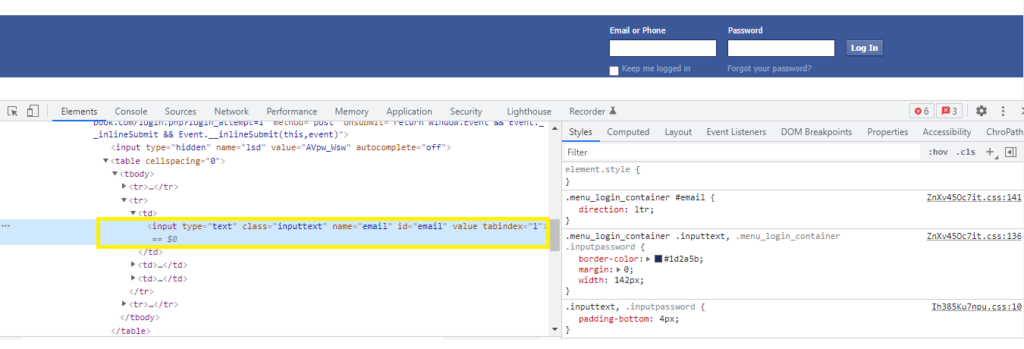
2) CSS Selectors Class :

Taking other example for creating the locator for class attribute . In CSS the class attribute is denoted by prefix ‘.’ The syntax to locate HTML for class id is below:
| Syntax | Description |
| TagName.ValueofClassAttibute | TagName= HTML tag for which we are looking to create locator .= Dot sign, its the prefix of class ValueofClassAttibute= class value for element being accessed |
Therefore the locator will be: input.inputtext
3) CSS Selectors Attribute:

Creating locator using attribute we have to take the combination tag along with attribute name along with it value. The syntax is as below:
| Syntax | Description |
| TagName[AttributeName=AttributeValue] | TagName= HTML tag for which we are looking to create locator AttributeName=Any attribute to be used.Its always preferred to use unique attribute like Id AttributeValue= Value of the attribute selected |
Therefore the locator will be: input[name=email]
How to use Sub-String and Inner text to find locators in Cypress?
4) CSS Selectors Sub-String:
However we have learned the locators like ID, class and attribute. Finding HTML element by Sub-string is also quite easy. The symbol ‘^’ represents starts-with in CSS locator or prefix. Suppose in a Web page we want to locate Email whose name attribute is not static, its dynamic, the start 3 text is always same but the next part is dynamic and changes every time the page gets refresh, so in this case with the help of static string we can locate the element in CSS locator using Sub-String .The Syntax is as below:
| Syntax | Description |
| TagName[AttributeName^=’AttributeValue’] | TagName=HTML tag for which we are looking to create locator AttributeName=Any attribute to be used. Its always preferred to use unique attribute like Id ^=Represents matching a string with words starts-with or prefix AttributeValue=Value of the attribute selected |
Therefore the locator will be: input[name^=em]
5) CSS Selectors Inner-Text:
The symbol ($) represents ends-with or Suffix in css locator. Suppose in a Web page we want to locate email text box whose type attribute is not static, its dynamic, the last 3 text is always same but the first part is dynamic and changes every time the page gets refresh, so in this case with the help of static string we can locate the element in css locator using starts-with (). Syntax is tagName[attributeName$=’attributeValue’]
| Syntax | Description |
| TagName[TttributeName$=’AttributeValue’] | TagName=HTML tag for which we are looking to create locator AttributeName=Any attribute to be used. Its always preferred to use unique attribute like Id $=Represents matching a string with words ends-with or suffix AttributeValue=Value of the attribute selected |
Therefore the locator will be: input[name$=ail]
Note: For easy in capturing the CSS and xpath. Chrome provides a plugin ChroPath. That make creating and getting the locator very easily. In further tutorials we will use this plugin.
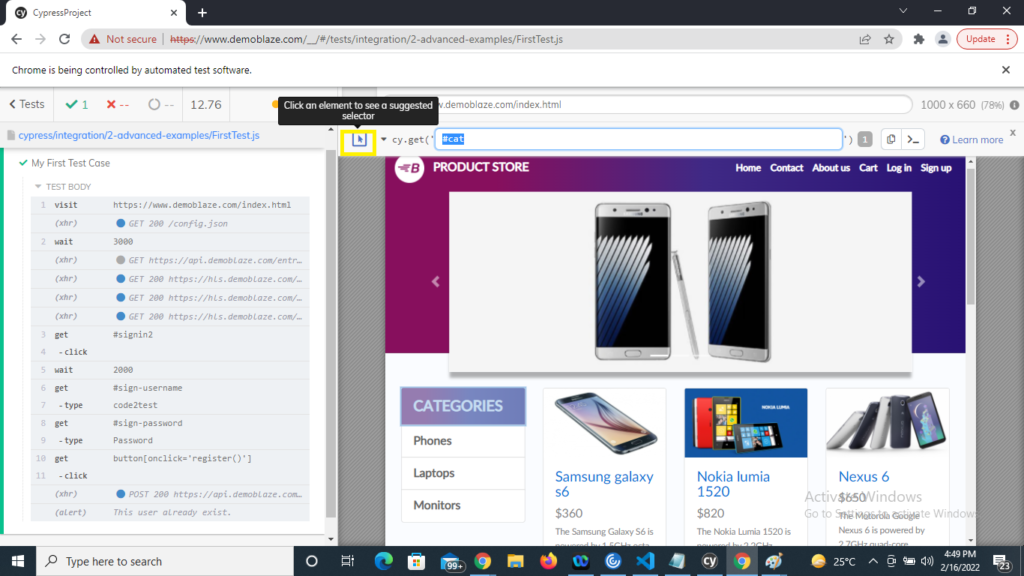
How To find locators using Cypress Selector Playground?
Imagine , If any automation tool provides you the feature get and verify the locators with in the tools itself. Isn’t that cool? Cypress automation provides you the same feature to get and verify the locators like CSS to make ease in automation with a functionality known as Open Selector Playground.
Steps to get and validate CSS locators is below:
1) Open the Cypress Test Runner and Run any of your existing script.
2) Select the toggle button and enable ‘open Selector Playground’ highlighted on the top.
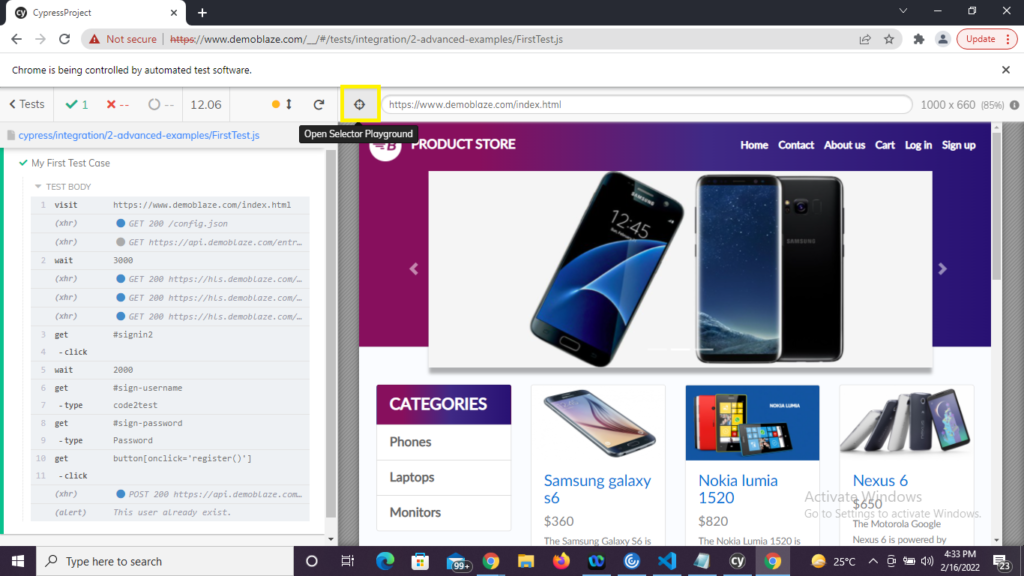
3) Once the ‘open Selector Playground’ is enabled click to any of the element on the UI (ex: CATEGORIES). The CSS gets generated on the top.

4) To validate the element click to arrow button as in screenshot, the element gets highlighted in UI.
How to Write First Cypress Test Case
Previous Topic , In this tutorial we are going to learn How to Write First Cypress Test Case and execute on different browser.
How to Write First Cypress Test Case?
Whys and how to write test in Cypress? As Cypress build on java script extension. So for working on JavaScript test framework, we have follow the standards of JavaScript framework (like jasmine or mocha). They are famous java script based framework available in market as test framework, we need to follow any one of testing framework standards to write cypress testing.
Cypress has the knowledge of browser to automate. But to make a test case or script runnable we need to inject any of the cypress test framework to any of the provided java script framework, same as TestNG and junit in selenium. Cypress is recommending to use Mocha testing framework because of which Mocha comes within cypress package. So as we download cypress, Cypress automatically bundles Mocha framework.
Understanding MOCHA Structure
Before Writing First Cypress test case, lets first understand MOCHA structure. Below is the MOCHA structure
//Code Structure

describe('My First Test Suite', function(){
    it('My First Test Case', function(){

    })

})
When we say describe block its test suite, it nothing but test suite, there can be multiple test cases in a test suite in Mocha and it block is treated as test case. Here we have one describe block name ‘My First Test Suite’ inside this test suite we have it block which is test case and whatever we define inside the it block it is treated as a test.
In other words all the test is wrapped inside it block and all the it block is wrapped inside describe block . Both the framework MOCHA and Jasmin have same way of writing test cases.
Steps to create first test case in Cypress
Lets consider below scenario for automation.
1) Open the URL -> https://www.demoblaze.com/index.html
2) Click to SignUp on top
3) Type Username
4) Type Password
5) Click to SignUp button
Lets Automate the above scenario:
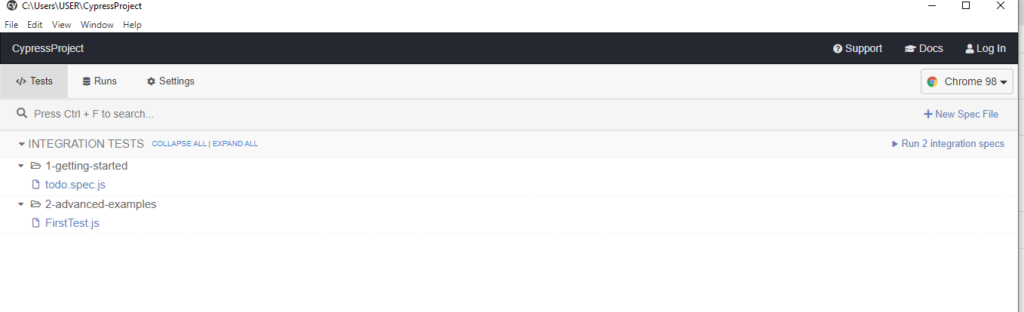
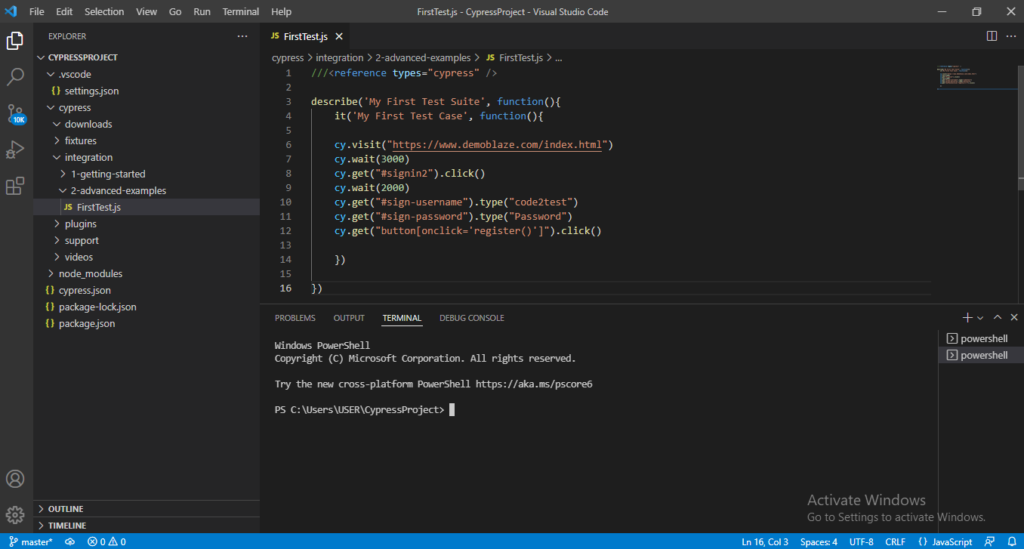
1) Click to New file button and create a spec file name as FirstTest.js as mention on screenshot below.

2) Copy and Paste the below code inside this FirstTest.js file.
///<reference types="cypress" />
describe('My First Test Suite', function(){
it('My First Test Case', function(){
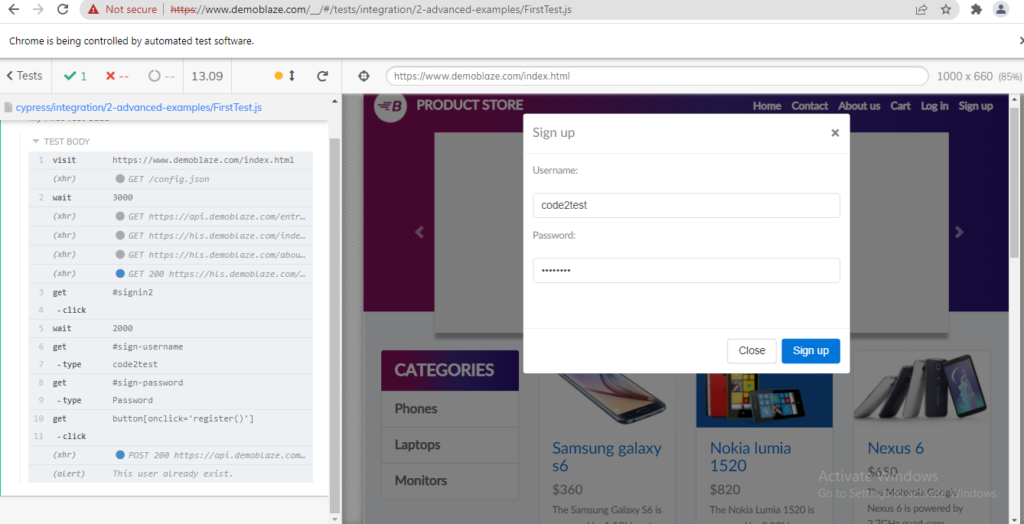
cy.visit("https://www.demoblaze.com/index.html")
cy.wait(3000)
cy.get("#signin2").click()
cy.wait(2000)
cy.get("#sign-username").type("code2test")
cy.get("#sign-password").type("Password")
cy.get("button[onclick='register()']").click()
})
})
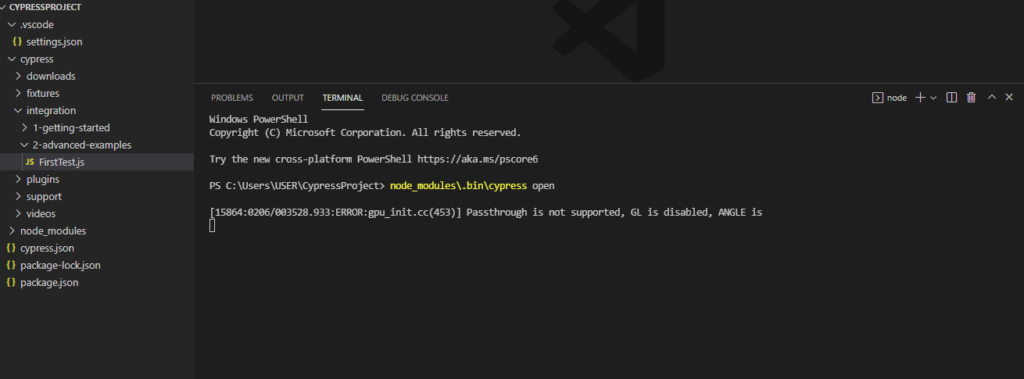
3) Now click to Terminal on the top and open a new terminal ( Terminal-> New Terminal).
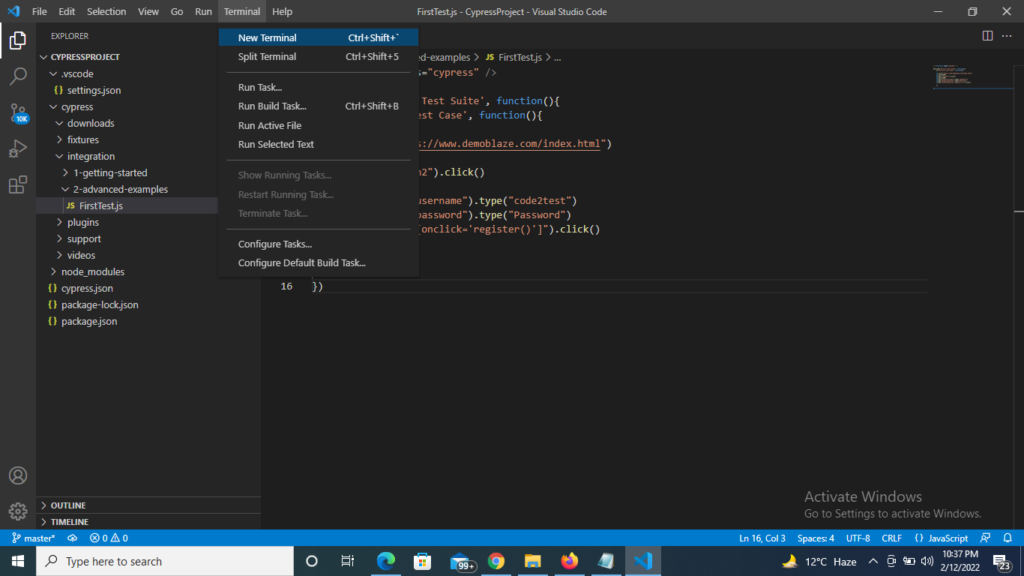
4) You will see a new terminal gets opened on the bottom of your script with different window.
5) Now the next step is to open Cypress Test Runner by hitting below command on terminal. As this command will open the Cypress Test Runner window
node_modules\.bin\cypress open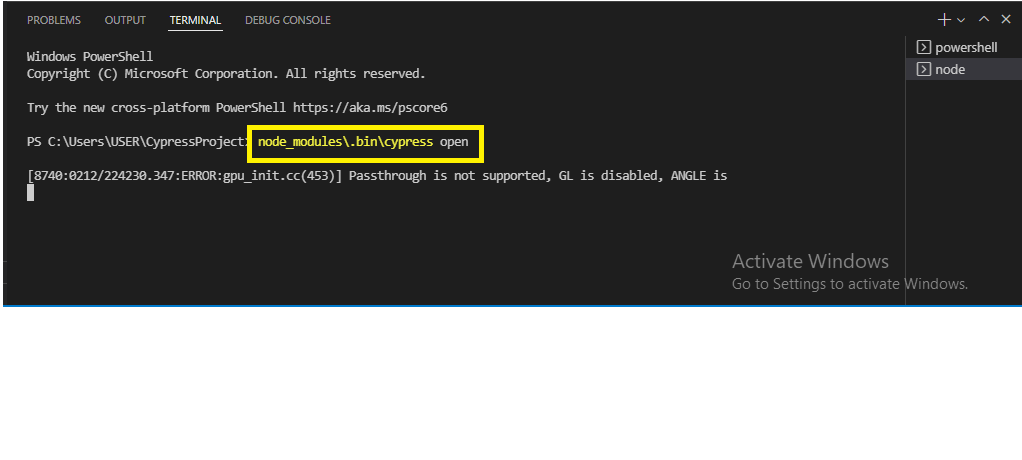
6) We see that our spec file (FirstTest.js) is visible in Cypress Test Runner window.
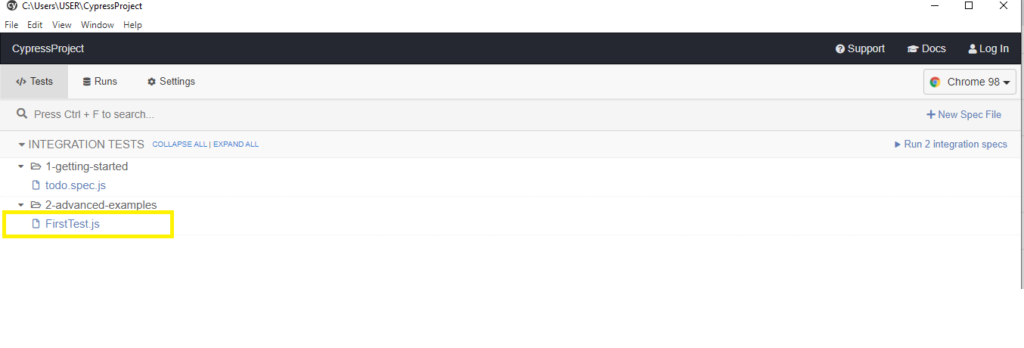
7) Now select the browser from top right list box with 3 options (Chrome, Firefox, Edge, Electron)
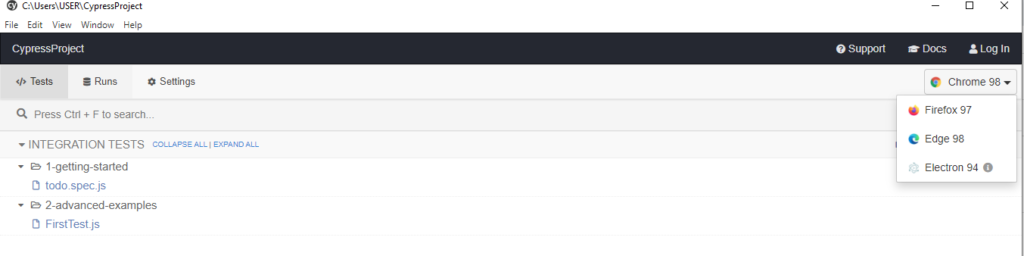
8) Suppose we selected Chrome, now double click to FirstTest.js file and execution gets start.
How to Run test execution through Command line or Terminal?
Below are the commands for running execution through terminal or without opening Cypress Test Runner
1) For running specific test file through terminal on default browser (Electron), hit the below command.
node_modules\.bin\cypress run --spec "cypress/integration/2-advanced-examples/FirstTest.js"Note: This command with run the “FirstTest.js” file only and execution will perform in default (Electron) browser in headless mode (means no browser is visible to you).
2) For Running a complete test (all test files available in example folder), hit below command.
node_modules\.bin\cypress run3) For Running specific test on headed Brower (Browser is visible to screen). Hit below command.
node_modules\.bin\cypress run --headed --spec "cypress/integration/2-advanced-examples/FirstTest.js"Note: If we don’t specify browser it will run on default browser Electron.
4) For Running on different browser as per requirement. Hit below command.
node_modules\.bin\cypress run --browser chrome --headed --spec "cypress/integration/2-advanced-examples/FirstTest.js"Note: On hitting above command the execution will perform in chrome browser as mentioned on code. To Run on (edge , firefox) specify or replace the browser name.
For example in firefox we use command -> node_modules.bin\cypress run –browser firefox –headed –spec “cypress/integration/2-advanced-examples/FirstTest.js”
What is Cypress Test Runner ?
Previous Topic , In this tutorial, we are going to learn about Cypress Test Runner in depth.
It is one the important part of Cypress tool which plays a crucial role in Test execution. It helps to provide the initial push to start the execution of test case. During the execution of test cases of test cases in cypress all the commands are being monitored and displayed in Cypress Runner with the provision of running it on different environments.
How to open Cypress Test Runner in Visual Studio Code?
We can open Runner using below steps:
Step 1) Open the Terminal on click to Terminal->New Terminal (refer screenshot)

Step 2) Hit the command inside the terminal as below:
//Command to open Cypress Test Runner
node_modules\.bin\cypress open

As we hit the command we see that the Cypress is opens the first time on the machine. Once the commands gets fully executed the Test Runner gets executed as it hits the internal API and commands to open Test Runner to different window.

Note: If you get Error as : Cypress verification timed out. The command failed with the following output : c:\User \xxxxxxxxxxx
//Use below command for Set Execution policy (required) refer screenhot below
Set-ExecutionPolicy RemoteSigned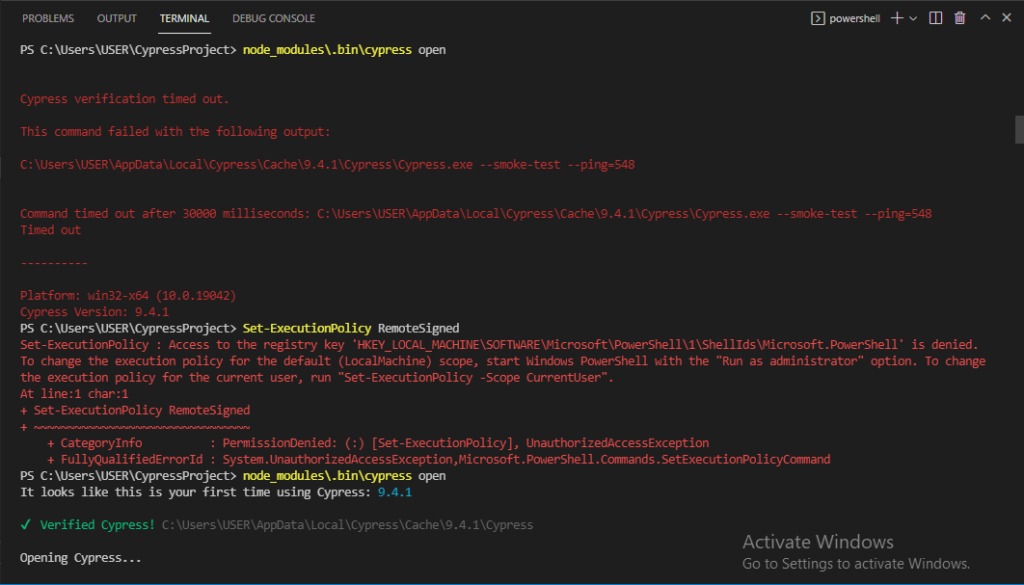
Cypress create a default folder and files inside the Cypress folder. This contains file name like Integration, Plugins, supports, videos’ etc.
The Cypress provides a Framework structure for easy script development. As we open the Test Runner we see that there multiple .js files as default which are sample test cases provided by Cypress developer to understand the the flow (refer screenshot)
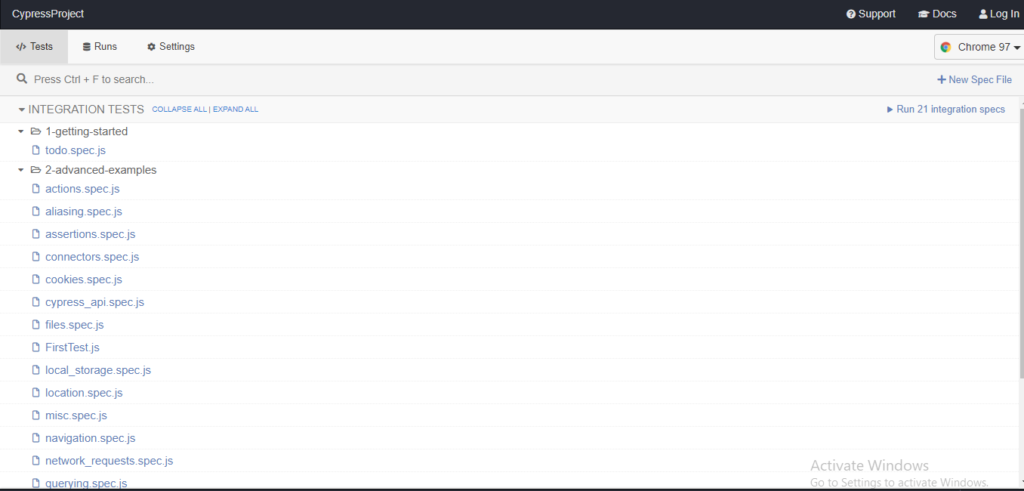
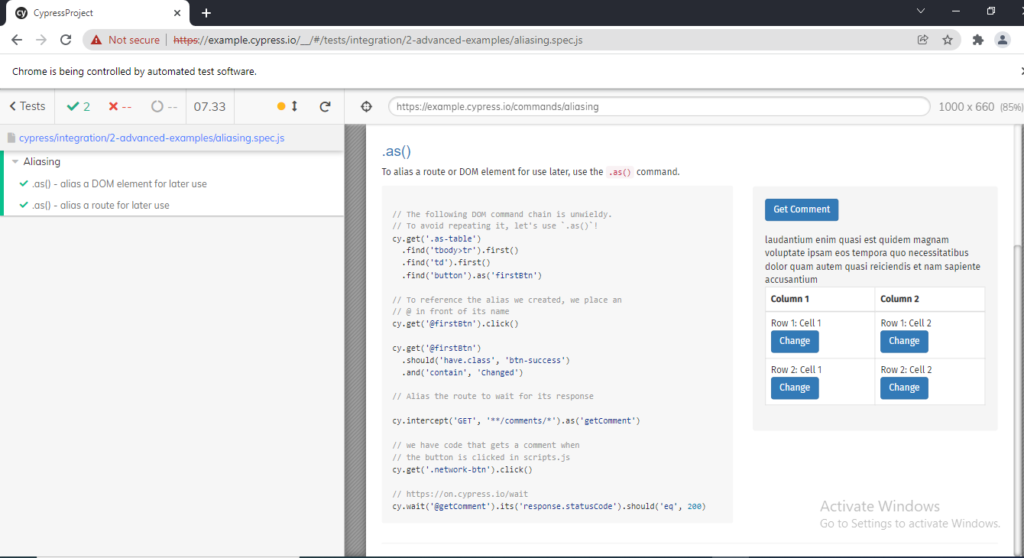
If you wish to run the test case any of the listed (Suppose: aaliasing.spec.js) , you just have to click to that specific test case as a result the browser will open along with logs on left side of browser.
Creating package.json file
Previous Topic , In this tutorial, we are going to learn Creating package.json file inside Visual Studio Code and creating Cypress Project.
What is package.json file? and Whats its use for?
As it name referrers, it a json file which resides in the root of the project and stores metadata
of the current project, its key role is managing all the dependencies and successfully
running the script in our local machine. We will be taking the example for 2 dependencies in our package.json file to understand more in details with the help of NPM commands. But going further we need to understand NPM is depth.
What is NPM? Creating package.json file
NPM refers to Note Package manager, All the developer who develops JavaScript based packages hosts all their package in to this node package manager to its npm Website -> https://www.npmjs.com/.
As we run npm command what it initially does is, it reads all the dependencies from package.json file and after reading json file it directly connects to its repository https://www.npmjs.com/. and search for the dependencies with its version number and pulls it from npm repository to our local project. Similarly it continues this process for all the dependencies defined in project.json file. Due to this reason Package.json is said to be the heart of the node project. So where ever we are working JavaScript or node project , we need to create package.json file.
Steps to Create Package.json file through VC Terminal
1) Go to the terminal create a folder with preferred name ex( CypressProject) and move to the folder. Below are the commands:
//this command will create folder with name CypressProject
mkdir CypressProject

//this command with move to CypressProject Folder
cd CypressProject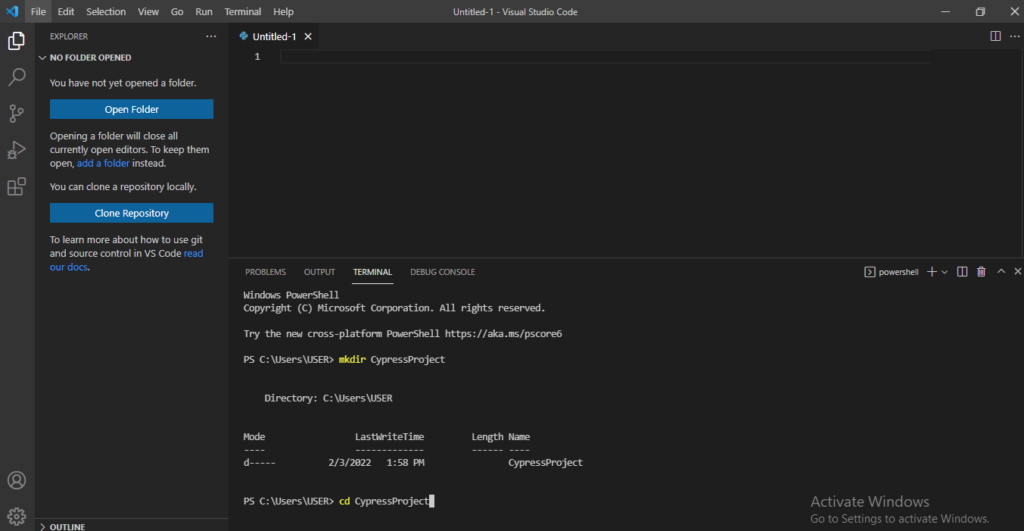
2) Now create npm project with below command
// Command
npm -i init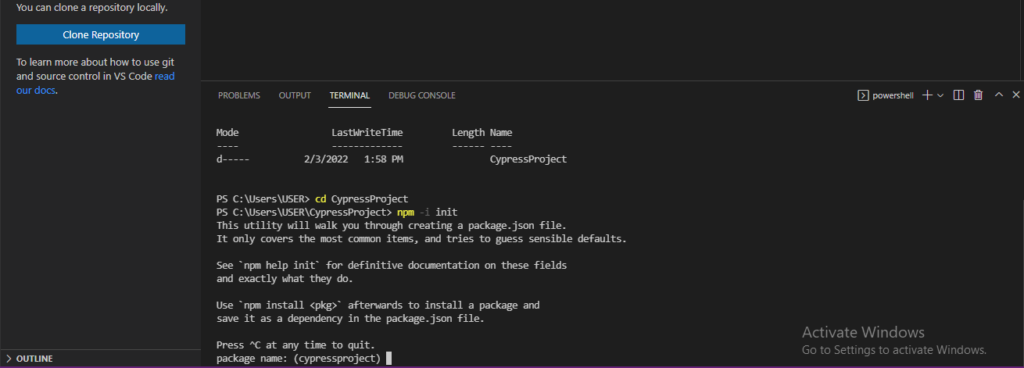
3) Now the terminal would ask you multiple pre-requisite (ex: package name, version etc) . Click to Enter for every pre-requisite or keep it on default data, till the json file gets generate on terminal (refer the screenshot)
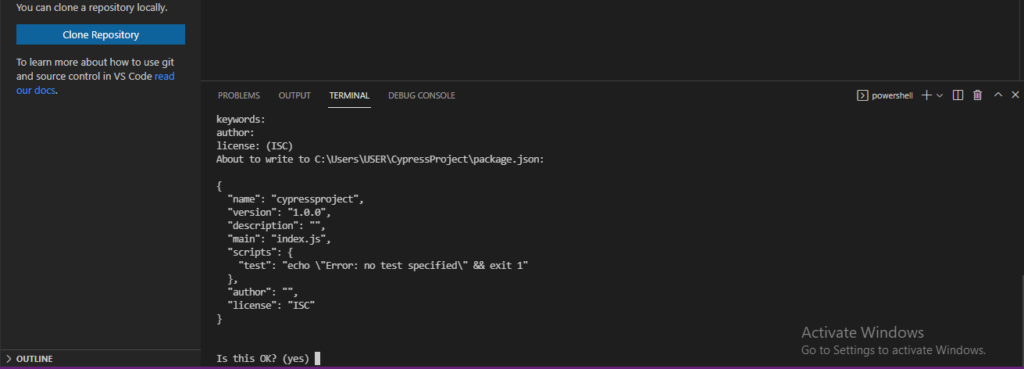
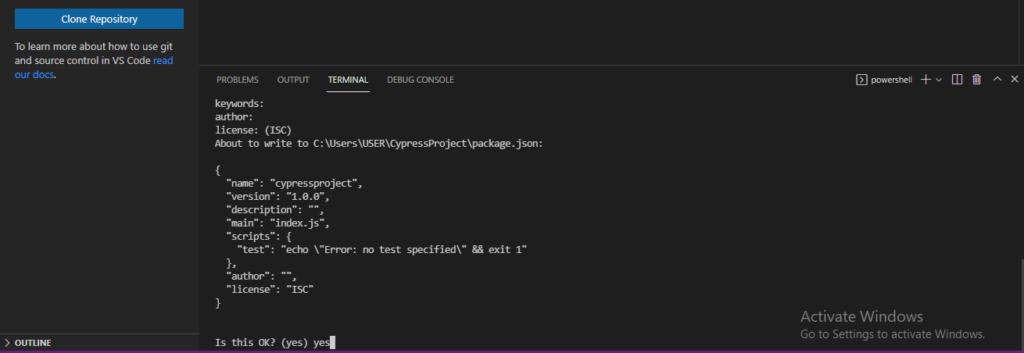
4) At last type “Yes” for question Is this OK?
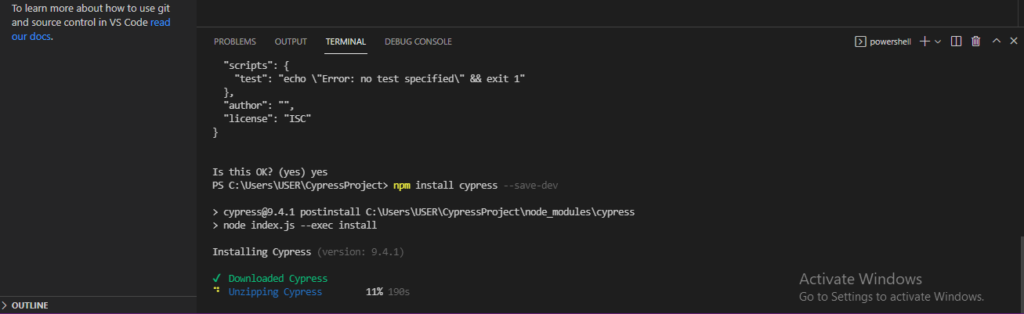
5) Now setup cypress dependency on using the below npm command and hit enter.
//This command will install cypress dependency
npm install cypress --save-dev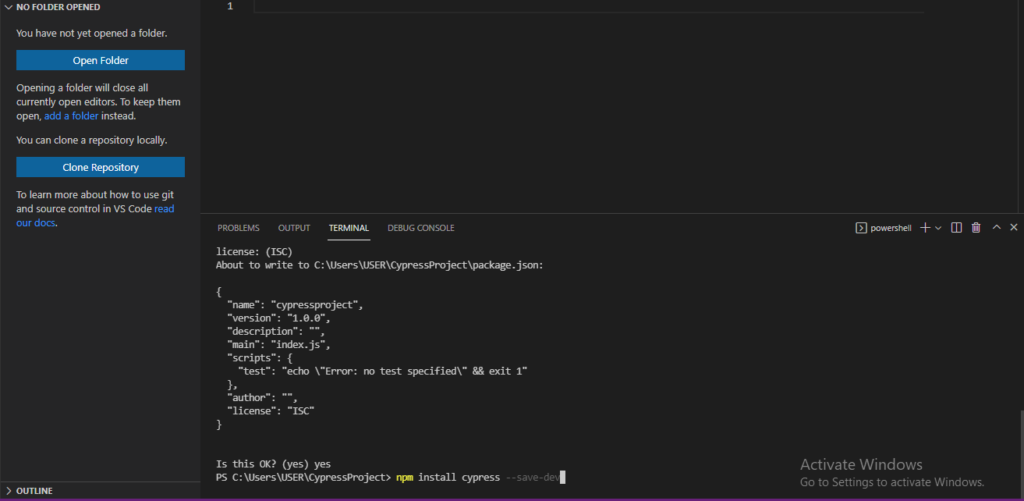
6) As we hit command npm start download , unzip and finish Cypress dependency.
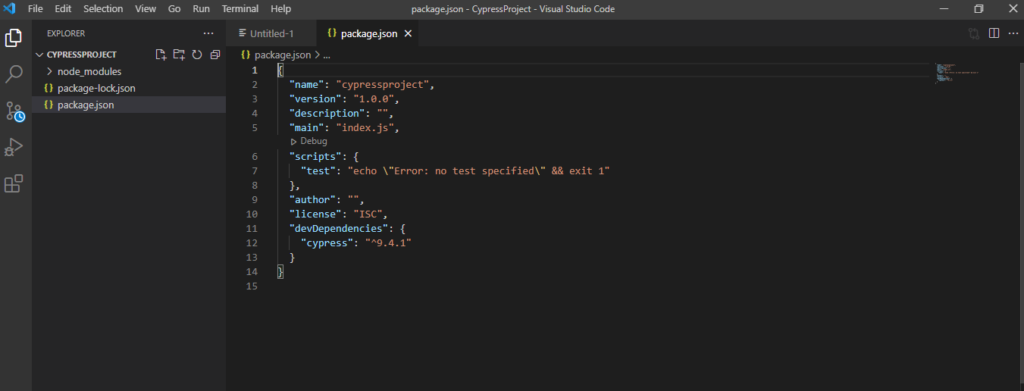
7) Once the Installation is completed click to open folder and select the folder we created above (CypressProject) from directory

8) Now we are completed with creation of VC project. Click to package.json file where you can see all the dependency mentioned on .json file as per below screenshot
How to Download and Install Visual Studio Code
Previous Topic In this article, we are going to learn how How to Download and Install Visual Studio Code.
For the development we need an IDE for programming in any specific language and Visual Studio is one of them. Why and how to use them? The reason for using this IDE , as this is light weighted and easy to use with strong base of code. This editor is available for Windows, Mac and Linux environment. VS code can support multiple language like C++, C#, Java, Python, PHP etc.
How to Download and Install Visual Studio Code?
Below are the steps to download and setup VC
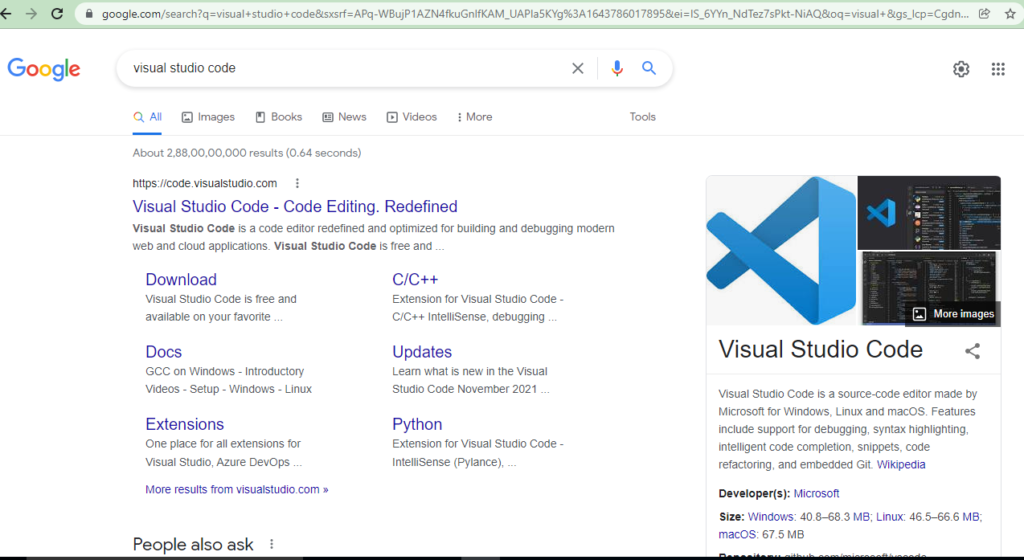
1) Search for “Visual Search Code” on google search as shown in screenshot or click to https://code.visualstudio.com/
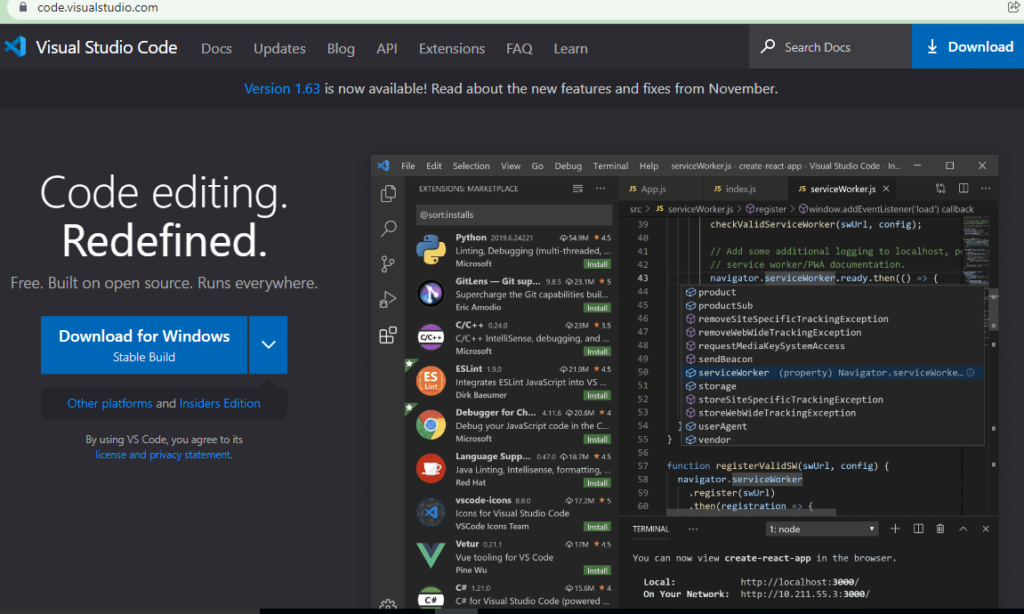
2) Click to Download for Windows button in blue.
3) After click “Download for Windows” button an .exe file gets downloaded to your system
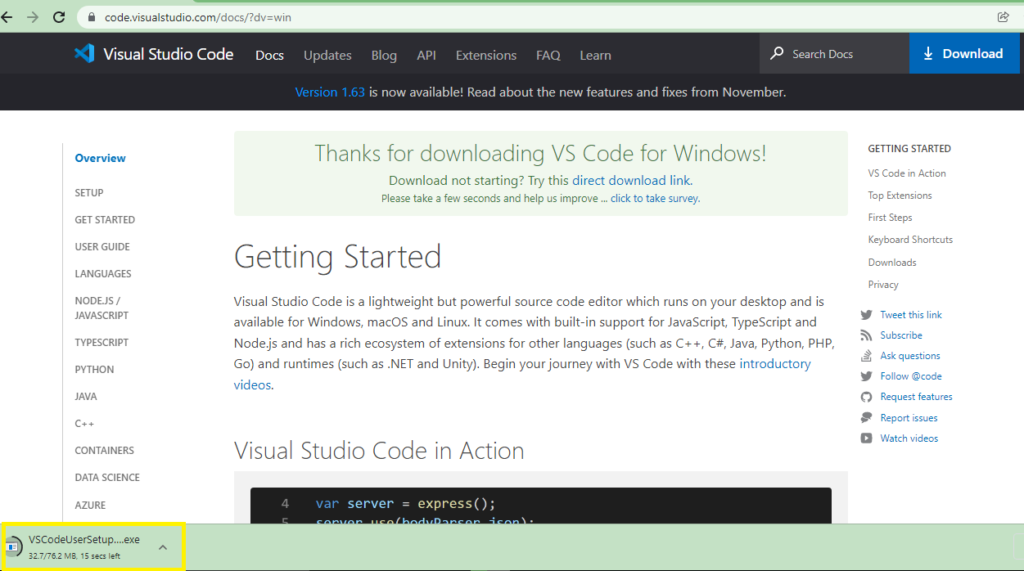
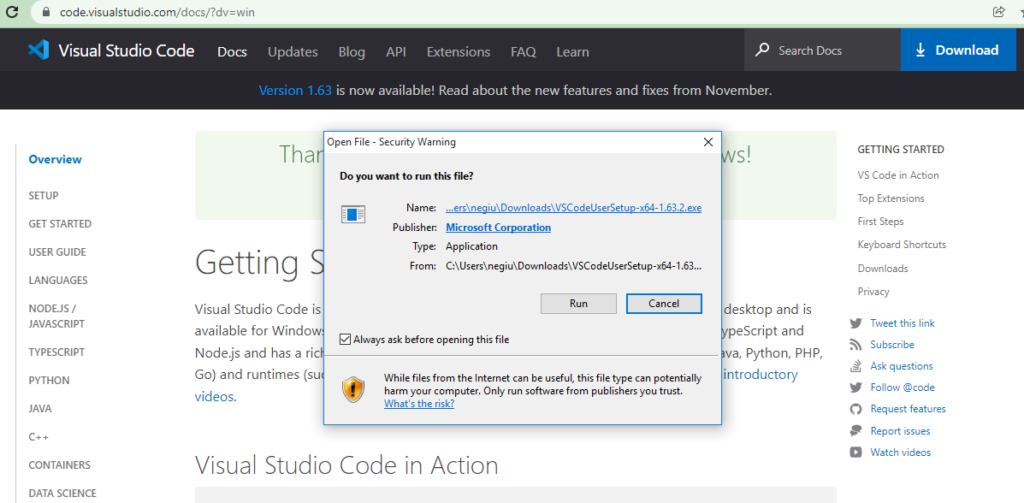
4) Run VSCodeUserSetUP.exe file to your local machine once its downloaded.
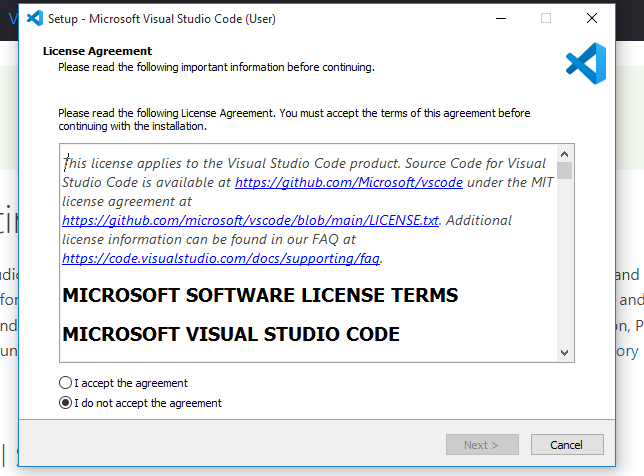
5) The Setup window gets appeared after running .exe file. Accept the agreement and click to Next button.
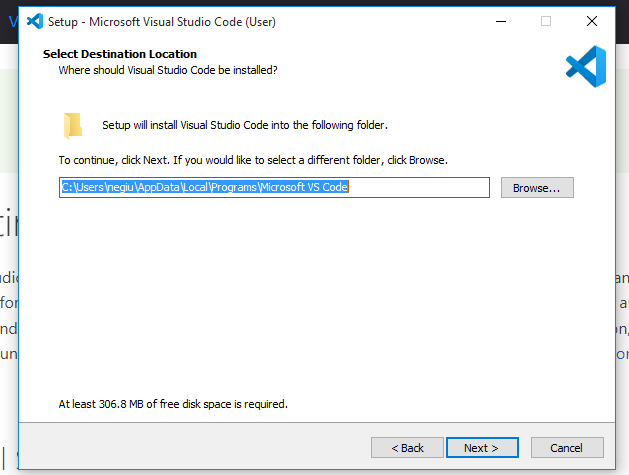
6) Select the default folder and click to next button
7) Keep default folder name and click to Next button
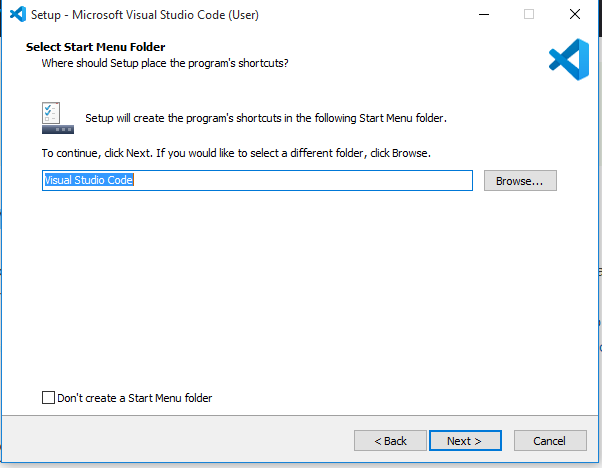
8) Click to Next button under “Select Additional Tasks” window

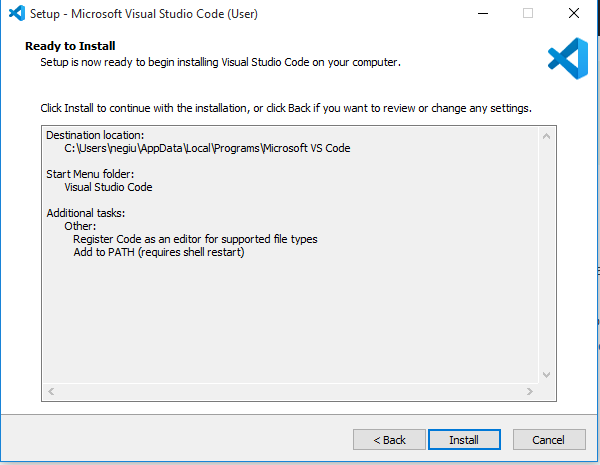
9) Under “Ready to Install” window, click Install button
10) On last step just click to Finish.
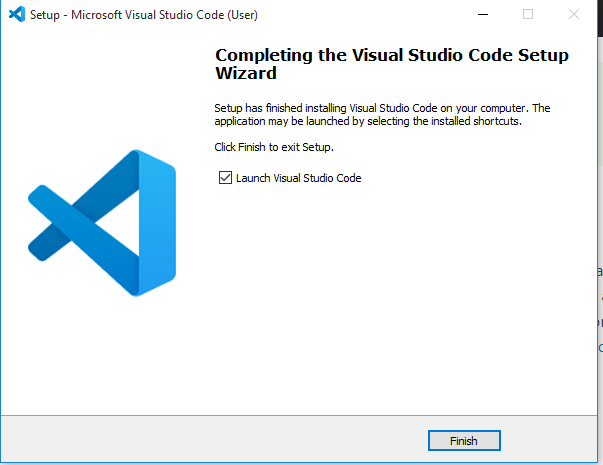
So, Following up the above steps sequentially , We can Download and install Visual Studio Code IDE for windows machine and can perform the coding for the supported languages along with Build-In support JavaScript, Node.js. We will be using the Visual Studio code in our upcoming automation tools like, Protector, Cypress tutorial in our further sessions.
Code2test would love to know your Feedback and suggestions in contents or if our learners need tutorial on some other topics not covered in site feel free to contact and share your suggestions.