Home » soapui-tutorial
Category Archives: soapui-tutorial
SoapUI Test Suite & Test Case
Previous Topic, After the installation of SoapUI Tool, we will now focus on creating , SoapUI Test Suite & Test Case , To understand better.
Understanding SOAP protocol
SOAP stands for Simple Object Access Protocol, its basically a XML based protocol which helps to communication between different systems and platform.
In this protocol a XML based WSDL is been developed by developers, which is in a form of request body with defined format structure and it it to server, the same format is been received as a response or output.
Structure of SOAP Request format
Soap request is basically a simple XML structure with the combination of different elements, which combines to create a proper request body. The elements of SOAP Request are:
1 ) Envelope : its basically defined at the start and the end of the element request and response body
2 ) Header: its basically used in the start of XML structure to initiate with different elements.
3) Body: It contains the message body and has attribute with different parameter followed by values associated with it.
How to Create Project in SoapUI?
To understand better, lets take a sample soap project and create step by step.
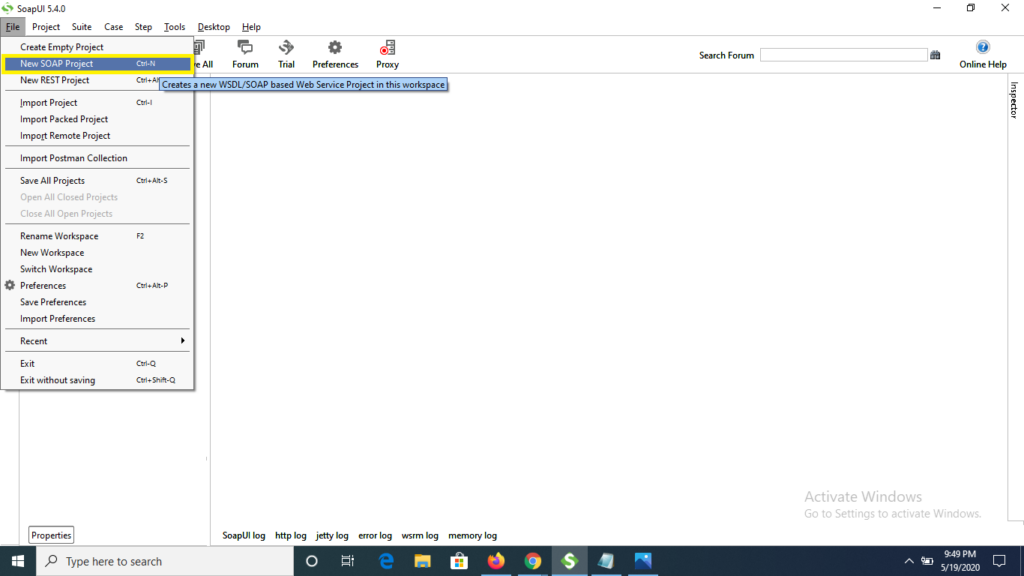
Step 1) Open the SoapUI tool, click to File and select “NEW SOAP Project” from the options.
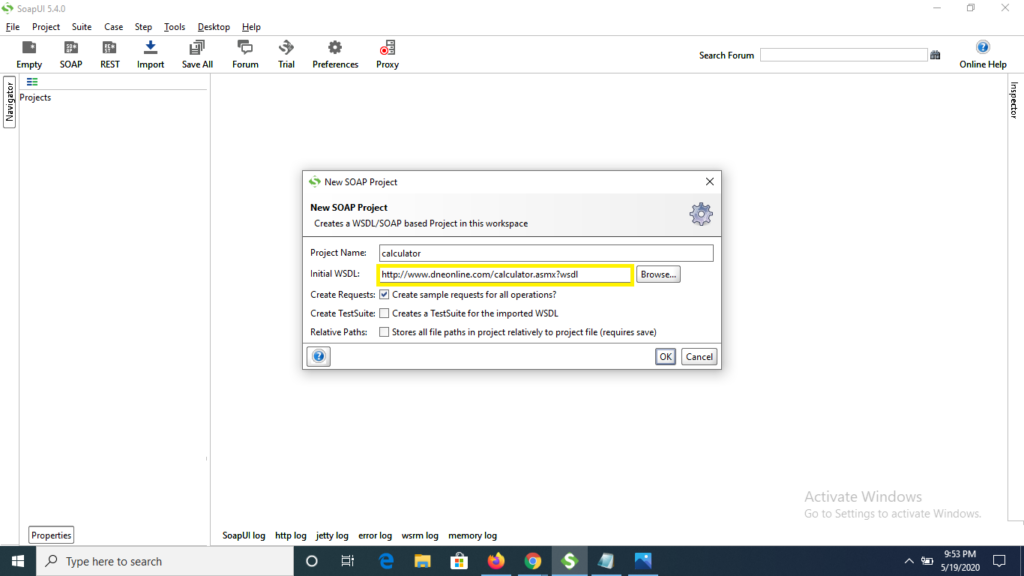
Step 2) Now enter the WSDL url-> http://www.dneonline.com/calculator.asmx?wsdl inside the Initial WSDL text field, the Project name will be auto filled as Calculator, and finally click to OK button
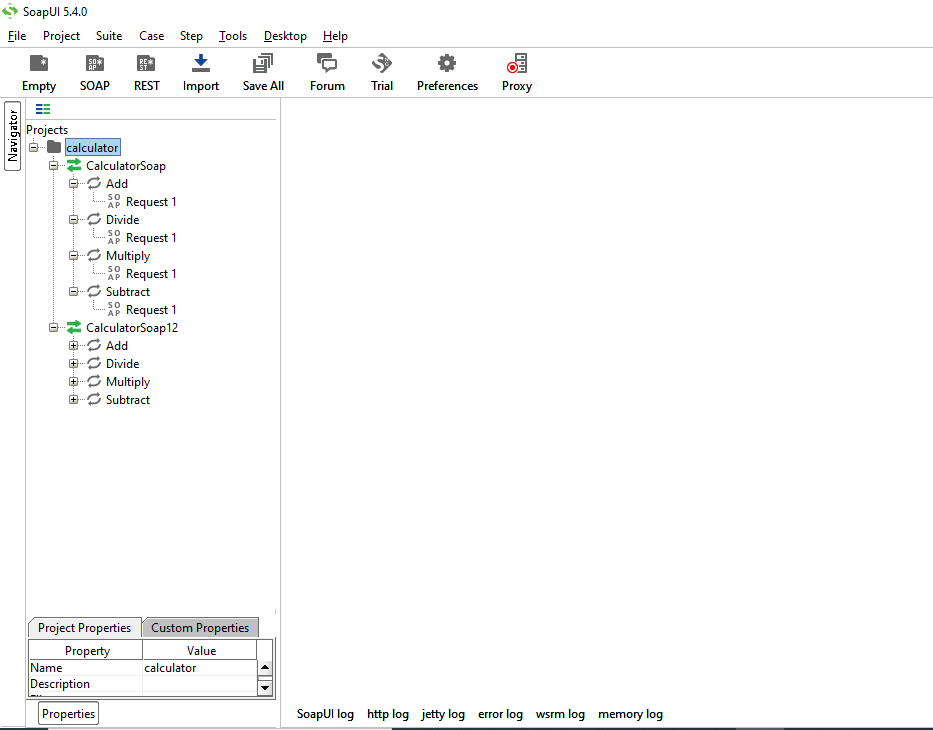
Step 3) Now we see that a project name Calculator along with two operations are getting displayed in SoapUI
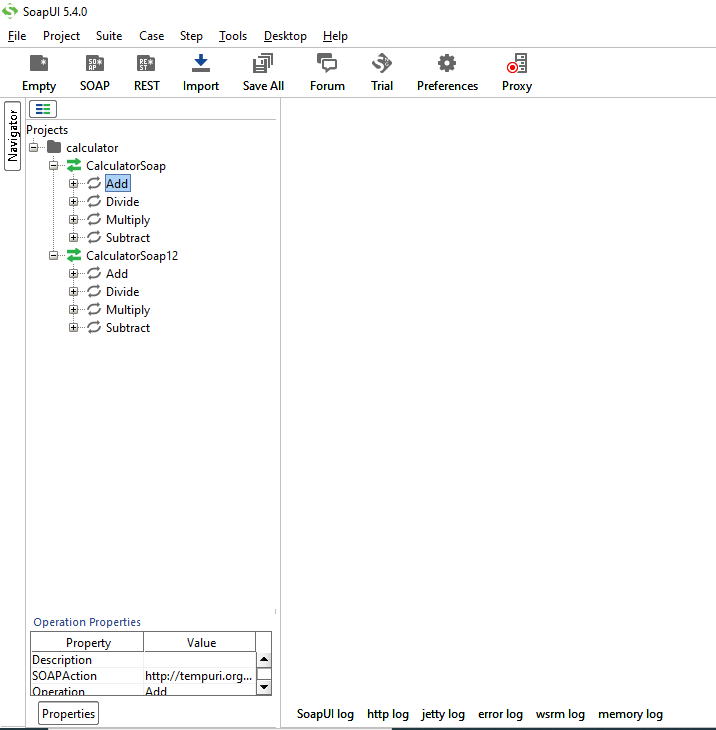
Step 4) On click to + or expand icon we see that single request with name as Request 1 is been attached with operations.
How to create Test Suite in SoapUI?
Creating Test suite is quite simple in soapUI , just follow the below steps and we are updated with Test suite
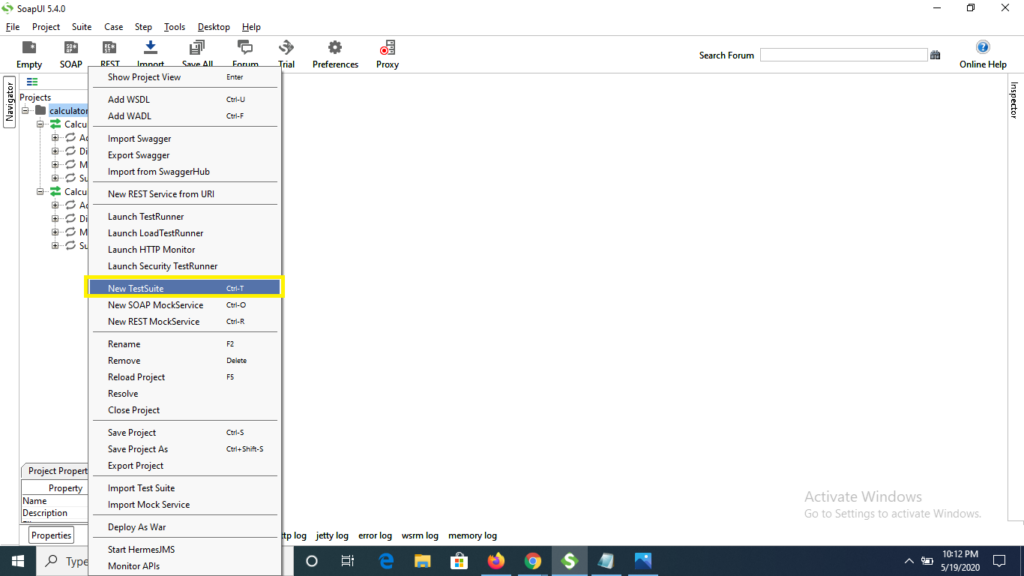
Step 1) Right click on the project (Calculator) and from the multiple options select New Test Suite.
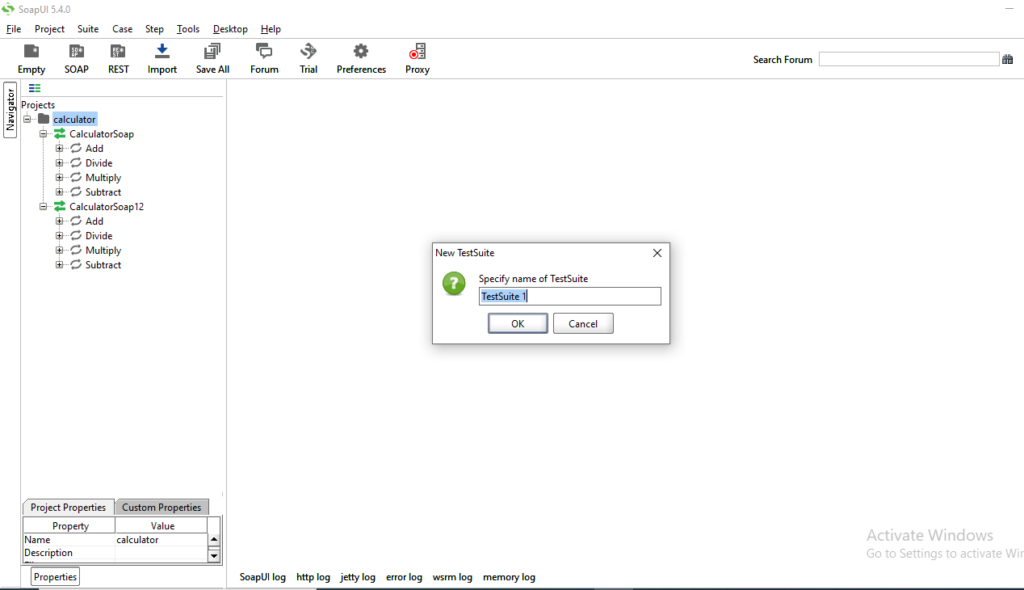
Step 2) Now specify the test suite name and click to OK button
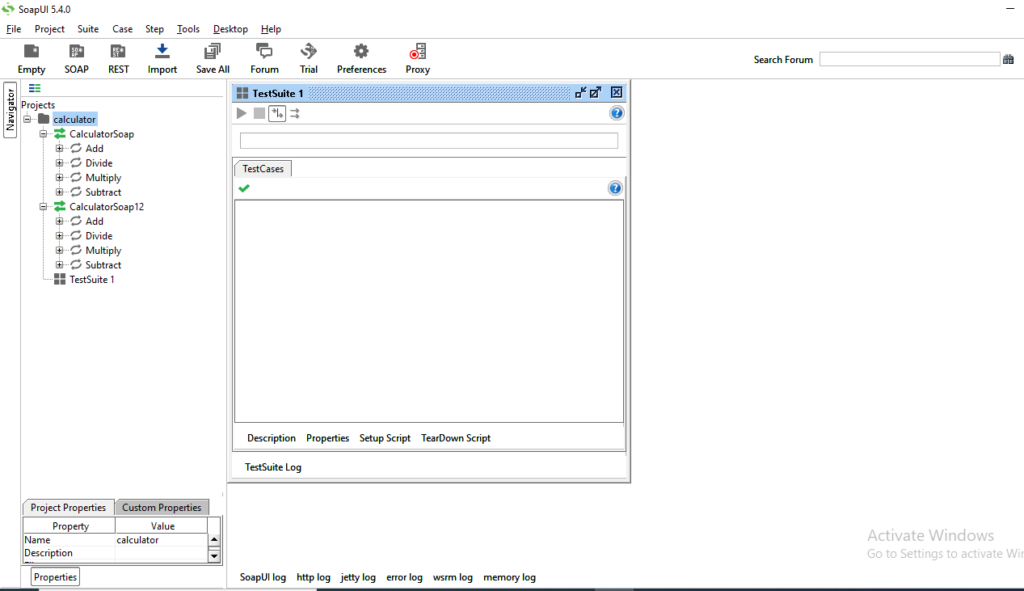
Step 3) The Test Suite with name as “TestSuite1” is created inside calculator project and the test suite window is been displayed on the right with no current test case initially.
How to create Test Case in SoapUI?
Below is the steps to create Test Case under Test Suite in SoapUI.
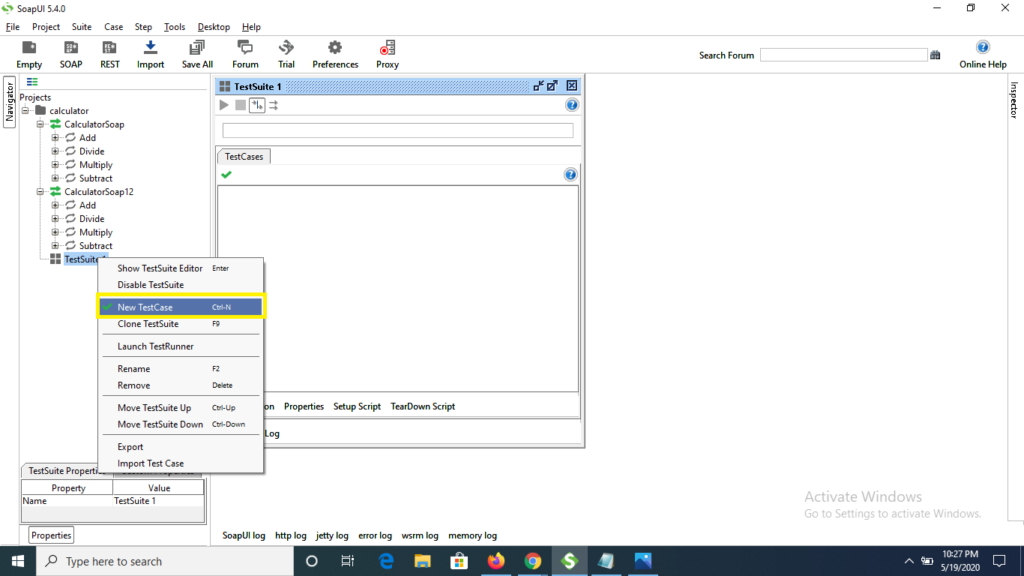
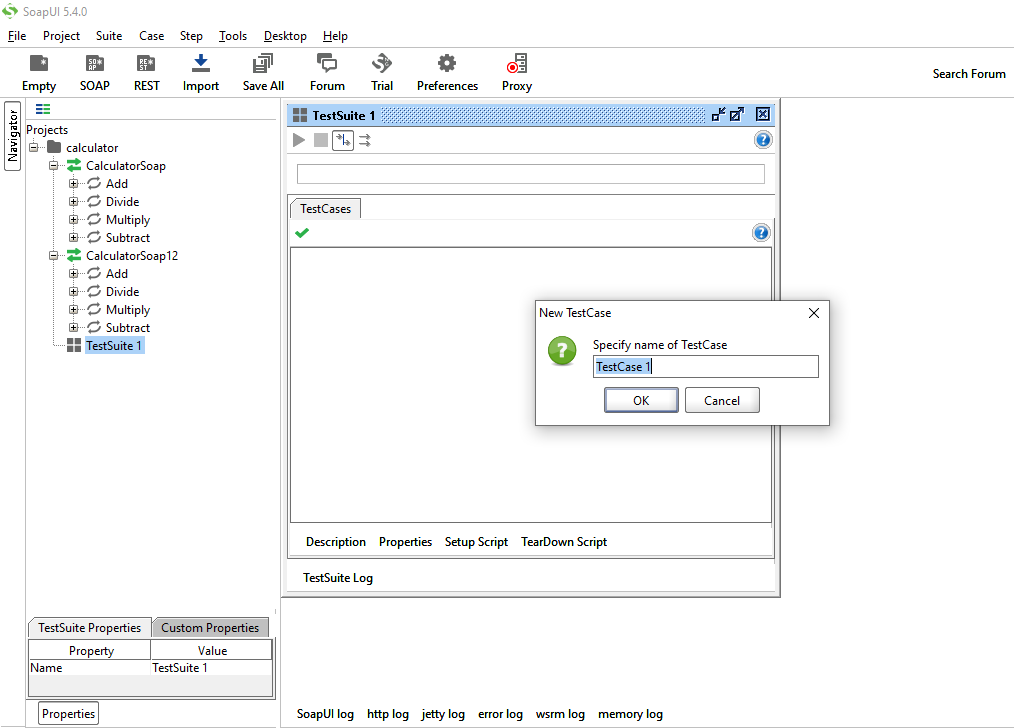
Step 1) As we are aware that multiple test cases can be created inside a test suite similarly, we can create as many test case in this suite (TestSuite1) by right-click under TestSuite1 and choosing to Test case option.
Step 2) Specify the test case name inside the New Test Case window and click to OK button
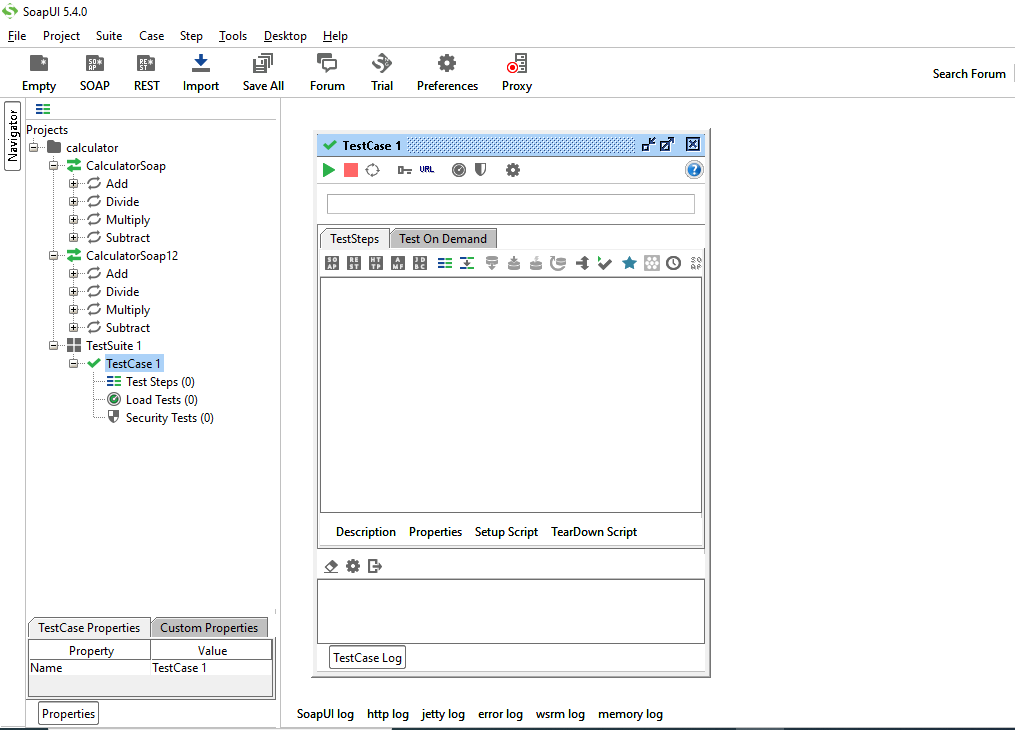
Step 3) As see that the TestCase 1 is been added inside TestSuite, as initially we see that there are zero (0) test steps and also zero (0) Load step inside Load Tests and similarly zero security test step inside Security Tests
How to create Test Steps in SoapUI?
Step for creating the Test Steps are below.
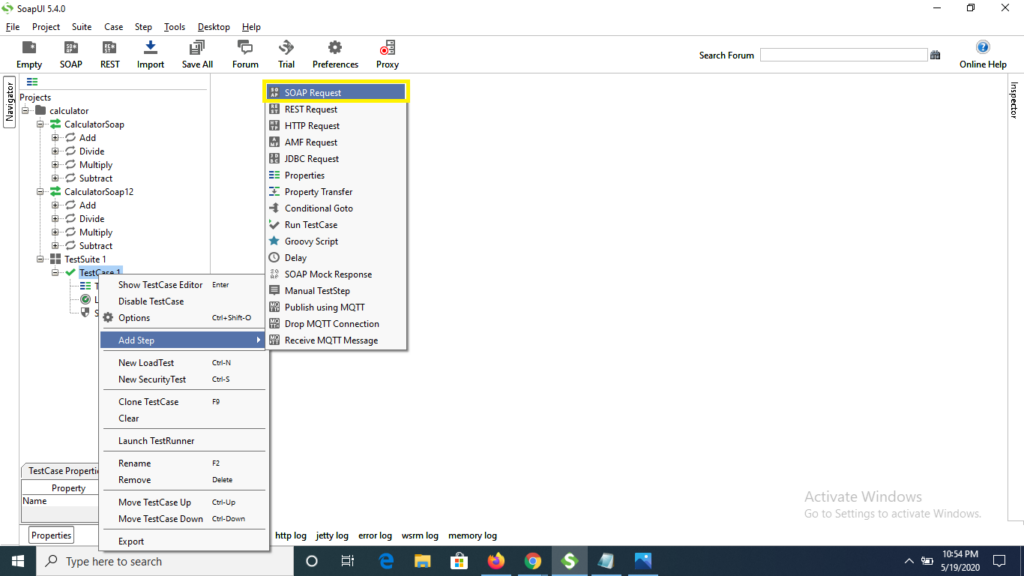
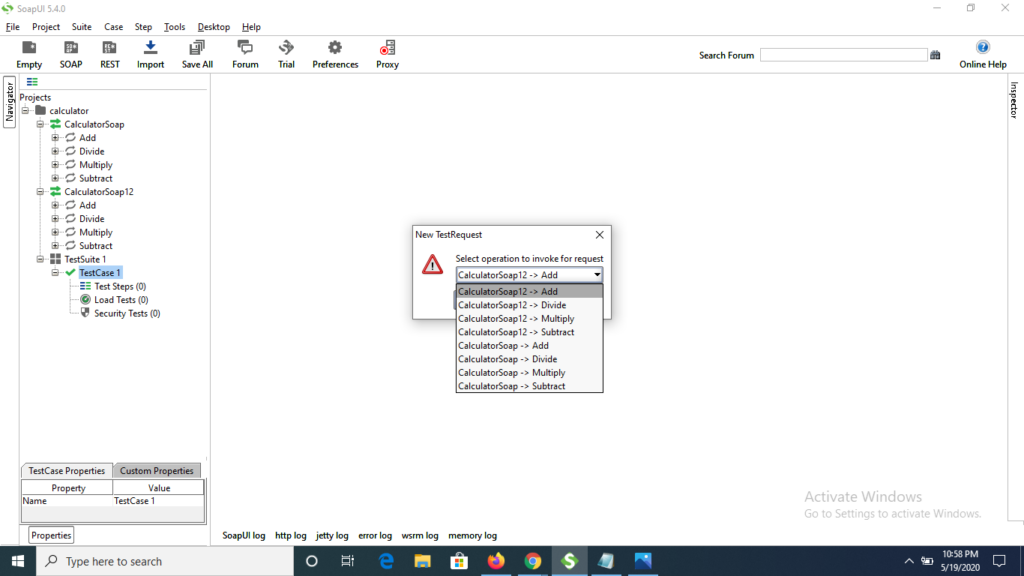
Step 1) Right click to TestCase1, select Add Step and inside multiple options choose Soap Request.
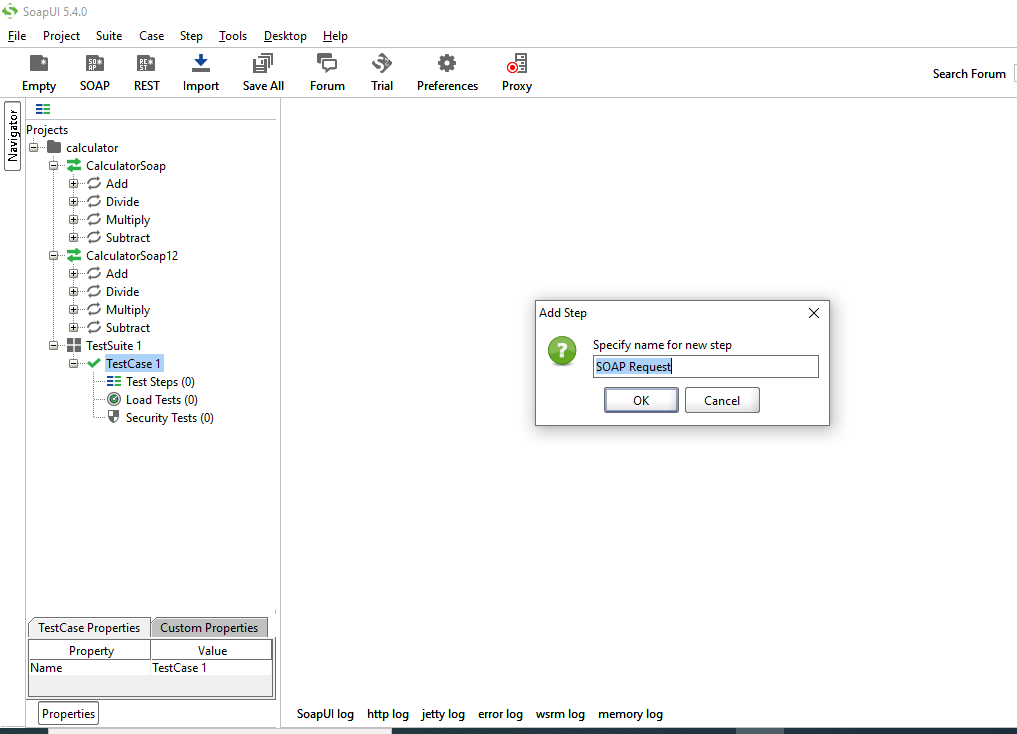
Step 2) Specify the test step name as below and click to OK button.
Step 3) Under New TestRequest window, there will display a list to test steps from TestSuite: CalculatorSoap and CalculatorSoap12, select any of test step from the list box (we are selecting Add from CalculatorSoap test suite) and click to OK button
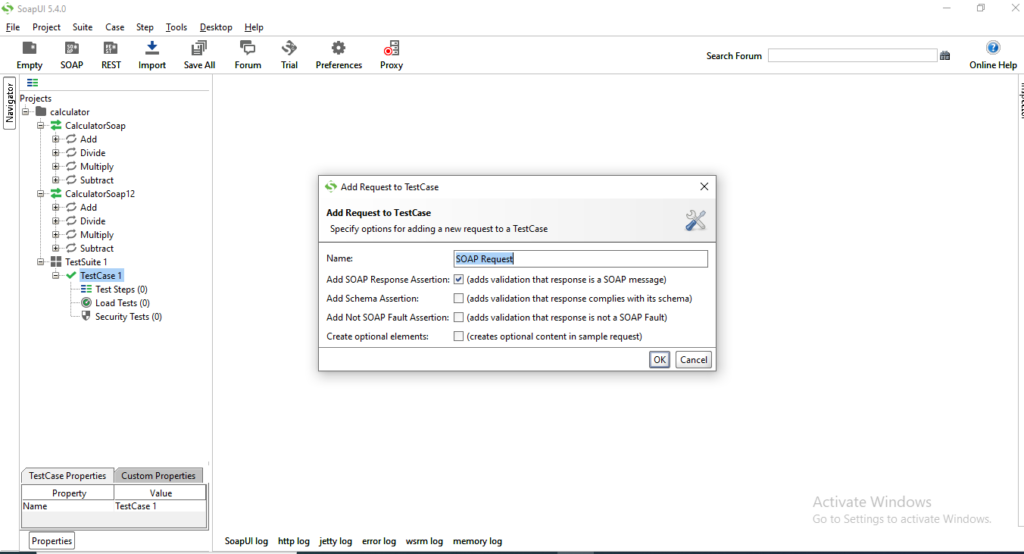
Step 4) Click to OK button under Add Request to Test Case window.
Step 5) We see that the Test Step as Soap Request is created and a XML is displayed on the right side of the pane.
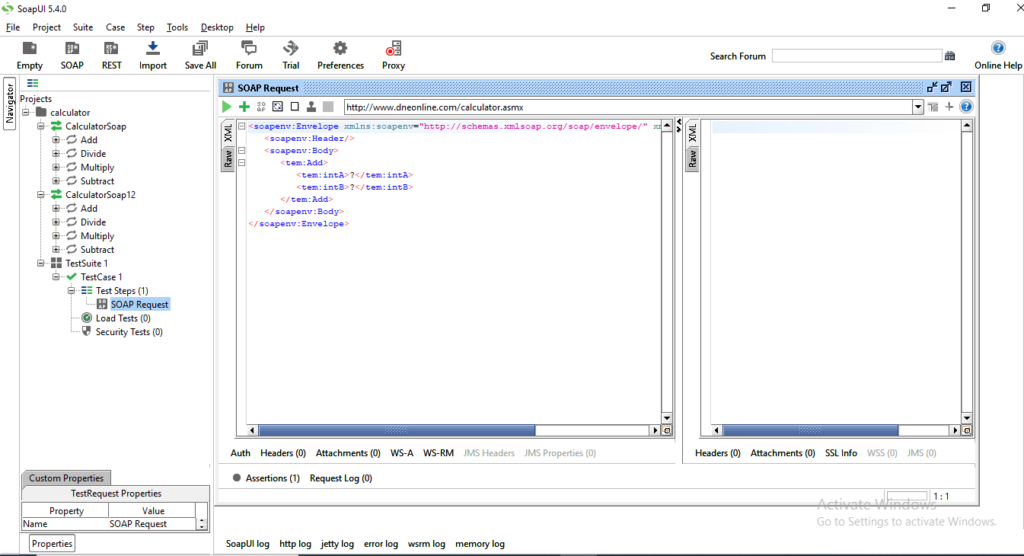
Step 6) Now pass intA value as 2 and intB value as 2, and click to Submit request arrow button at the top of the Soap Request window.
Conclusion:
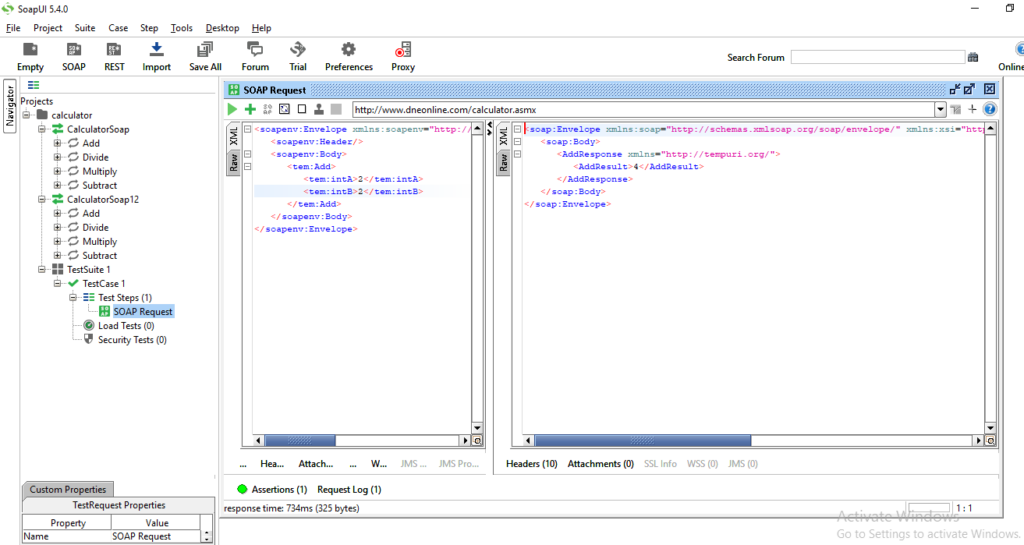
As a result as we have entered the intA value as 2 and intB value as 2 inside the XML Soap Request body and hit to Submit request button, SoapUI tool took sometime to get the response from the server and displayed the output on right side in the form of XML structure with result as 4 in AddResult tag.
How To Install SoapUI in Windows
In this tutorial we are going to learn How To Install SoapUI in Windows platform? also we will go step by step installation process, so that it can be easily configured in to local system.
How To Install SoapUI in Windows?
To install SoapUI tool in to the system, we need to get the setup file from SoapUI official website and download its free version configuration.There we can also find the SoapUI pro version, its paid tool but we can have its trial version available.
Over to this tutorial we are taking the free version and begin the installation process step by step. Lets discuss the installation process.
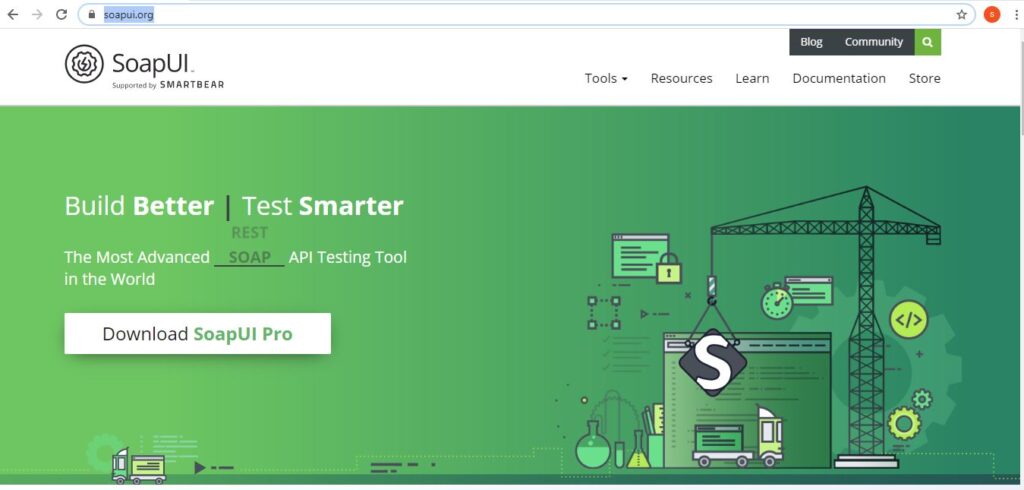
Step 1) Open the official website for soapUI, click to navigate.
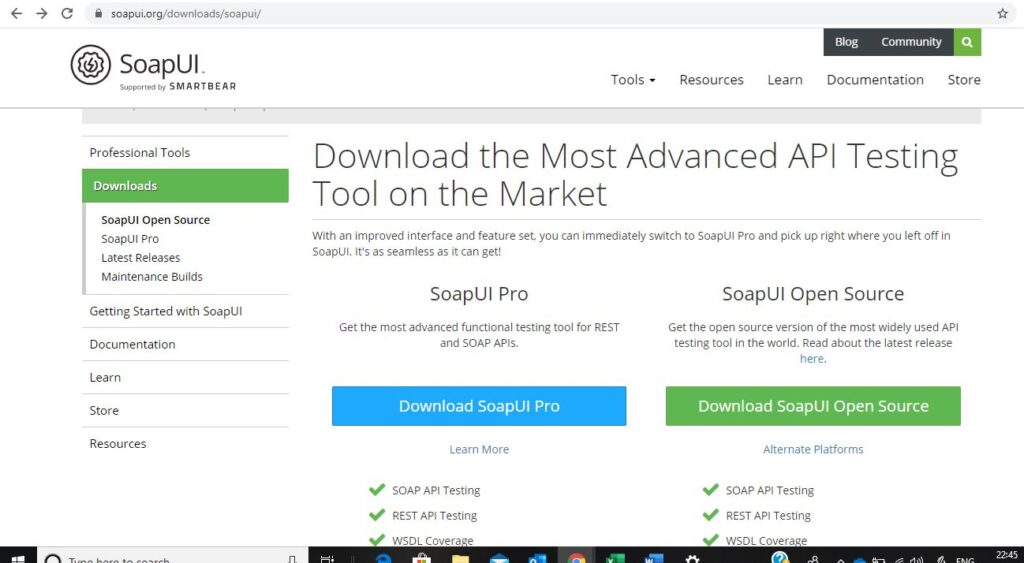
Step 2) Now click to Tools list box and select SoapUIopen Source tool link from the options.

Step 3) Once the window gets opened, click to Download SoapUI open Source link to start the installation.
Step 4) Choose the location for the installation of of SoapUI file
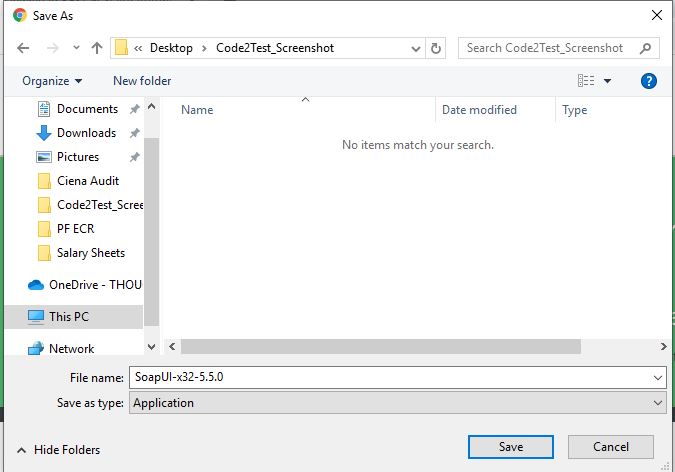
Step 5) Click to save button and the SoapUI .exe file gets starts to download in its defined location.
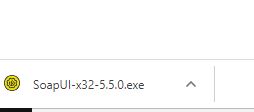
Step 6) Double click to the .exe file and setup gets started to install to your local window
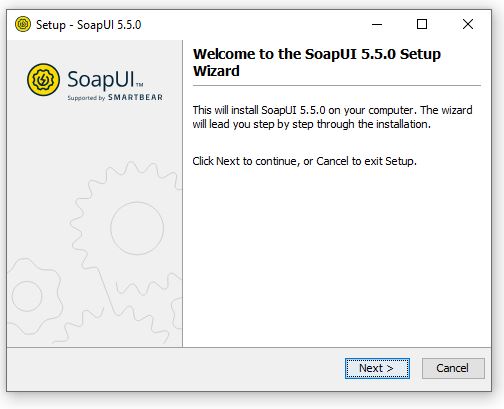
Step 7) Keep the installation file to its default location and click to Next button
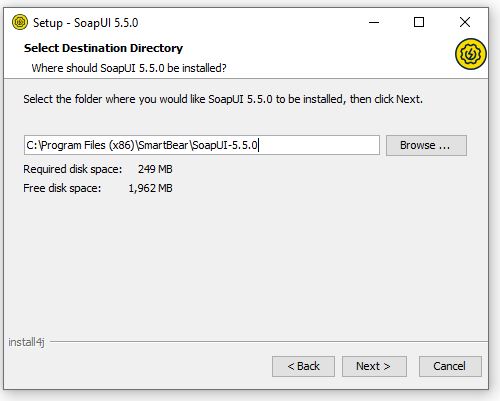
Step 8) Click to Next button
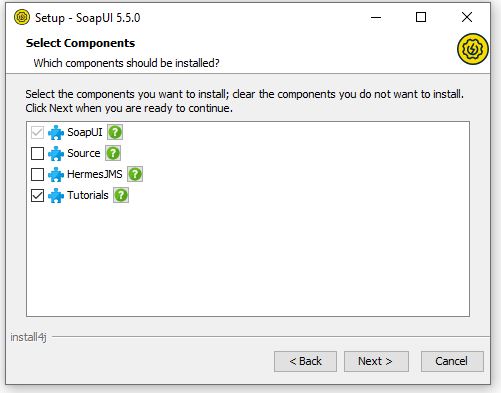
Step 9) Click to Next button for default location
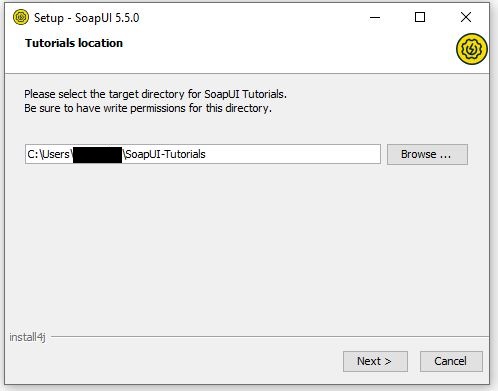
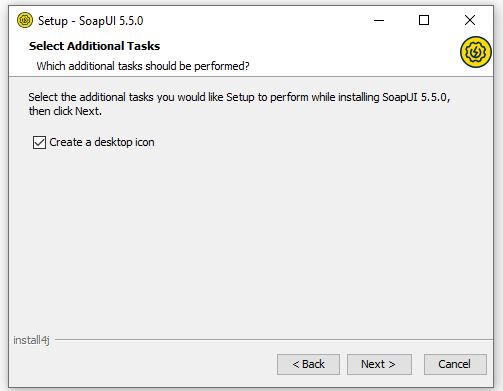
Step 10) Next button and a desktop icon for SoapUI will be created
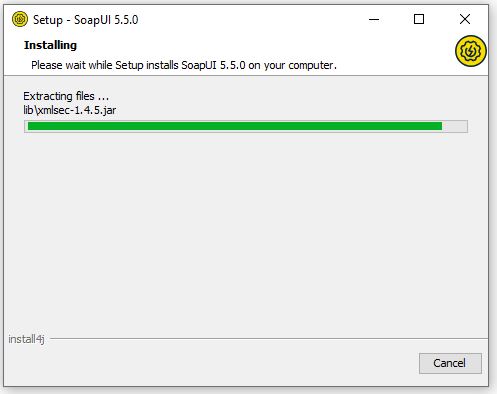
Step 11) Wait till the installation gets completed.
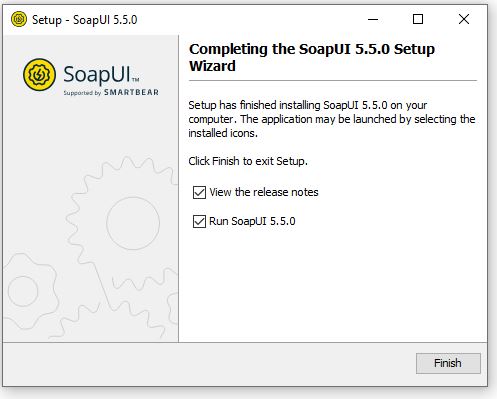
Step 12) We are now done with the installation part, click to finish button.
Step 13) We see the home window of SoapUI, we are now good to go for writing the scripts.

Conclusion:
So following the aboce steps we can install the SoapUI free version tool easily step by step and once the installation gets completed, we can starts writing out test script.