The another way of creating the maven project through eclipse is quite simple, in this we do not have to create a folder structure from otherside and import to eclipse ide.
Follow the below steps to create maven project from Eclipse:
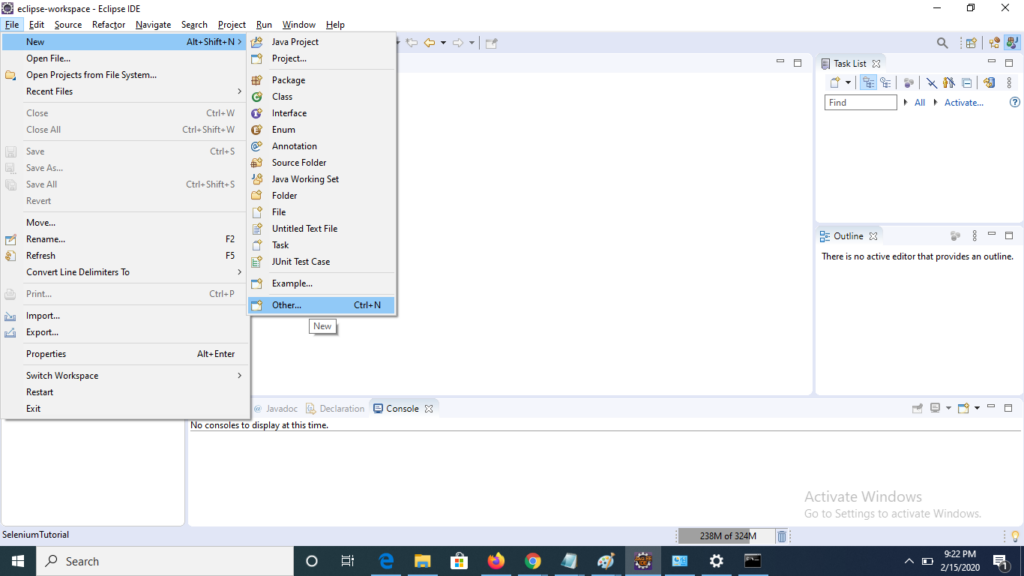
1) Open the eclipse IDE and click to File->New->other , a wizard will open.
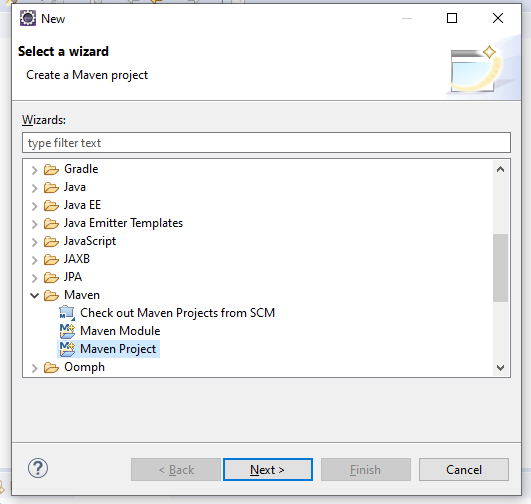
2) Under ‘Select a Wizard’ select Maven->Maven project.
3) Under ‘New maven project’ window uncheck the default folder path and select your preferred location of workspace for maven project, here a choose the default workspace location and click to next.

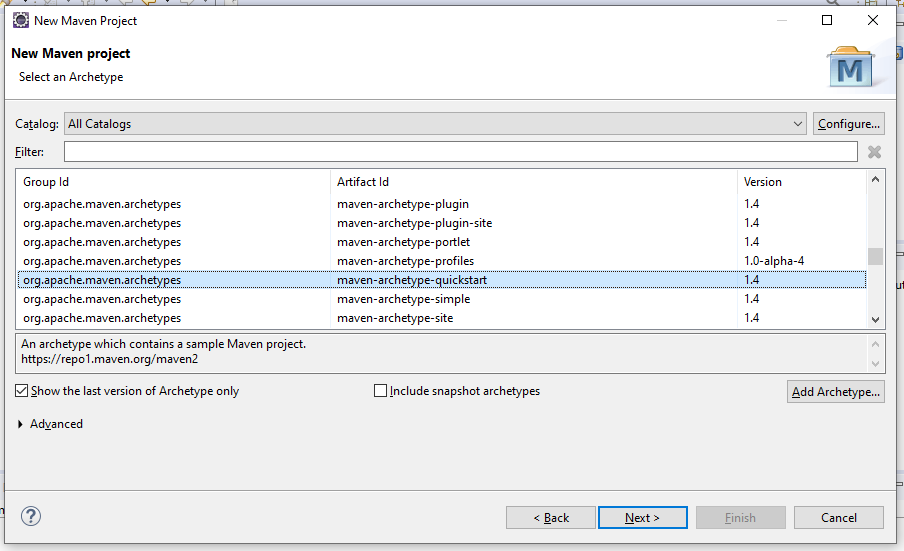
4) Now select the ‘Achetype’ named as ‘maven-archetype-quickstart’ and click to next.
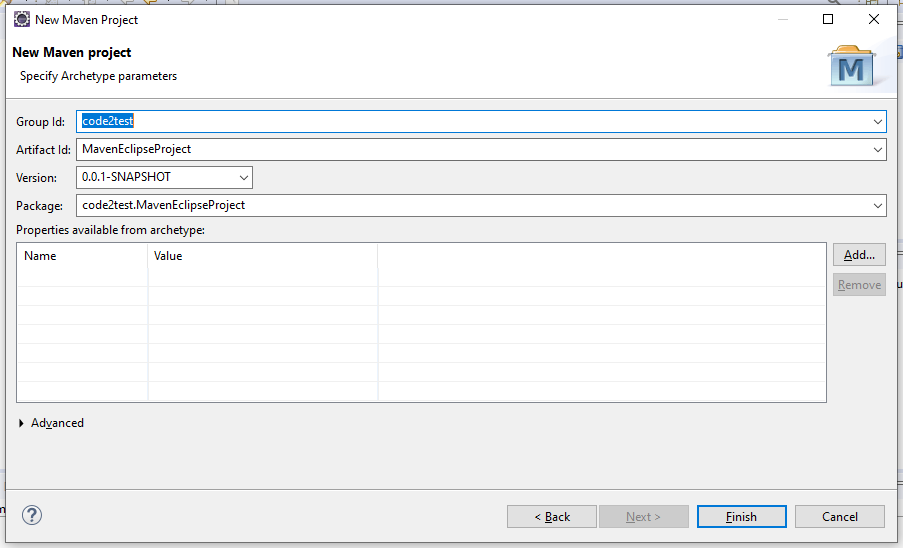
5) Define ‘Group Id:’ and ‘Artifact Id’ and click to Finish button, Package field will be auto create which is combination of (Group Id + Artifact Id).
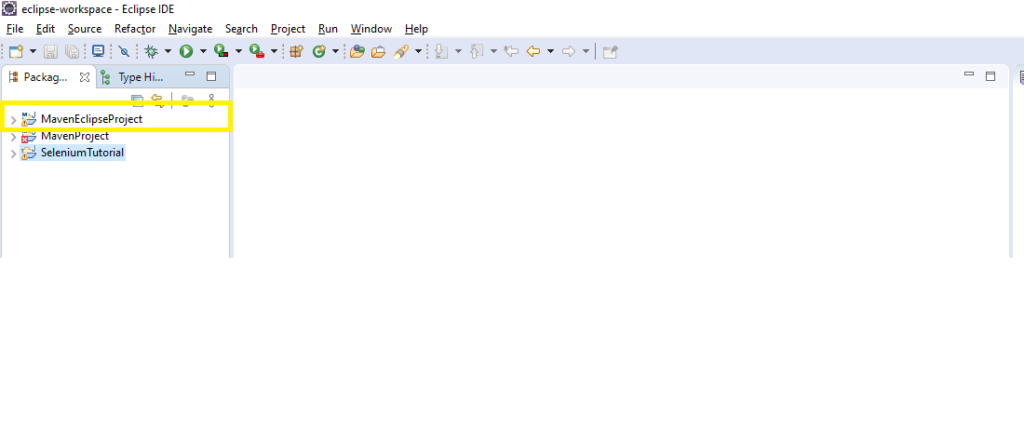
6) We can see inside the eclipse id that the maven project is been created with defined project name.
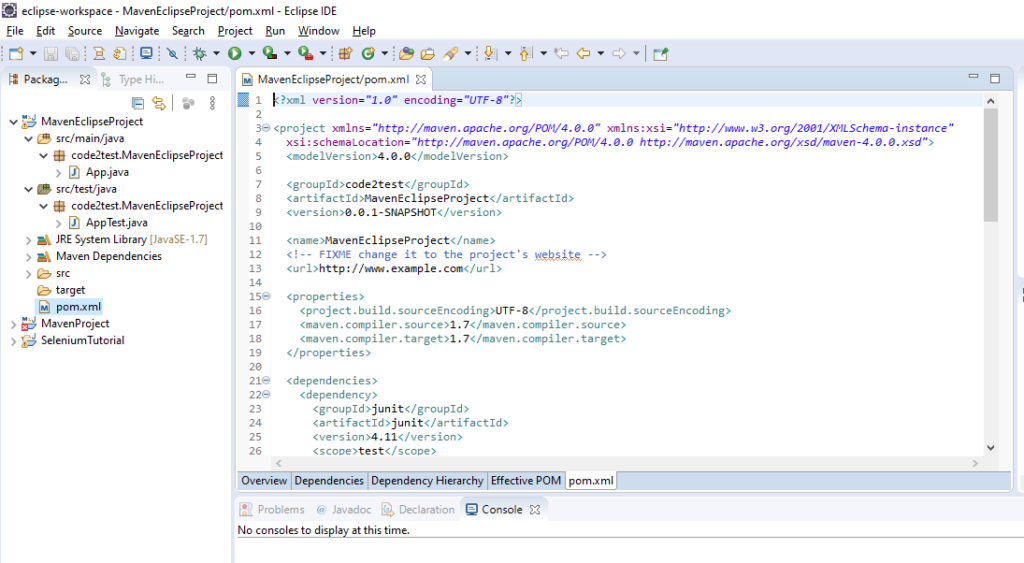
7) Pom.xml and folder structure of maven project for the created maven project will look as below screenshot.
So following the above steps sequentially we can create maven project through eclipse IDE. If you guys have any suggestions or feedback please share with us we love to hear from you and if something need to added as per the suggestion we will add to code2test.com site with you help.