Installation of maven can be performed through command line along with through eclipse IDE, in this tutorial we will learn to install maven through Eclipse ide.
Steps to install Maven through Eclipse are below.
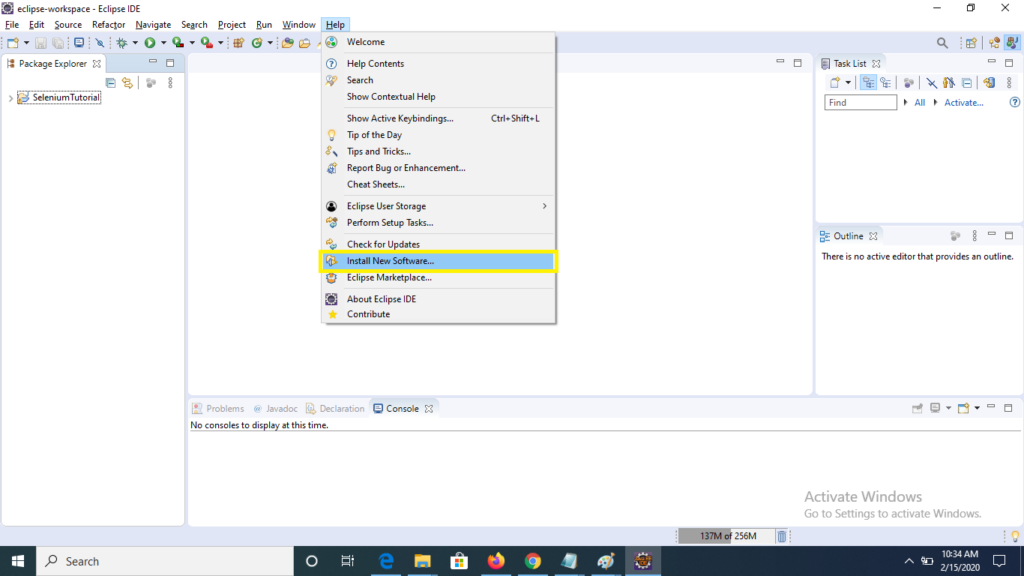
1) Initially click to Help menu on the top of eclipse ide and select “Install New Software” option from the list.
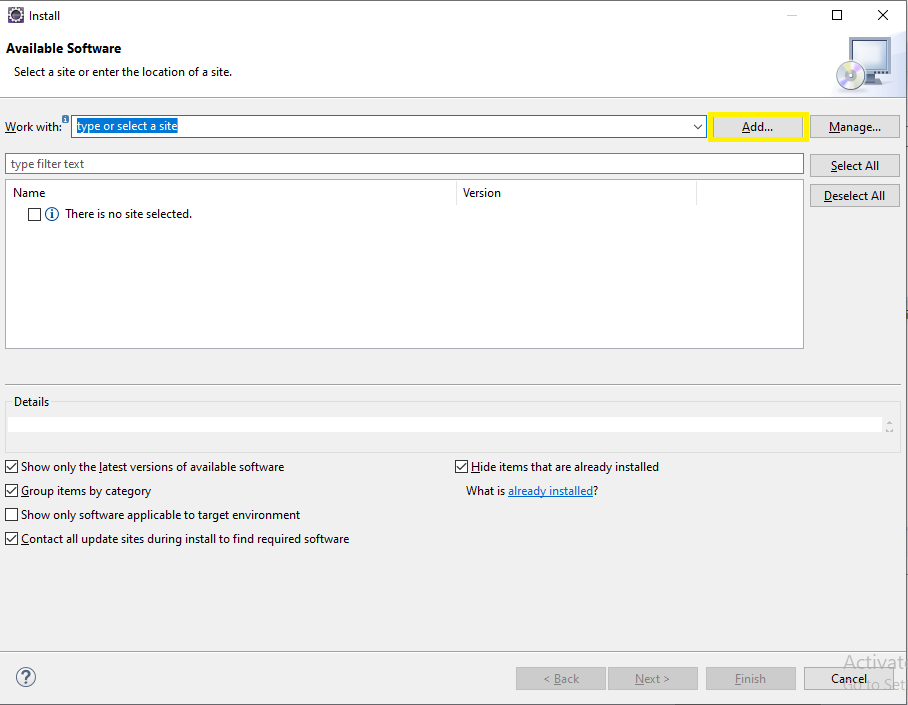
2) Now click to Add button on the top right after click to new will open.
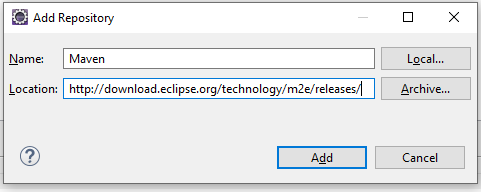
3) A new window “Add Repository ” will get open, now type “Maven” under name text box and enter ” http://download.eclipse.org/technology/m2e/releases/ ” under location text box, click to add.
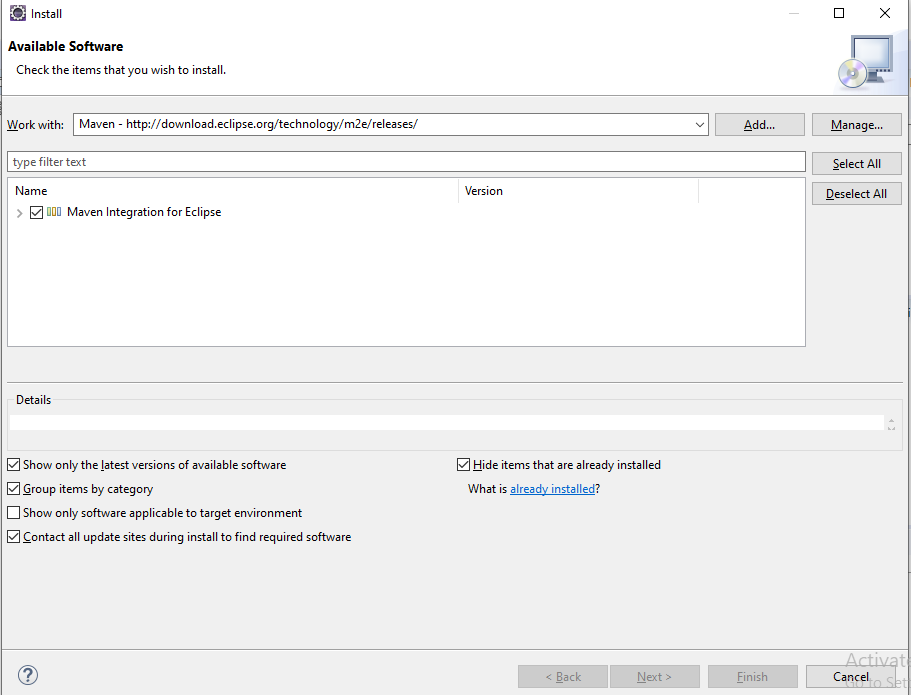
4) Now check the check box for “Maven Integration for Eclipse” and click to Next button on the bottom.
5) Now process with start for download and will take few minute.
6) Now a window displaying the default setting will be displayed, just click to Next button.
7) Now next window is of “Review License” will appear, this will contain terms and condition of the agreement, accept the license and click to “Finish” button.
8) Window for the installation of software will appear and will take few minutes, will till it completes.
9) A window for Software updates will appear, asking to start eclipse click to Yes to start system it will help to reflect the changes performed to your eclipse.
So, Through this process you can install maven to your eclipse IDE, In next tutorial we will learn to install maven through Command Line.