Home » maven-tutorial
Category Archives: maven-tutorial
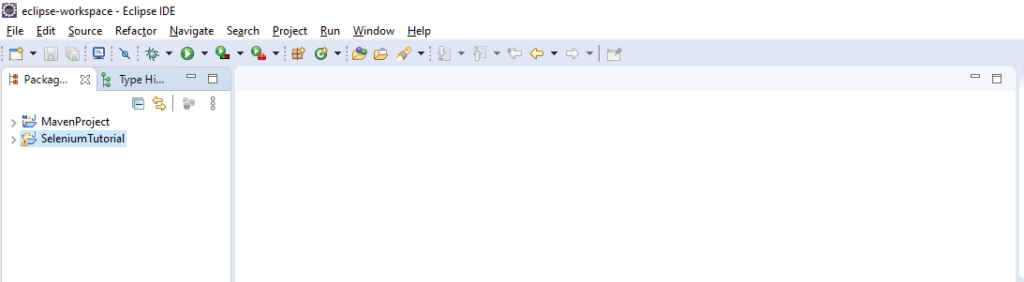
Creating Maven Project from Eclipse
The another way of creating the maven project through eclipse is quite simple, in this we do not have to create a folder structure from otherside and import to eclipse ide.
Follow the below steps to create maven project from Eclipse:
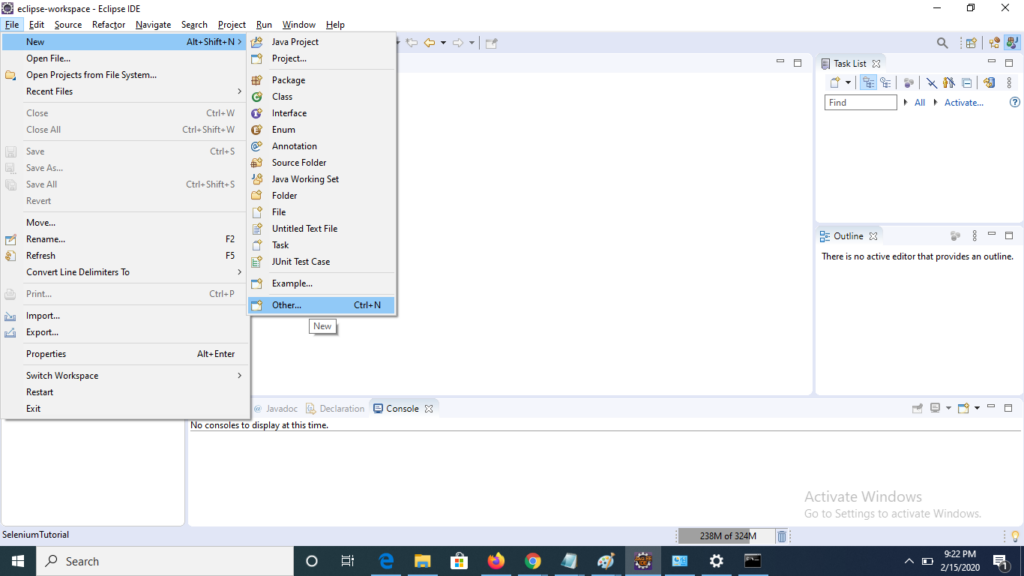
1) Open the eclipse IDE and click to File->New->other , a wizard will open.
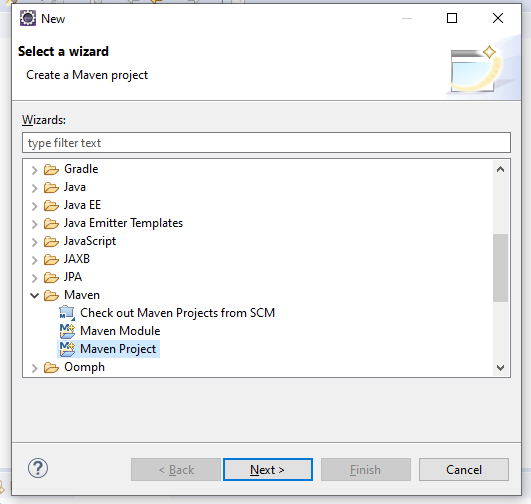
2) Under ‘Select a Wizard’ select Maven->Maven project.
3) Under ‘New maven project’ window uncheck the default folder path and select your preferred location of workspace for maven project, here a choose the default workspace location and click to next.

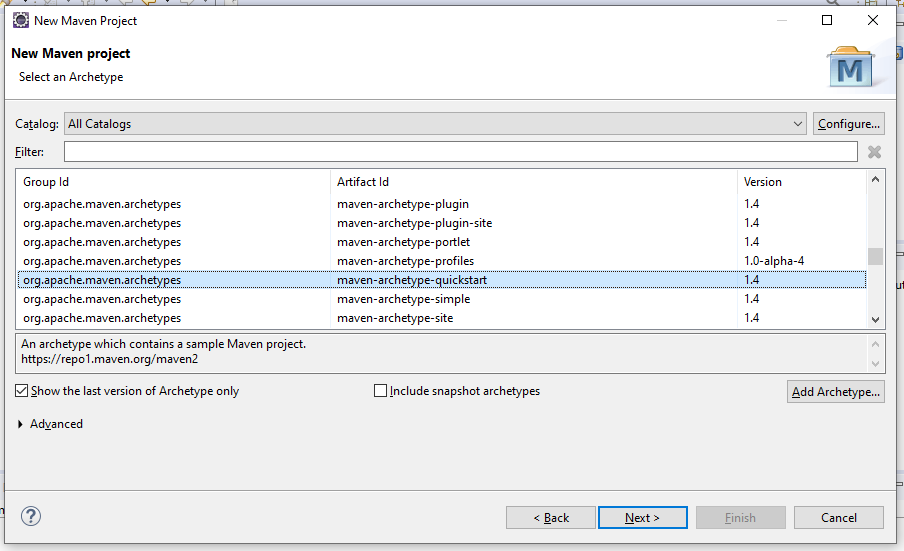
4) Now select the ‘Achetype’ named as ‘maven-archetype-quickstart’ and click to next.
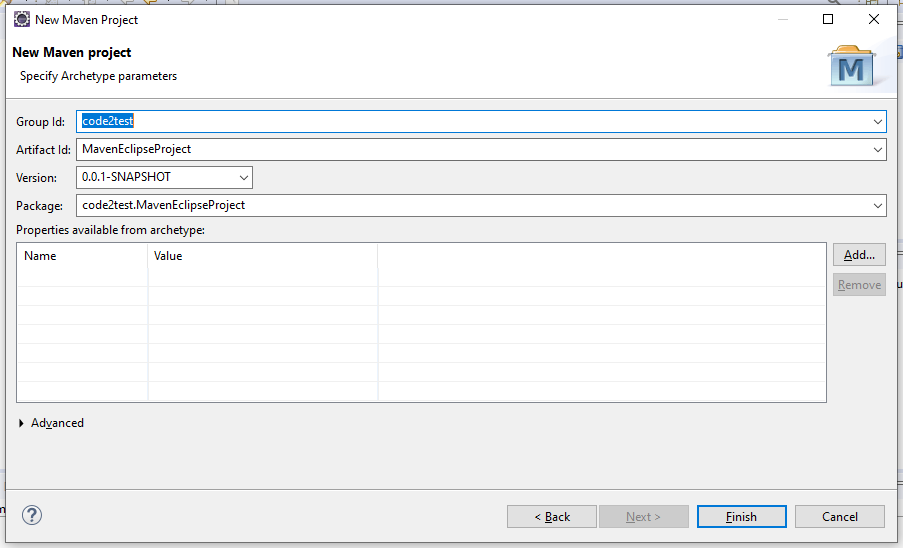
5) Define ‘Group Id:’ and ‘Artifact Id’ and click to Finish button, Package field will be auto create which is combination of (Group Id + Artifact Id).
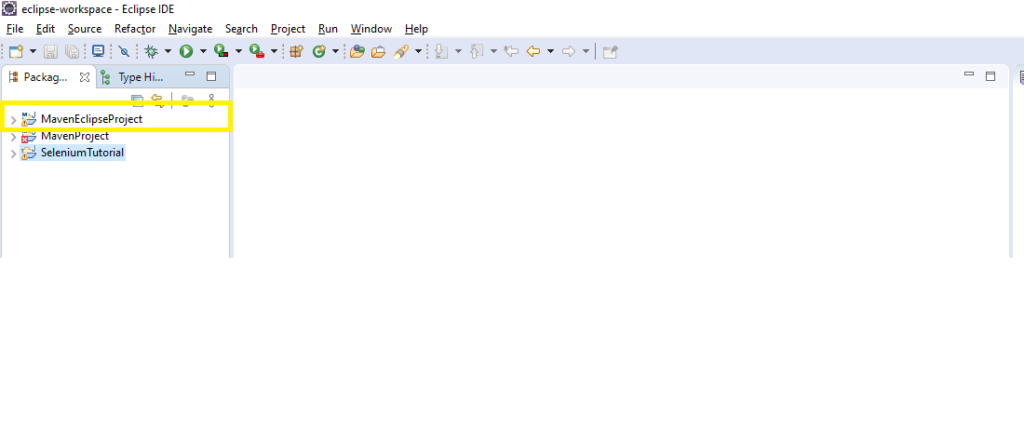
6) We can see inside the eclipse id that the maven project is been created with defined project name.
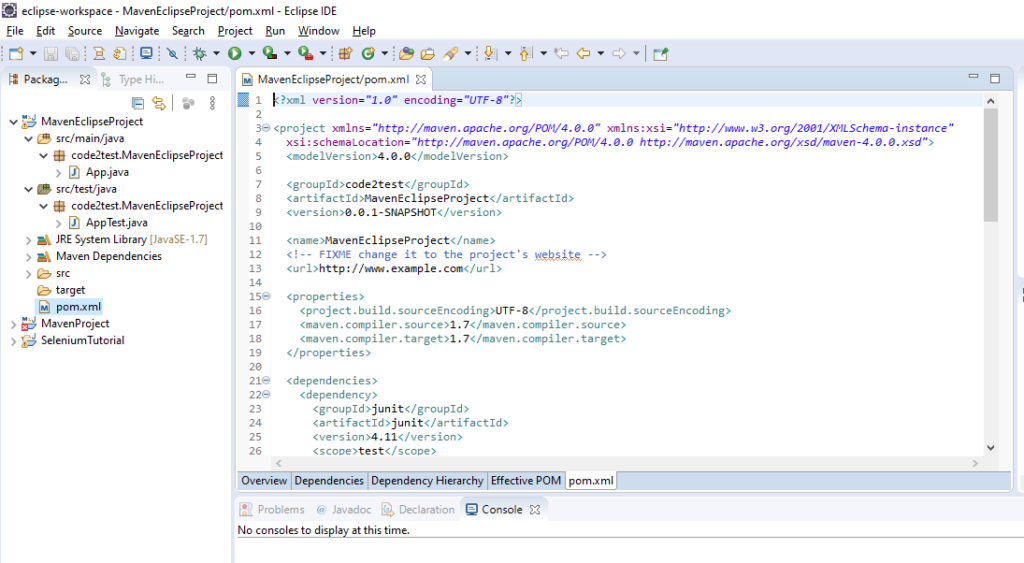
7) Pom.xml and folder structure of maven project for the created maven project will look as below screenshot.
So following the above steps sequentially we can create maven project through eclipse IDE. If you guys have any suggestions or feedback please share with us we love to hear from you and if something need to added as per the suggestion we will add to code2test.com site with you help.
Creating Maven Project from Command Prompt
Previous Topic , In this tutorial we will learn Creating Maven Project from Command Prompt?
Creating Maven Project from Command Prompt
We can create maven project by two ways.One is by command prompt and another is by eclipse ide, let discuss the using command prompt.
Steps to create maven project from command prompt are below:
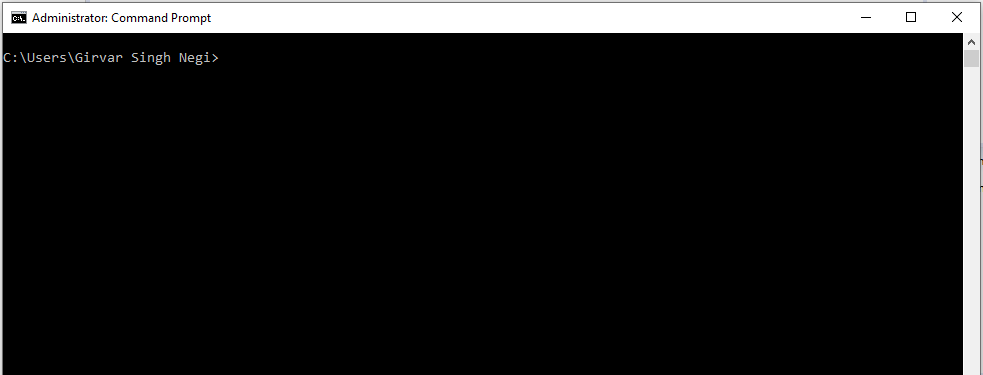
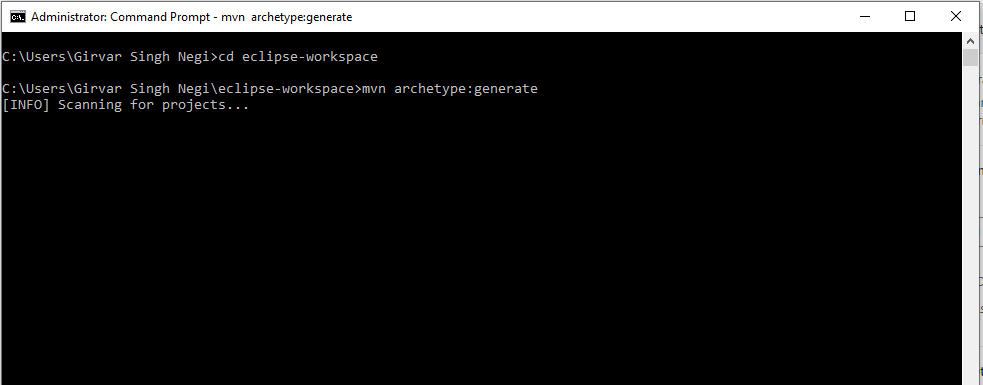
1) Open the command prompt by opening Run and type cmd and enter.
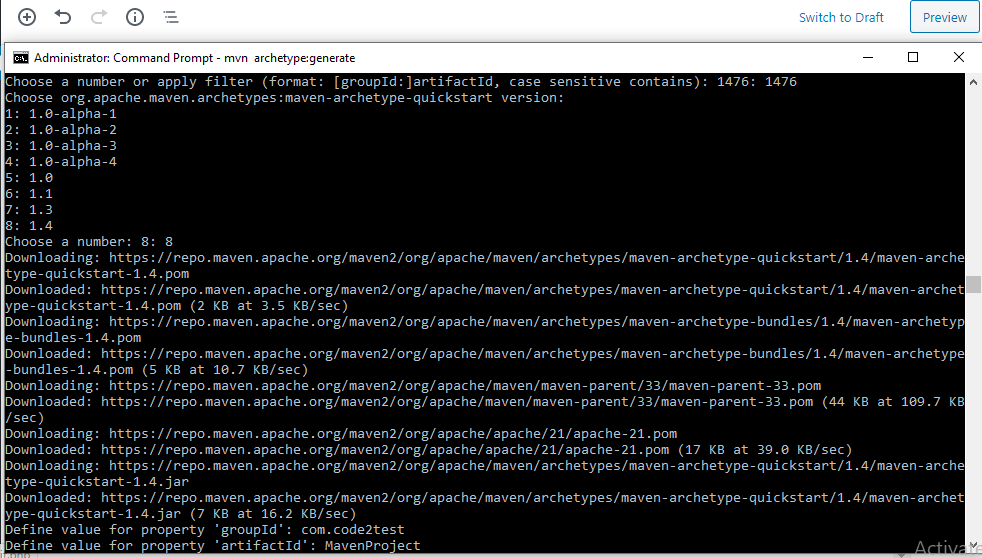
2) Take your path till the folder structure of your eclipse workspace . Type the command mvn archetype:generate and click enter. This command basically generates the maven project and take few seconds.
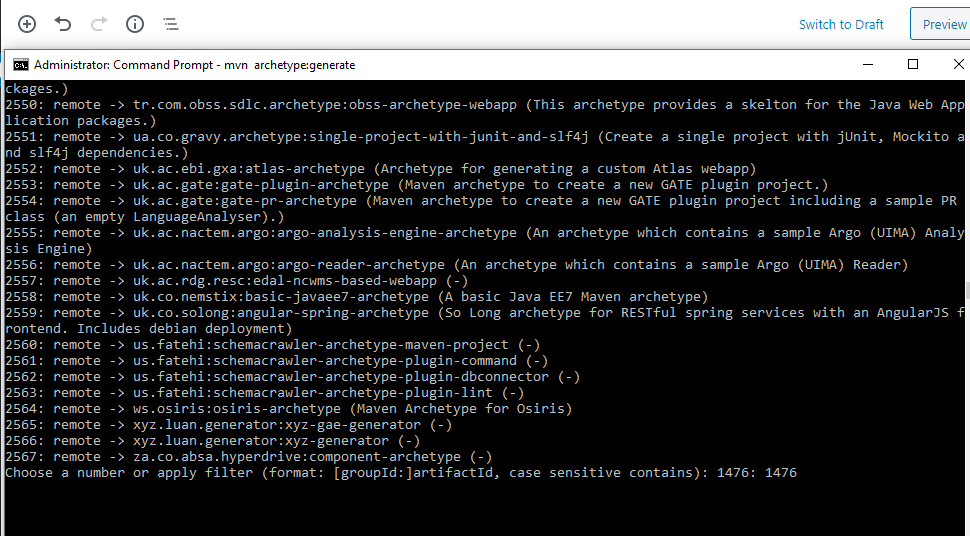
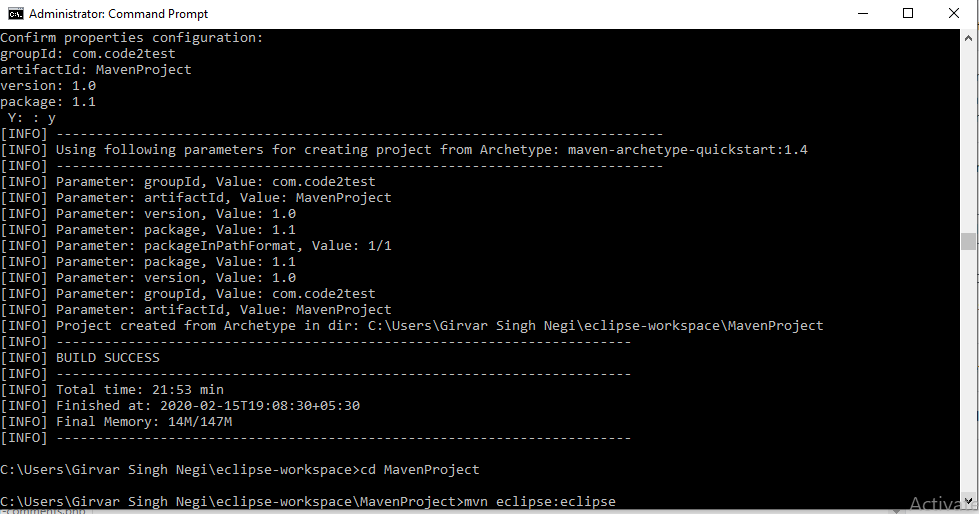
3) Now in cmd during process of generating maven project, it will ask to choose a number, type the number same as mentioned in cmd for me its 1476
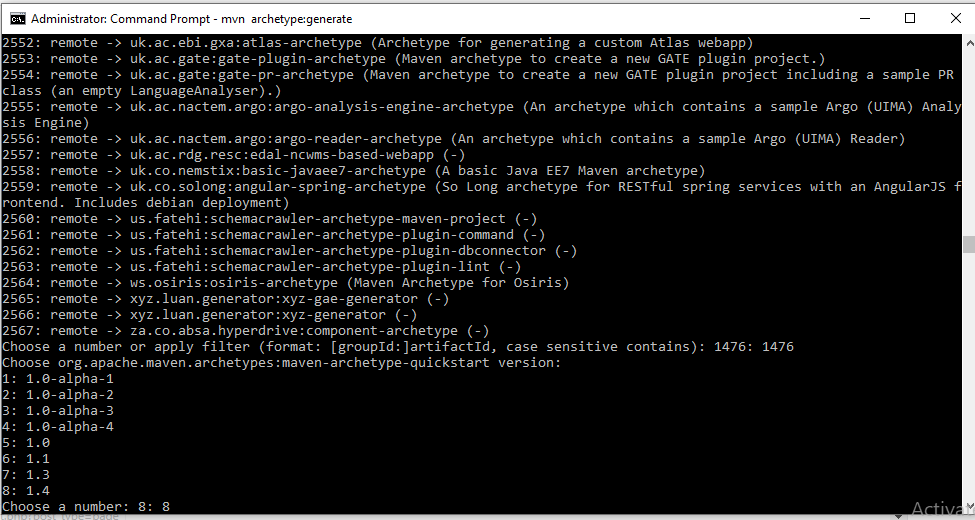
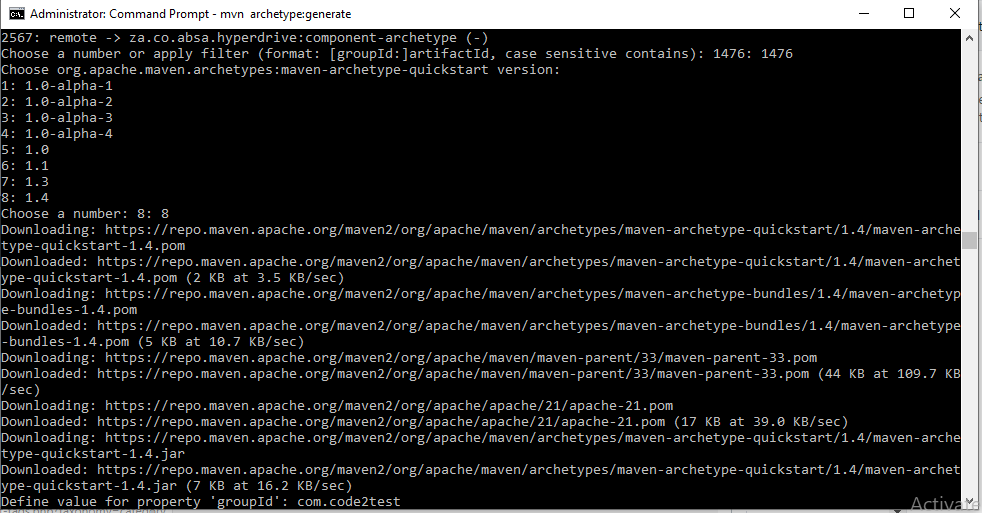
4) Again it will ask to choose a number which is basically the maven archetype version, you can choose the updated version, for me its 8. and click to enter after that it will start downloading the files for updated version to create folder structure of maven project
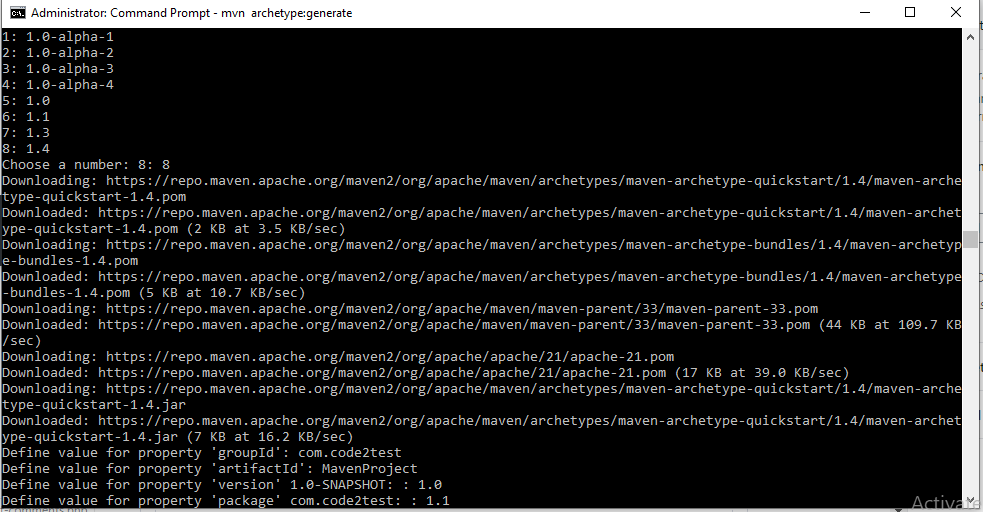
5) Now it will ask for ‘group id’ which means you have to define the package structure to your maven project, I am defining the package as com.code2test
6) Next step is to define the ‘artifact Id ‘, which is basically the project name, i name it as MavenProject
7) Next step is to define the version, for this you have provide any number (you can give you build number of version number of your project code) , I give it 1.0 along with package propery version and hit enter.
8) Now the step is to provide the confirmation of you maven poject, for this type ‘Y’ and enter.
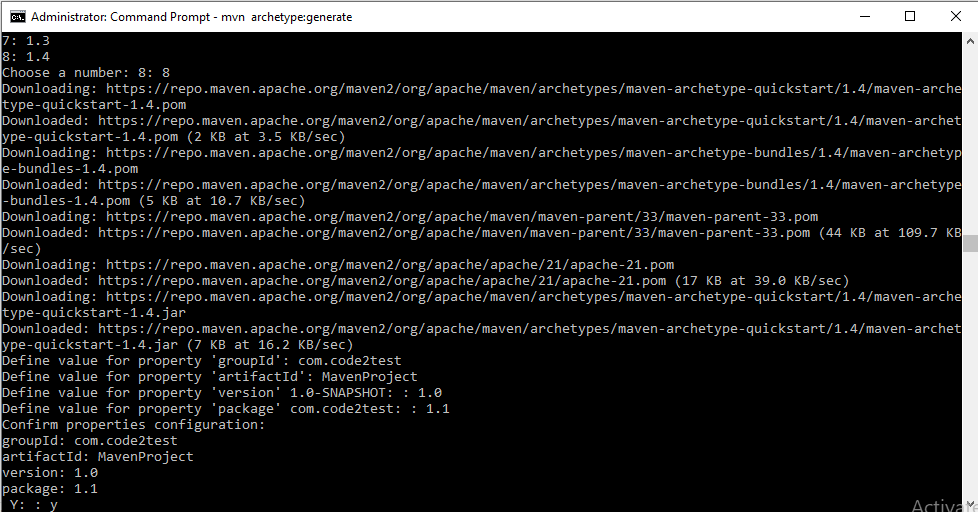
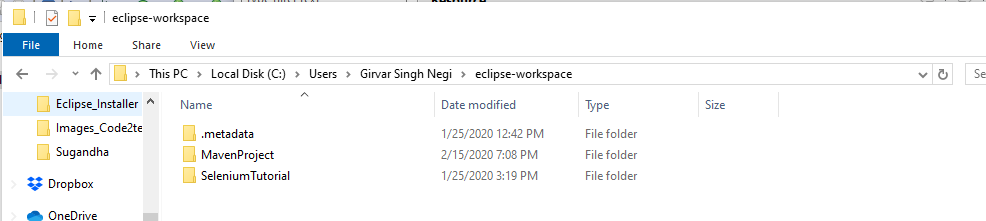
9) Now you will get the message of Build confirmation, go to your project workspace there you will see the maven project is been created on the folder structure.(As in screenshot).
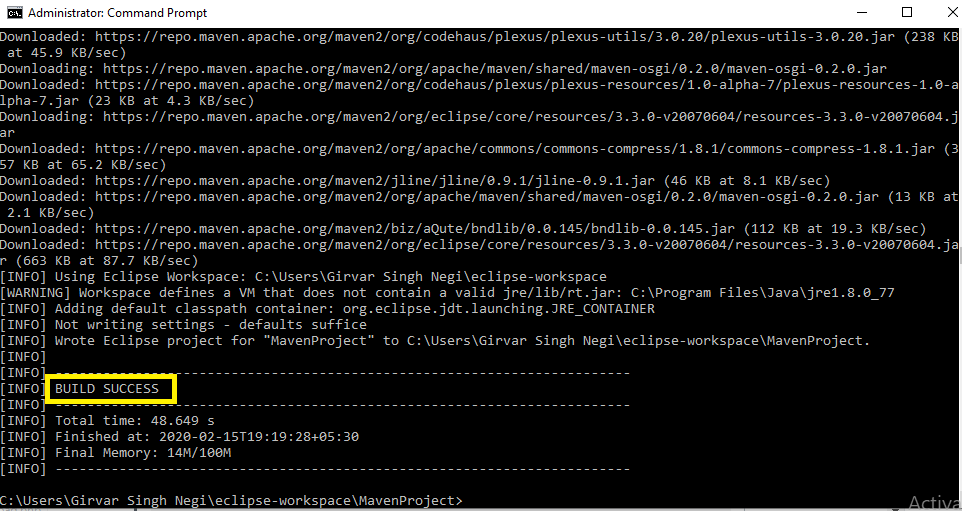
Once your project is created it time to maven your maven project compatible with eclipse ide or in other words can imported to eclipse.
For making maven project compatible with eclipse project, firstly go to the folder structure of the recently created maven project for me its (Maven Project) and type the command mvn eclipse:eclipse and click enter
10) Once the process of making maven project compatible with eclipse project is completed, we will get ‘Build success’ message.
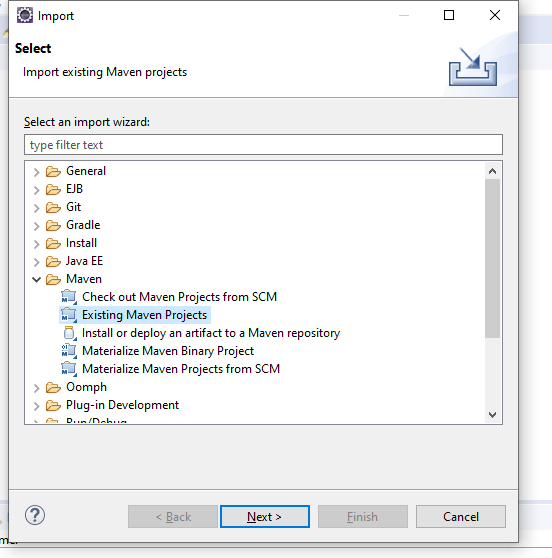
11) Now go to eclipse select-> File->import->Maven->Existing maven project and click next.
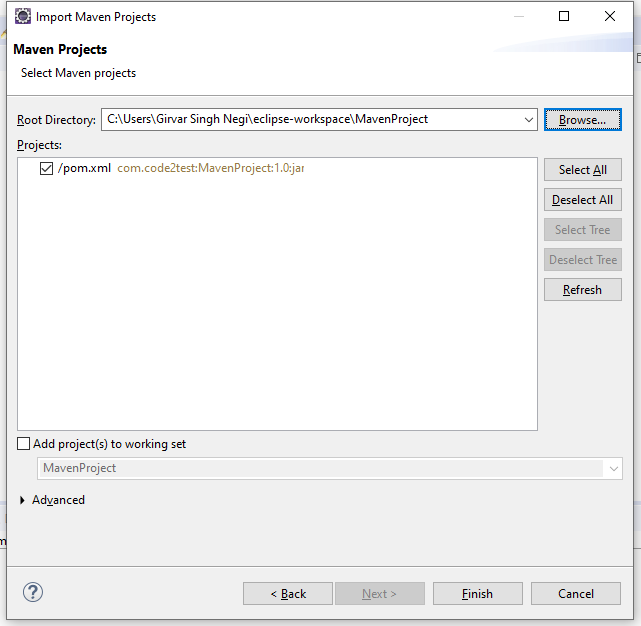
12) select newly created maven from workspace on click to ‘Browse’ button under Import Maven Projects window and click to finish.
We can see that the maven project gets imported to eclipse ide.
So following the above steps we can create maven project from CMD prompt and perform assigned task. Now in next topic we will discuss how to create maven project through Eclipse.
Maven installation in Window machine
We can easily install maven to our local window machine, for this follow the below steps.
1) There is pre-condition before the installation, we need to install Java and setup the environment variable for the java. In the previous post we have discussed the installation of Java and setup the environment variable. Please click to link for the java setup-> Click for Java Setup
Maven installation and Setup Environmental Variable:
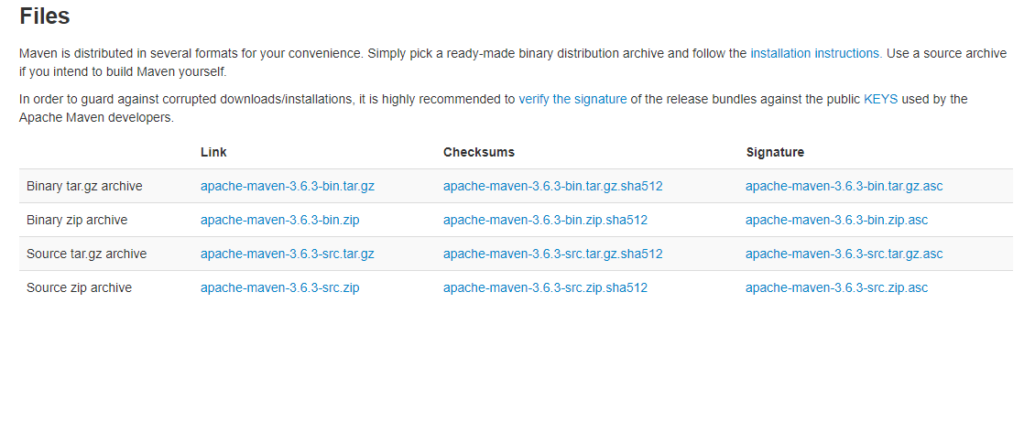
2) Now download Maven from the location : Maven Download
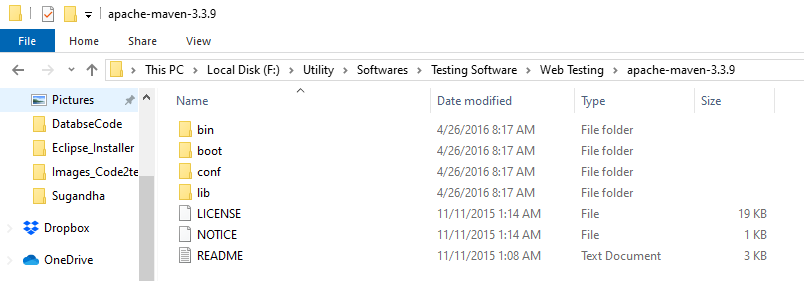
3) Extract the file in any of your preferred folder, I have created a folder and kept the file in this location – “F:\Utility\Softwares\Testing Software\Web Testing\apache-maven-3.3.9”.
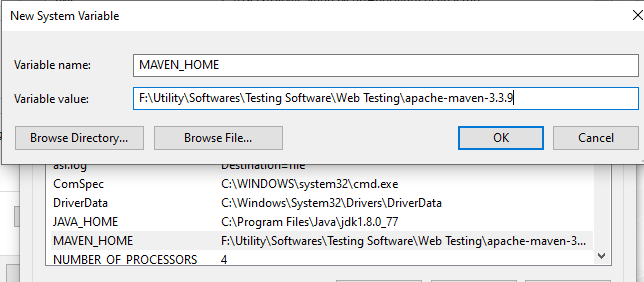
4) Now Setup the Maven Environment variable from system environment variable window.
Under System Variable section, click to New mention variable name as “MAVEN_HOME” and variable value the path of maven folder location, for me its “F:\Utility\Softwares\Testing Software\Web Testing\apache-maven-3.3.9”. and click to OK button
5) The MAVEN_HOME will be displayed under system variable section as below.

6) Now set the Location of MAVEN_HOME to Path location. For this click to Path under system variable and click to edit button.
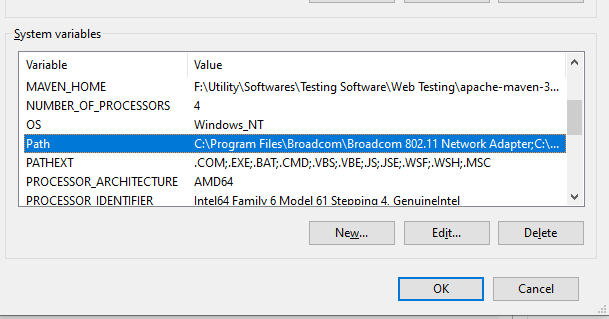
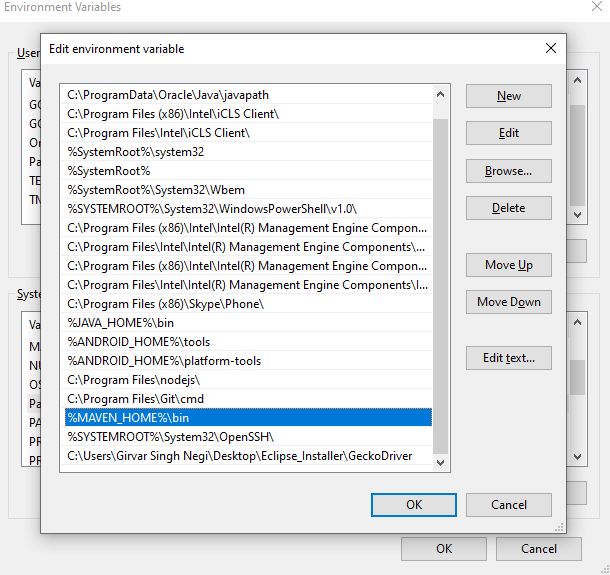
7) Append or add the MAVEN_HOME path till bin folder followed by “;” as this format “%MAVEN_HOME%\bin” and click to OK button , we are using window 10 so it will look like this .
Now its time to check the Maven Installation:
8) To check the maven installation open the command prompt for this, click to Run and type Cmd. Under cmd prompt type command: mvn -version
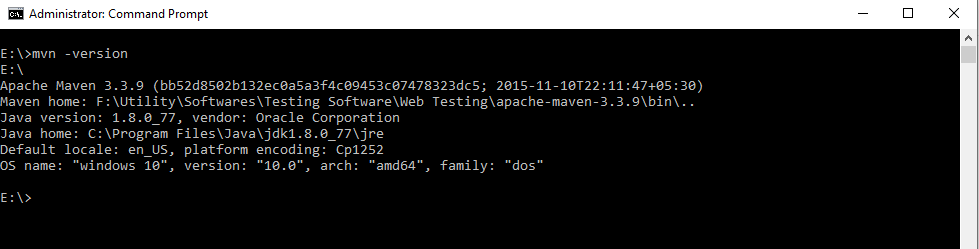
So, we can see the maven version on CMD after hitting the command with no error message , says that we have successfully installed maven to our local system.
Maven Installation in Eclipse
Installation of maven can be performed through command line along with through eclipse IDE, in this tutorial we will learn to install maven through Eclipse ide.
Steps to install Maven through Eclipse are below.
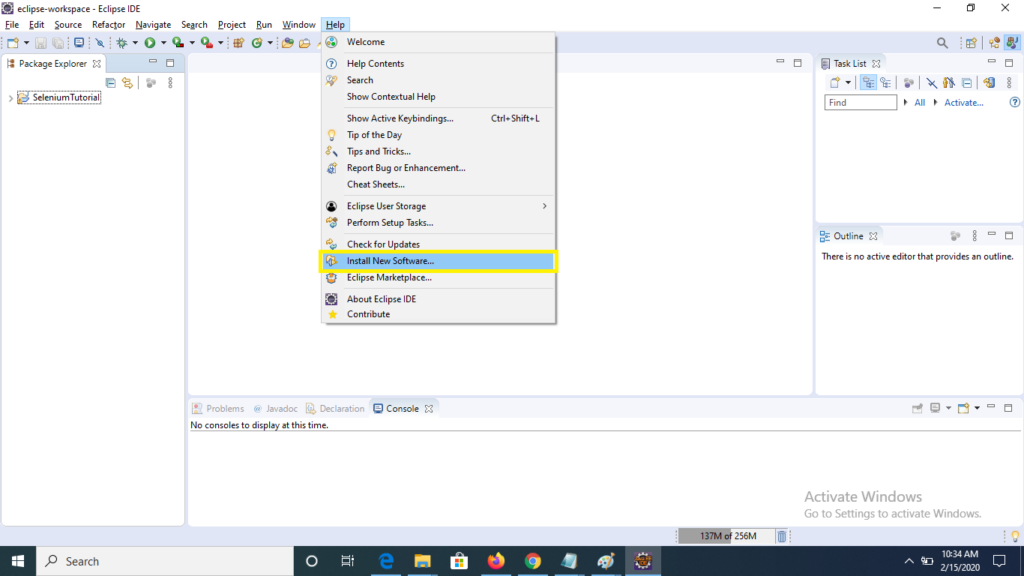
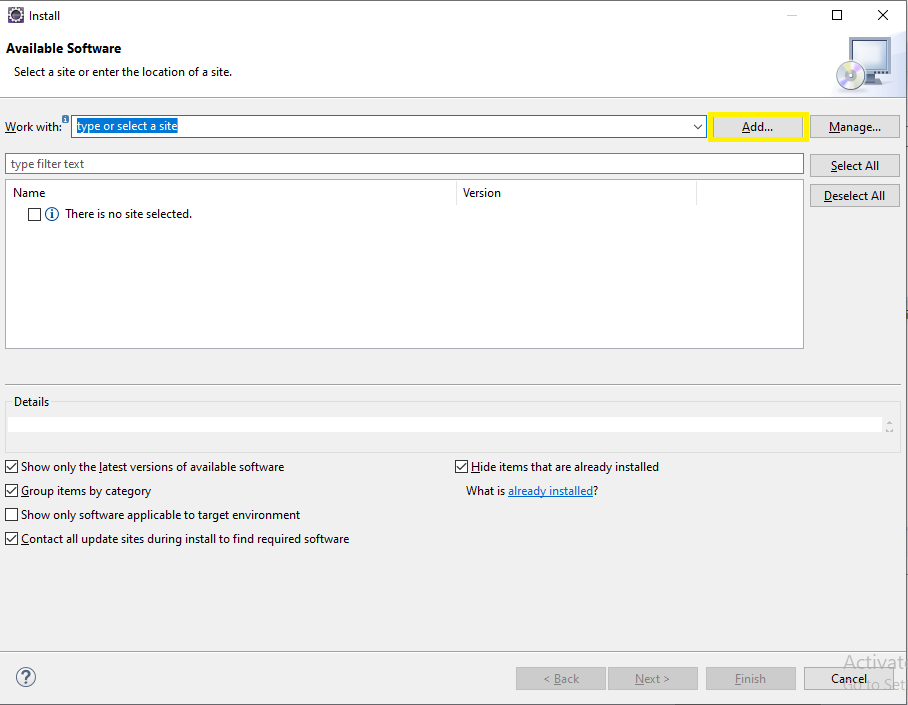
1) Initially click to Help menu on the top of eclipse ide and select “Install New Software” option from the list.
2) Now click to Add button on the top right after click to new will open.
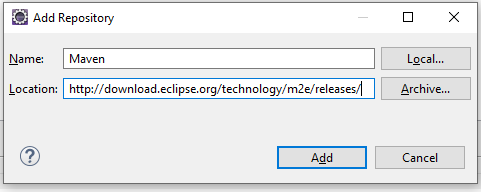
3) A new window “Add Repository ” will get open, now type “Maven” under name text box and enter ” http://download.eclipse.org/technology/m2e/releases/ ” under location text box, click to add.
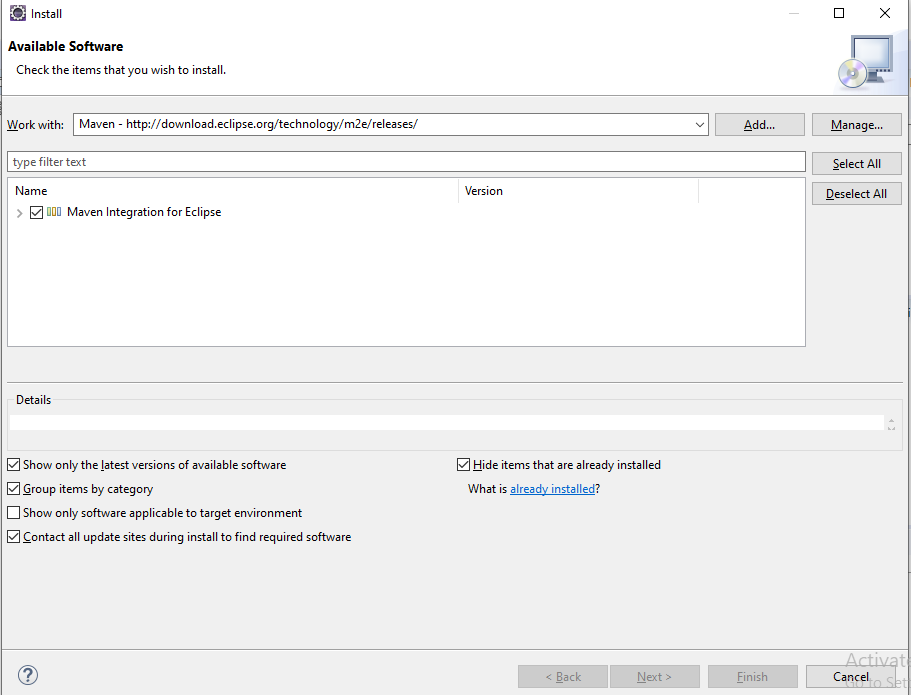
4) Now check the check box for “Maven Integration for Eclipse” and click to Next button on the bottom.
5) Now process with start for download and will take few minute.
6) Now a window displaying the default setting will be displayed, just click to Next button.
7) Now next window is of “Review License” will appear, this will contain terms and condition of the agreement, accept the license and click to “Finish” button.
8) Window for the installation of software will appear and will take few minutes, will till it completes.
9) A window for Software updates will appear, asking to start eclipse click to Yes to start system it will help to reflect the changes performed to your eclipse.
So, Through this process you can install maven to your eclipse IDE, In next tutorial we will learn to install maven through Command Line.
What is Maven and Why Maven?
Maven: is basically a build tool that helps developers a complete build lifecycle. Maven provided a solution to build multiple project, deploy those project and manage multiple jars with in a single structured environment.
The Maven provide a structure to a project for different build which can be reusable, structured and easy manageable. Maven is a project management tool which is basically based on POM (Project Object Model),which helps in maintaining a build, dependency of multiple jars and documentation, it is advanced than ANT (which is again a build tool).
Problem when not using maven
- Multiple jar management: In a project there are multiple jars that are used for different work or different activity, searching every jar, downloading and building it to every project becomes a huge task.
- Building and deployment: the build related task for ex :build report, execution of junit methods and library are tough and deployment is not easy manageable.
- Project structure: Correct structure must be initiated at initial level, if project structure is not well defined then the project will not be executable.
Maven helps in managing below:
- Builds
- Documentation
- Reporting
- Dependencies
- Releases
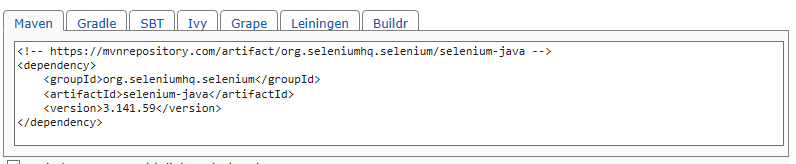
Maven Central Repository:
Maven has its central repository https://mvnrepository.com/, when the dependencies is been defined in pom.xml, maven first looks all its jars in local user at .M2 folder if the jars are not available in .M2 folder it downloads all the jars from the central repository, where all the jars are available for download.