Previous Topic, In this tutorial session we are going to learn how to Inspect Element Using Appium Inspector.
How to Inspect Element Using Appium Inspector?
To inspect element by Appium Inspector, we need to first connect our mobile device with our local system and follow the below steps:
Step1) Open the Appium desktop client application.
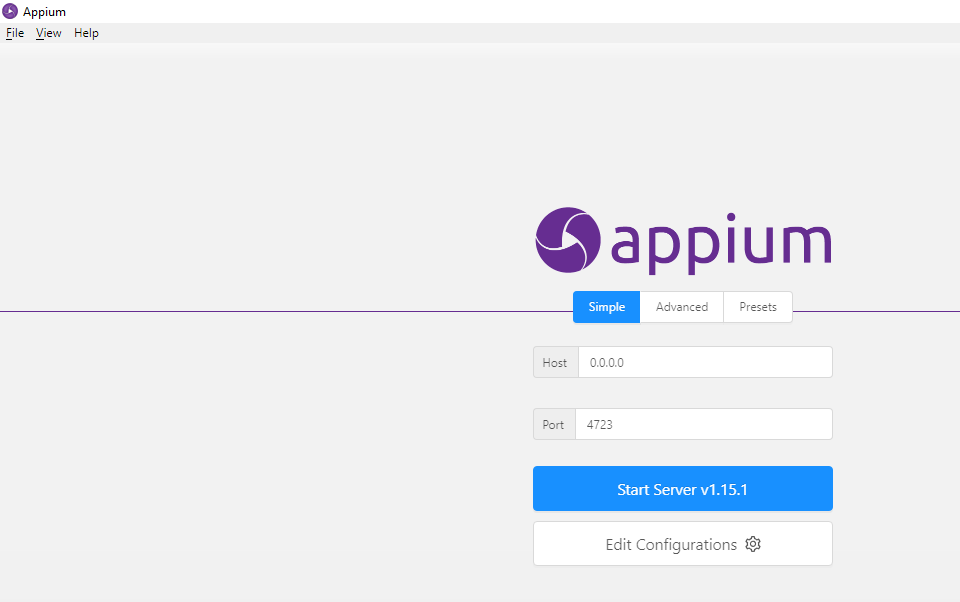
Step 2) Now Click in to Start Server, to get appium your server started.
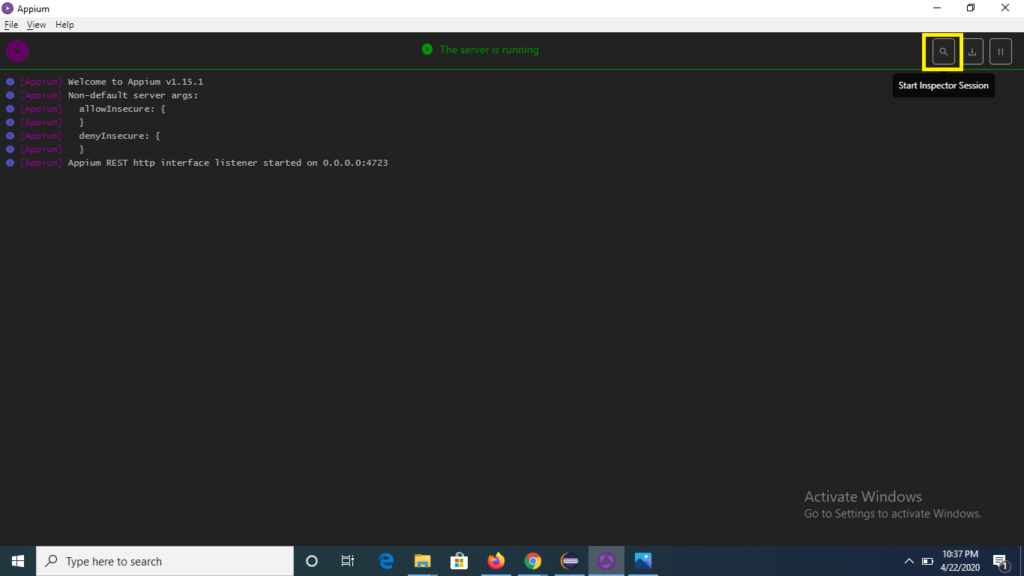
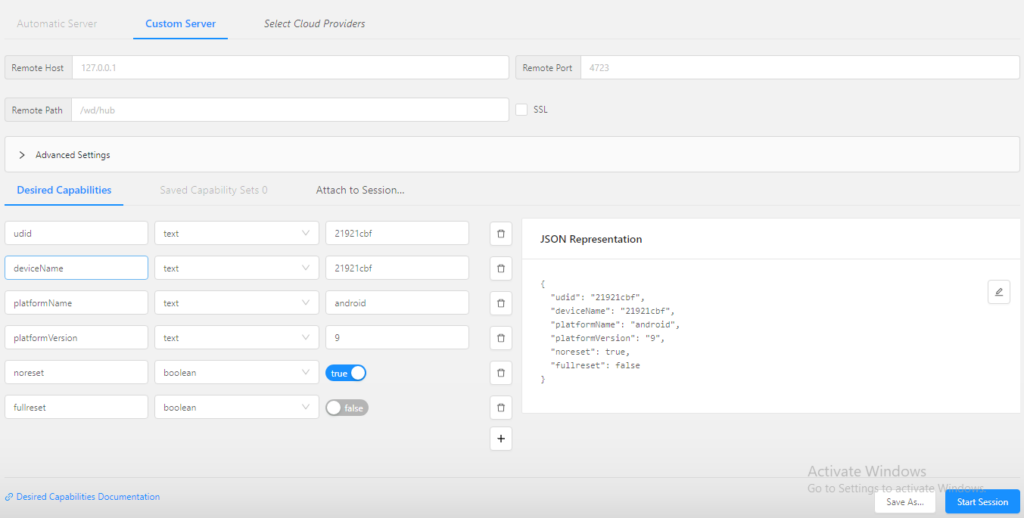
Step 3) Now define the desired capabilities as below:
- udid
- deviceName
- platformName (define as android)
- platformVersion (define as per per mobile device)
- noReset (define as true)
- fullReset (define as false)
Refer the screenshot below:
Step 4) Now save the desired capabilities for future reference, so that we need not to define these capabilities again. Click to Save As and give any name of your preference and click to save button.
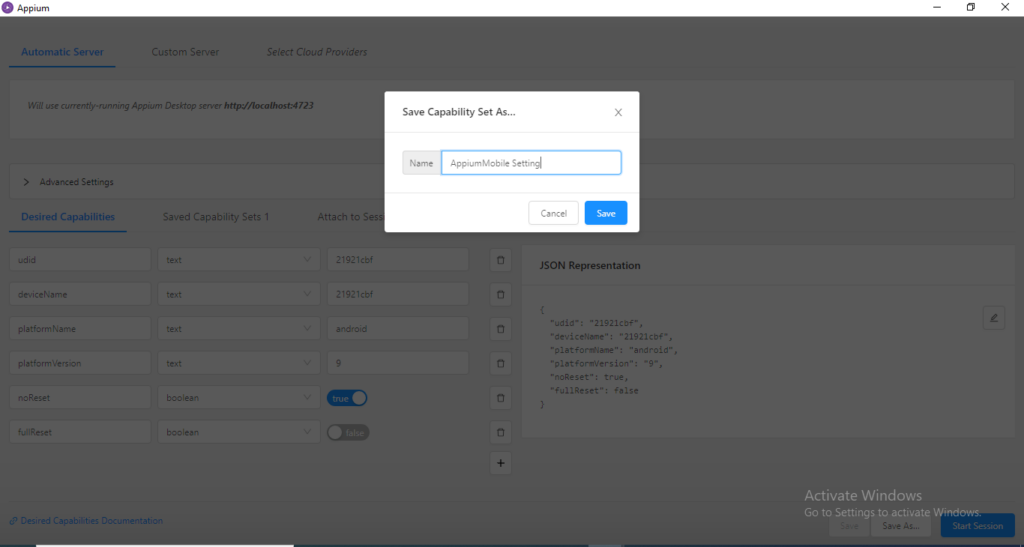
Step 5) Now we see that the capabilities we have save is getting displayed under “Saved Capabilities Sets1” menu.
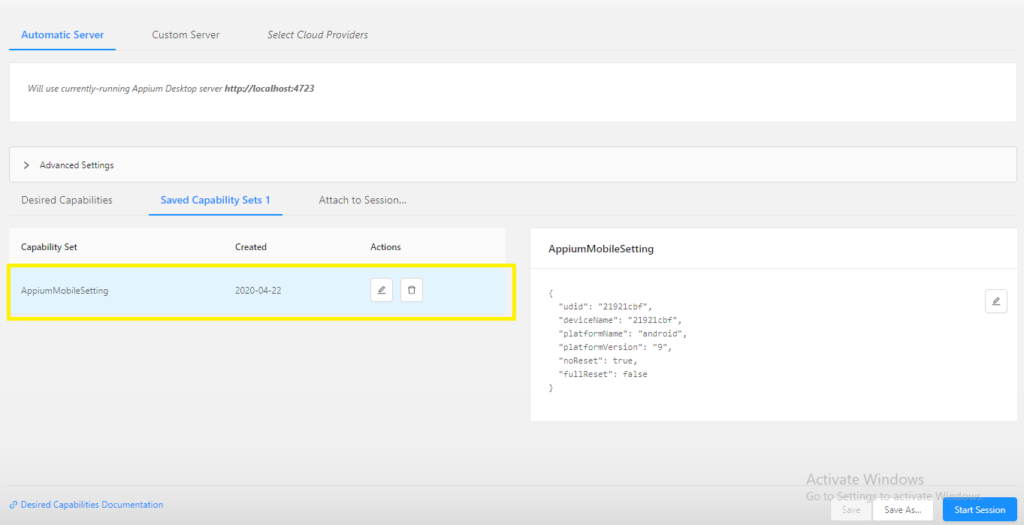
Step 6) Now select the capability and click to Start Session button and wait for few seconds.
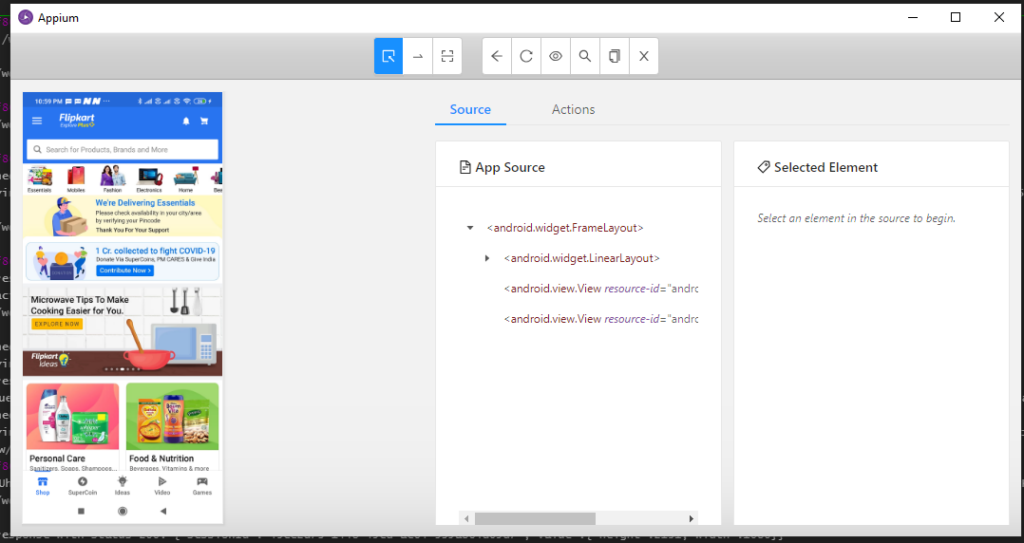
We see that the Flipkart application opened in mobile device is getting displayed in appium inspecter, the screenshot is displayed on left and its properties are displaying on the right side of window.
Step 7) Now lets check the properties of element in the application, click to Hemburger button on the top left of the element and check its properties and source on the right pane.
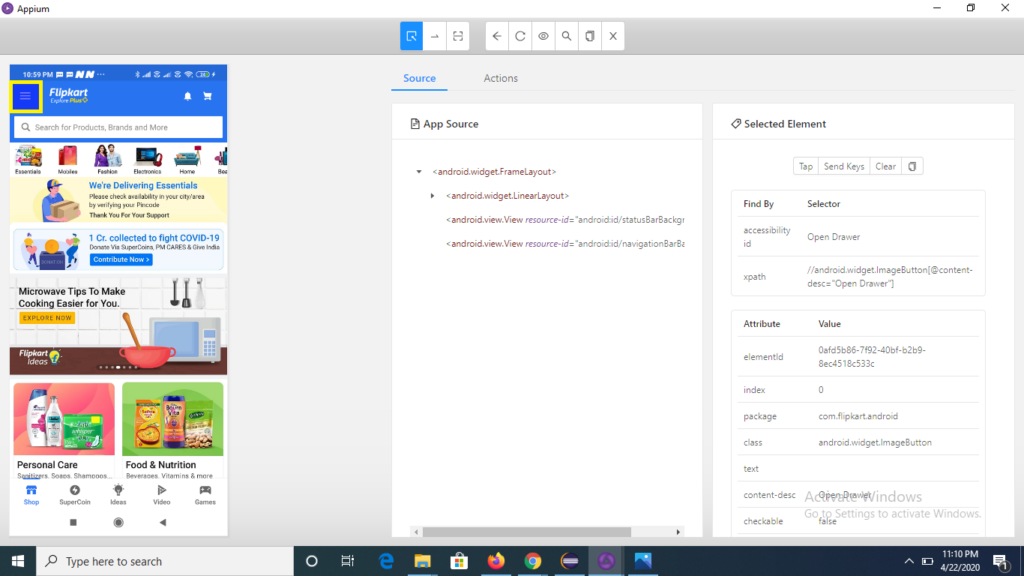
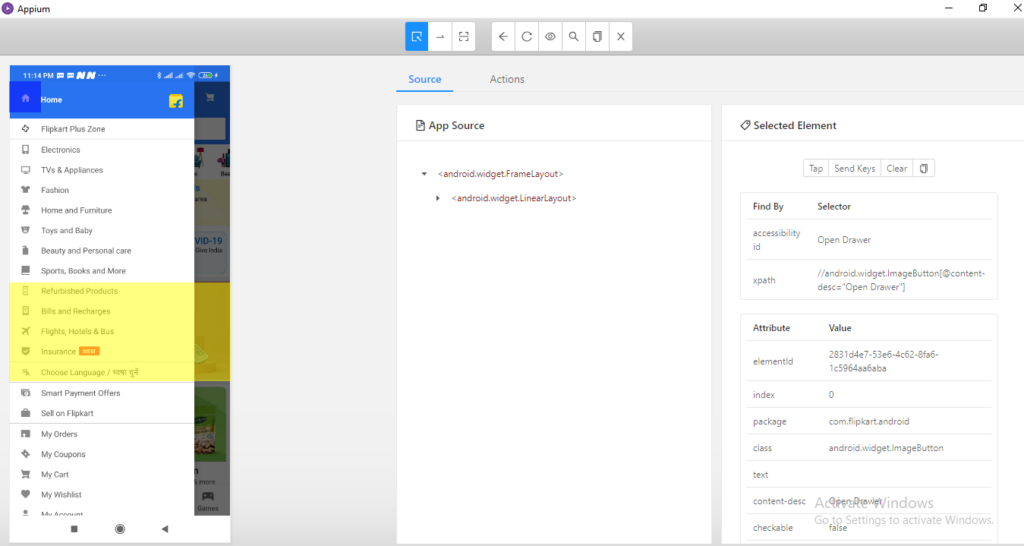
Note: We can also click or perform any action to Hemburger menu from the appium inspector window and view all the listing under the menu option without touching the mobile device.
For this click to Tap button on the right side of the pane below Selected Element heading (refer the screenshot below).
Conclusion:
So we from the above tutorial we have learned inpecting of locating the elements of mobile device using Appium Inspector and perform any task for the selected element from appium inspector itself.