Home » Posts tagged 'jdbc connection string sql server'
Tag Archives: jdbc connection string sql server
SqlServer Connection through JDBC in Selenium
Previous Topic, In this tutorial we are going to learn SqlServer Connection through JDBC in Selenium but before starting with connecting database we need to understand what is JDBC?
JDBC: JDBC stands for (java database connectivity) is a java API that provides methods which helps in creating the connection with the database. that helps in inserting the query, receiving the result and evaluating the outcome on the basis of actual and expected result.
Use of JDBC connection with database in selenium Script?
Once we are connected with database through jdbc connection, we are able access all the data available in database and perform any action as per requirement.
Suppose we execute any test case through selenium webdriver that created a profile in Web application and stores data is database, so if we are connected with the database we can check whether the saved data is safely stored or created in database or not.
How to perform SqlServer Connection through JDBC in Selenium?
Steps to create connection with Sql server using JDBC connection are below:
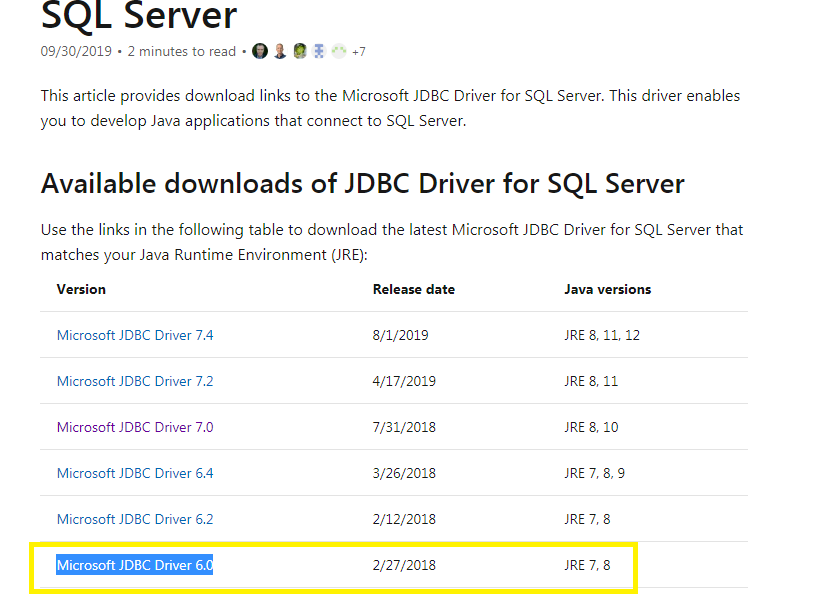
Step1) Download the SqlServer driver from this location location-> https://docs.microsoft.com/en-us/sql/connect/jdbc/download-microsoft-jdbc-driver-for-sql-server?view=sql-server-ver15 and click to any updated version (we are downloading Microsoft JDBC Driver 6.0 version)
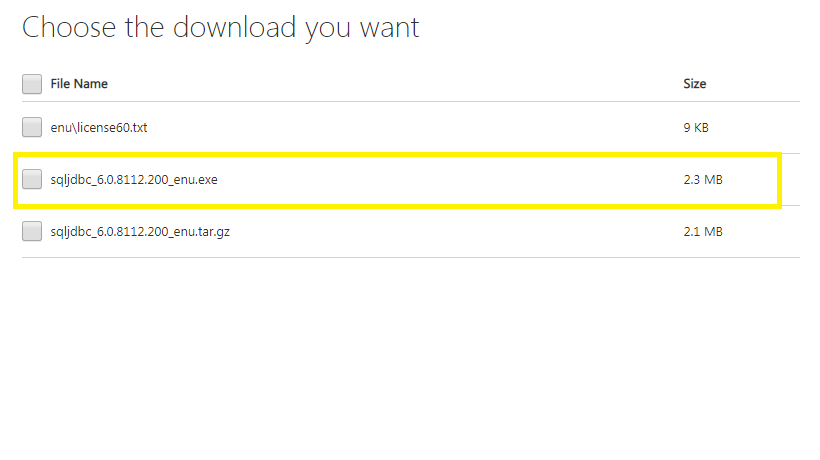
Step 2) Under Download window select sqlJdbc.exe file and click to download.
Step 3) After download the .exe file double click and unzip it as below in screenshot

Step 4) Copy the JDBC driver folder to any of preferred location. Now open the folder and open the x64 in auth folder ex -> C:\Workspace\Microsoft JDBC Driver 6.0 for SQL Server\sqljdbc_6.0\enu\auth\x64 and copy the .dll file

Step 5) Copy the .dll file and paste under bin folder to Jre and jdk folder of you java location , generally its in (Important Step)
for JDK->C:\Program Files\Java\jdk1.8.0_102\bin
for JRE->C:\Program Files\Java\jre1.8.0_102\bin
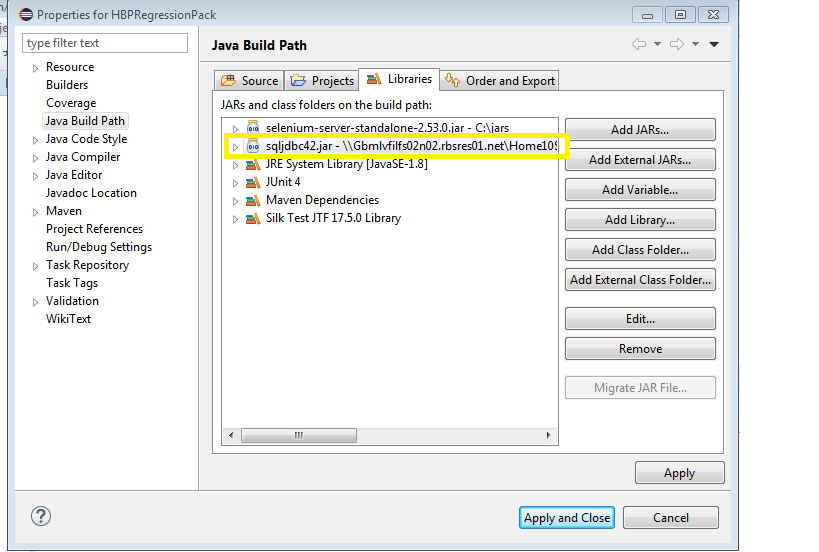
Step 6) Go to eclipse and right click to your project and open configure build path. Under libraries add external jar, which is under the JDBC driver folder . Path for the jar -> Microsoft JDBC Driver 6.0 for SQL Server->sqljdbc_6.0->enu->jre8 and add the jar.(refer screenshot)
Step 7) Now open your SQLServer Database, On login page or connection page always select authentication as ->Window Authentication (on selecting this you don’t have to provide the credentials under your script ) if option not available we will pass the credentials on Test case.
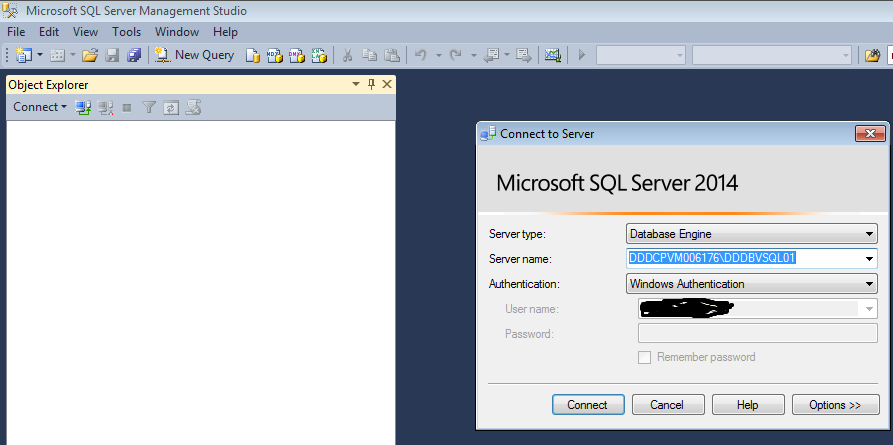
Step 8) We are now done with all the setting stuffs, open the eclipse create a project, Inside the package under class copy the below code.Each Line in code have explanations in comment.
package com.sanity.UserTest;
import java.sql.DriverManager;
 import java.sql.PreparedStatement;
 import java.sql.ResultSet;
public class DatabseConnection {
public ResultSet databaseConnection() {

    java.sql.Connection conn =null;
    ResultSet result = null;
    try {

String url="jdbc:sqlserver://localHost:1433;"+ "databaseName=xxxxxxxxxxx; integratedSecurity=true;";

String username ="xxxxx\\XXXXXXXXXX";
String password="XXXXX";
//Initialize Sqldriver instance
  Class.forName("com.microsoft.sqlserver.jdbc.SQLServerDriver");

 // Creating the connection providing URL and username password
   conn = DriverManager.getConnection(url, username, password);

 //Checking for the connection( returns boolean false if connected)
   System.out.println(conn.isClosed());

 // For Print
    System.out.println("Data values getting displayed below");
 // Sql Query to dispaly all the values under xxxxxxxx table
    String query = "SELECT * from XXXXXXXXX";
 // Providing the query under prepareStatement parameter
    PreparedStatement pst=conn.prepareStatement(query);

 //Command to execute query and capturing all the result under Result set
    result=pst.executeQuery();
     while(result.next()) {

  //Printing the 1 column 2 column and 6 column of the table
     System.out.println(result.getString(1)+ "   "+ result.getString(2) +"   " +result.getString(6));
            }

    return result;

            } catch (Exception e) {
            e.printStackTrace();
            }finally {

            }

    return result;


}}
Step 9) Now provide your server name ,database name, Username, Password after the right click to the .java file and run the program, you will see that all the values of the column are getting displayed under the console. Code in the eclipse displays in the below ways.
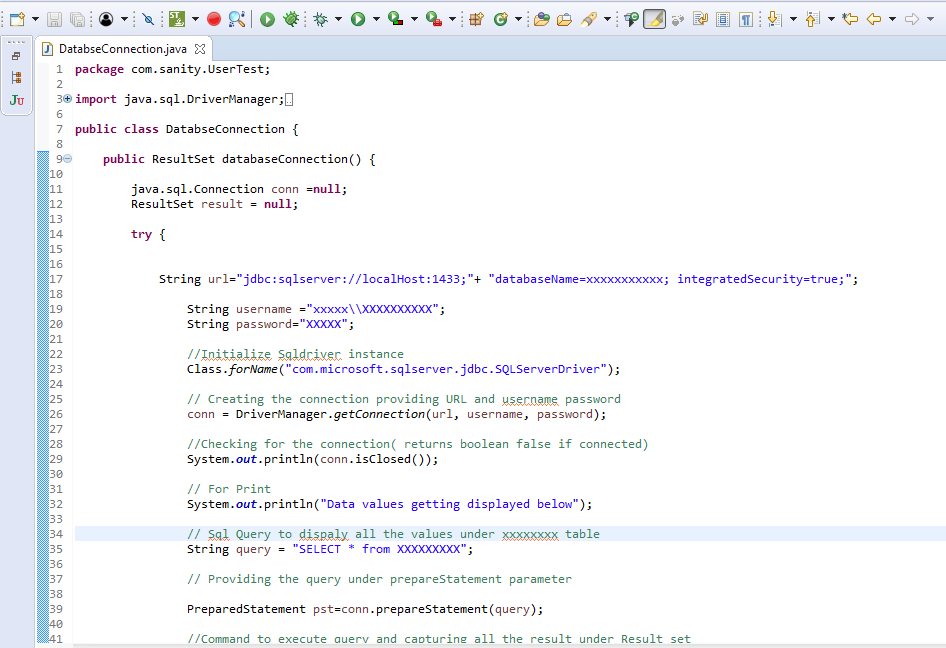
Code Description:
Step 1) Define global variable for the connection and ResultSet
java.sql.Connection conn =null;
ResultSet result = null;
Step 2) Provide the connection strings containing the host name along with database name.
String url=”jdbc:sqlserver://localHost:1433;”+ “databaseName=xxxxxxxxxxx; integratedSecurity=true;”;
Step 3) Provide the database credentials
String username =”xxxxx\XXXXXXXXXX”;
String password=”XXXXX”;
Step 4) This commands is import step, it initializes the driver instance.
Class.forName(“com.microsoft.sqlserver.jdbc.SQLServerDriver”);
Step 5) Creating the connection using credentials and Url instance
conn = DriverManager.getConnection(url, username, password);
Step 6) This step will return boolean and get to know that the connection is up or not. Returns you false if connection is done.
System.out.println(conn.isClosed());
Step 7) General select query
String query = “SELECT * from XXXXXXXXX”;
Step 8) By this command your query if been fetched and executed to database internally and result is captured .
PreparedStatement pst=conn.prepareStatement(query); //Command to execute query and capturing all the result under Result set
result=pst.executeQuery();
Step 9) The statement will move to next every time and with display the data of 1,2 and 6 columns.
while(result.next()) { //Printing the 1 column 2 column and 6 column of the table
System.out.println(result.getString(1)+ ” “+ result.getString(2) +” ” +result.getString(6));
}
Conclusion:
So will above tutorial we can conclude that, we can get the data from the database connection for sqlserver and use the data in a form of String to the selenium automation script, and execute script on different sets of data.