Home » appium-tutorial (Page 2)
Category Archives: appium-tutorial
Mobile Application Command
In previous topic we have discussed Identify Element Using UIAutomatorViewer, in this topic we will discuss Appium Mobile Application command.
What are Mobile Application Commands in Appium?
Those commands which helps in riding and controls the mobile application in terms of installation, launch, perform multiple activity etc with in application is refereed to as mobile commands.
Lets discuss Appium Mobile Application command in details:
1 ) launchApp(): This commands re-launches the current application once its been closed. The basic syntex of launchApp()
driver.launchApp();2) closeApp(): This commands closes the current running application from the mobile window and the script stops execution.
//Syntex:
driver.closeApp();
3) resetApp(): As we run this commands, all the cache and the cookie gets cleaned for the application and removes the previous backlogs.
//syntex:
driver.resetApp();
How to Run Application on background?
4) runAppInBackground(): This command help to run the application in background mode or in other words the application running in mobile device is not visible on screen.
This commands takes int as a parameter and returns nothing or Void, we pass time in seconds as a parameter.
Note: If we want to run our application permanently on background, we can pass time or parameter as -1;
//Syntex
driver.runAppInBackground(10); //where 10 represents 10 seconds
driver.runAppInBackground(-1); //Runs application permanently on background
5) startActivity(): If we want to open another application in mobile device or execute any automation script which requires to run two different application to open in single run.
The startActivity() commands requires app Package and app activity as a paramater and returns nothing or Void.
For example, if we want to open calculator application, we hit the commands as below.
//Syntex:
driver.startActivity("com.miui.calculator","com.miui.calculator.cal.CalculatorActivity"); // Parameter are app package and app activity of calculator
6) currentActivity(): In Mobile application every page or every window of mobile application has its app activity, so if we want to get the app activity of any page or window, we can call this method, this command takes no parameter and returns a String.
//Systex:
adriver.currentActivity();
7) isAppInstalled(): This command gives the confirmation of installation of an application. This commands requires the bundleId as a parameter and returns boolean.
//Syntex:
adriver.isAppInstalled(bundleId);
8) installApp(appPath): We can use this command to direct install an application to the mobile device. This command requires appPath or apk file and returns nothing or Void.
//Syntex:
driver.installApp(appPath); // appPath is the APK file of android application
9) removeApp(appPath): This command will remove the application from the mobile device . This command requires bundleId or app Package and returns nothing or Void.
//Syntex:
driver.removeApp(appPath); // appPath is the APK file of android application
Conclusion:
So in the above tutorial we have discussed the basic commands for mobile application, further we will discuss commands to Touch gesture, and identification of object with different attributes.
Identify Element Using UIAutomatorViewer
Previous topic, In this tutorial we will learn locate or Identify Element Using UIAutomatorViewer. Let discuss in depth.
Why and how to check device connectivity?
In initial step, connect your mobile device with local system or computer and check your device connectivity. This can be done by two ways:
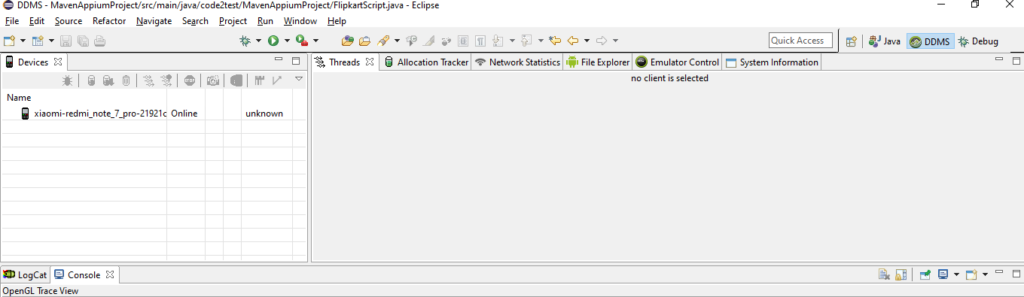
First way is go to open perspective->select DDMS and click to ok button and the connected device will be displayed under the devices list as shown blow.
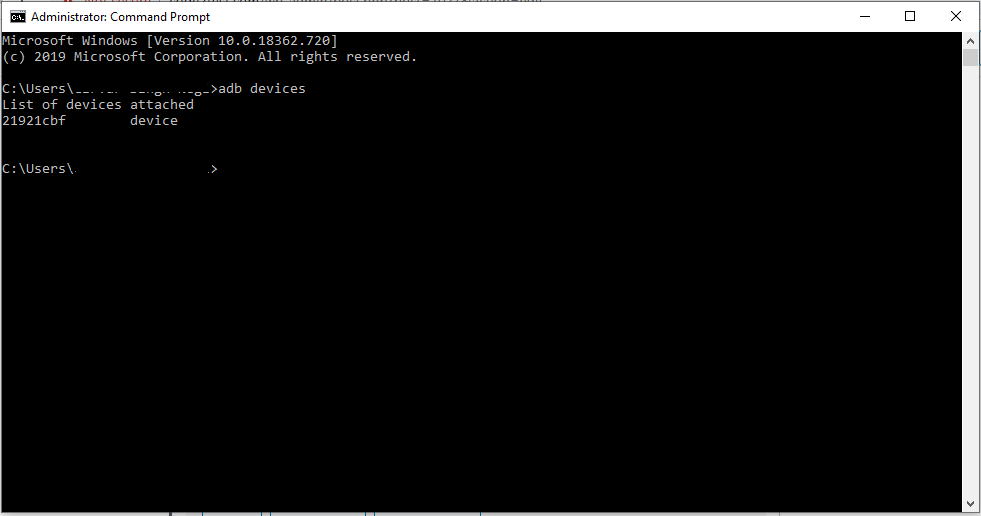
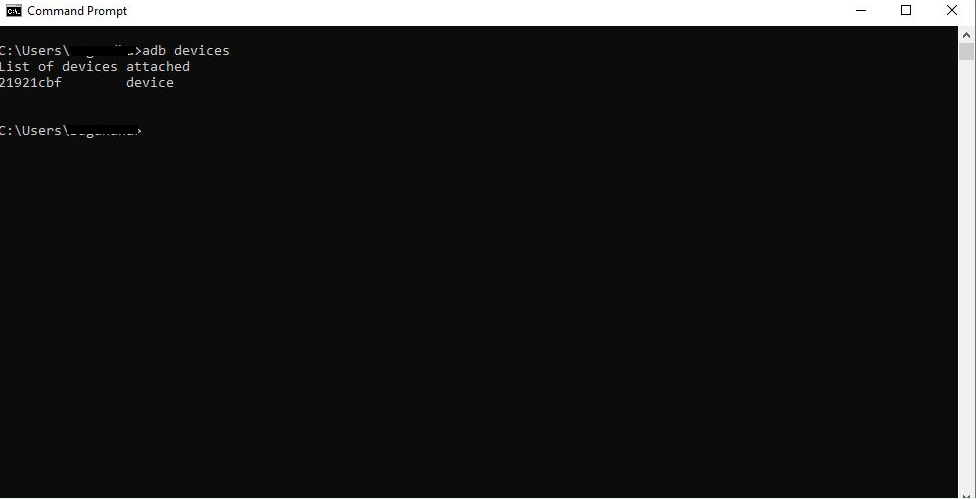
Second way is hit command-> adb devices under cmd prompt or command prompt as below.
How to Identify Element Using UIAutomatorViewer?
Follow the below steps for locating the elements:
Step 1) Open the application on your mobile device (as we are working on Flipkart, will identify its element.
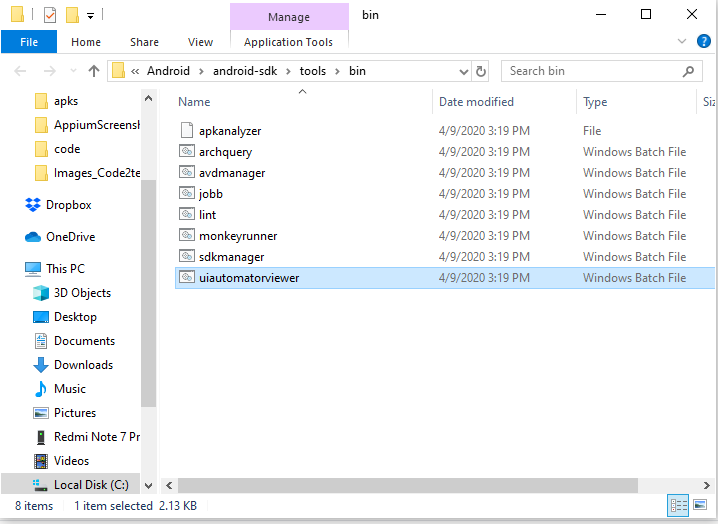
Step 2) Browse the android folder till the uiautomatorviewer.bat file, or follow the below path->C:\Users\xxxxxx\AppData\Local\Android\android-sdk\tools\bin and double click to uiautomatorviewer .bat file.
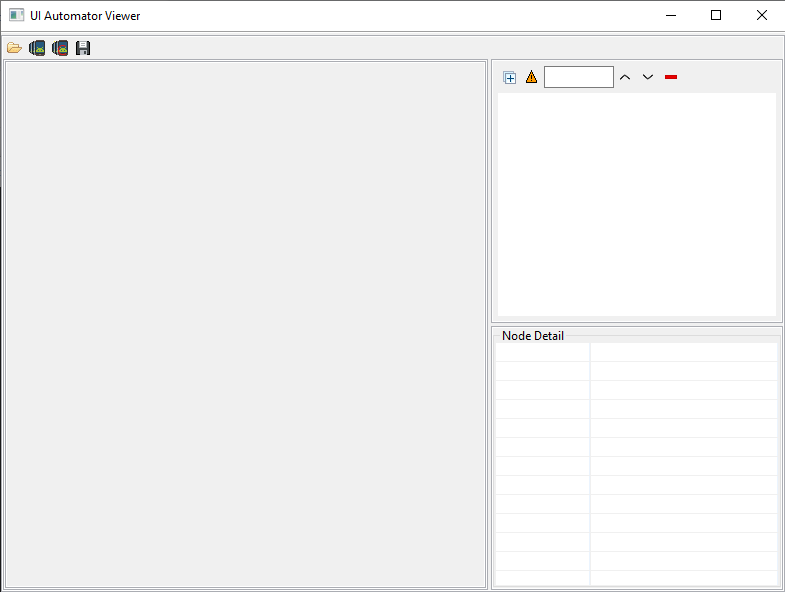
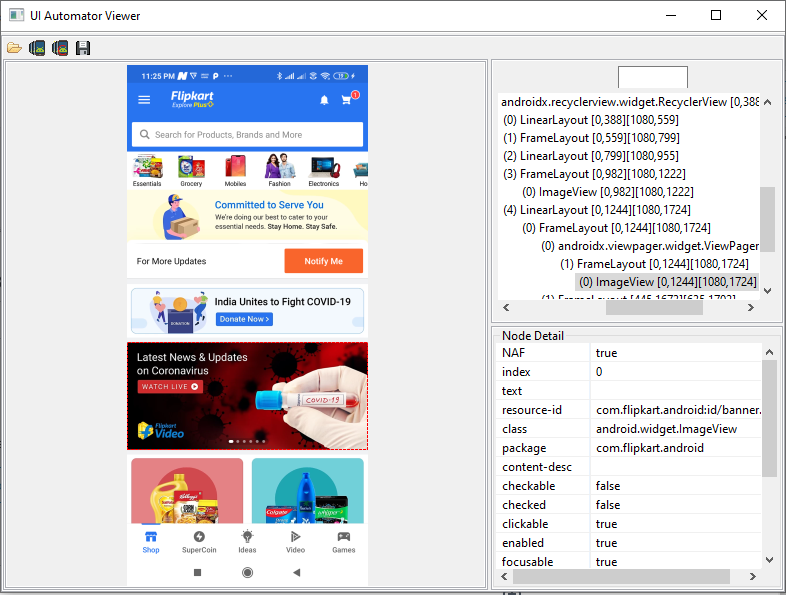
Step 3) As we hit to uiautomatorviewer.bat file, a UI Automatoe viewer will get opened.
Step 4) Click in to device screenshot button available as second menu on the top. The screenshot for the flipkart application will get opened. (Note: keep flipkart application opened on mobile device).

Step 5) Now click to Main Menu on the top of the screenshot and all the properties of the element will get displayed on the right.
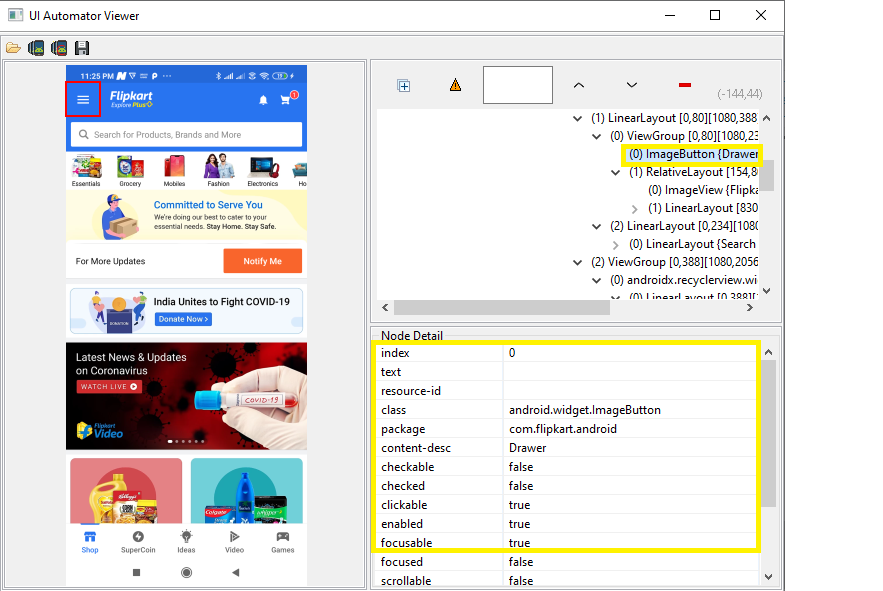
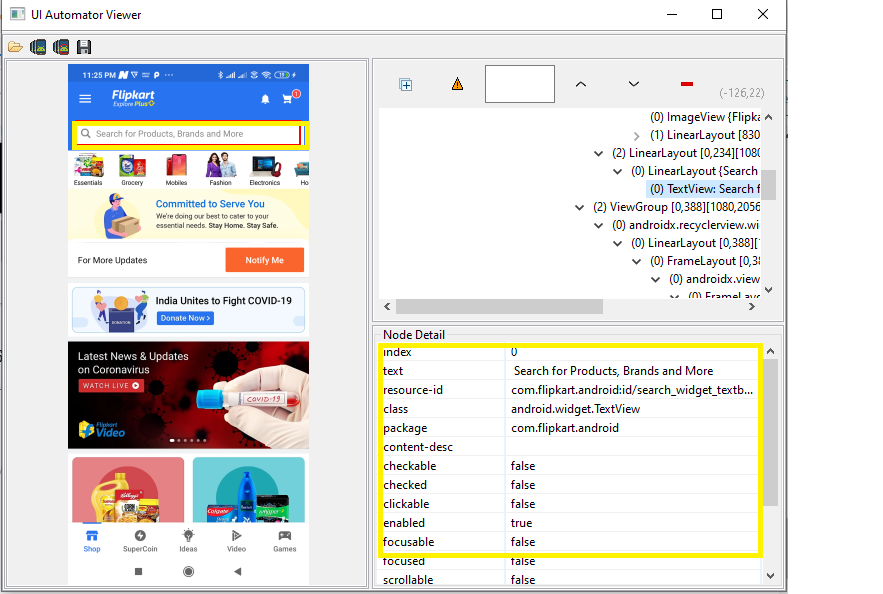
Step 6) Now click to search field on the flipkart application screenshot, similarly all the attribute along its values will be displayed on the bottom right.
Now lets understand how to save the screenshot and its related files.
How to save screenshot and UiX File?
It is very important to save your screenshot and its related UiX file because, one need to take screenshot again and again for the same page and check for device connectivity.
With the save feature inside the UI Automation viewer, once can save the screenshot of the application and UiX file and can use later even when the devices is not connected with computer.
Steps to save the screeshot along with Uix File are below:
Step 1) Take the screenshot of the flipkart application and click to save button on the top.
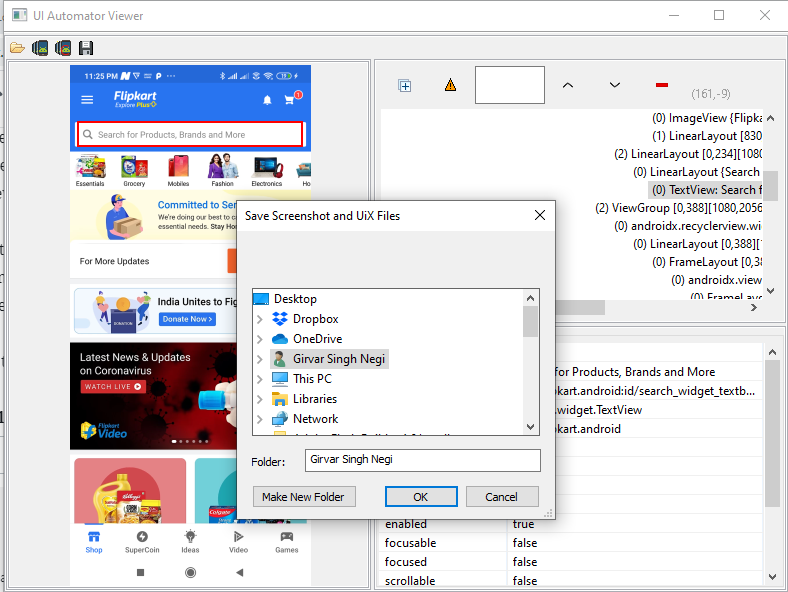
Step 2) Now give the path and click to OK button.
Step 3) now go the that path and you will see that 2 files are created on the location.
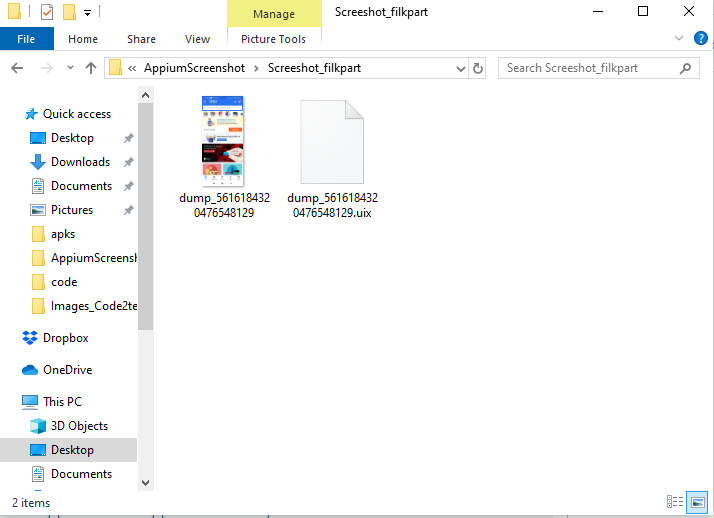
The two files are created in the same location one is the screenshot and other is the properties of all the elements displayed in the screenshot.
How can we open the saved UI files?
Below are the steps to open the saved UI files:
Step 1) Click on the open menu at the top.
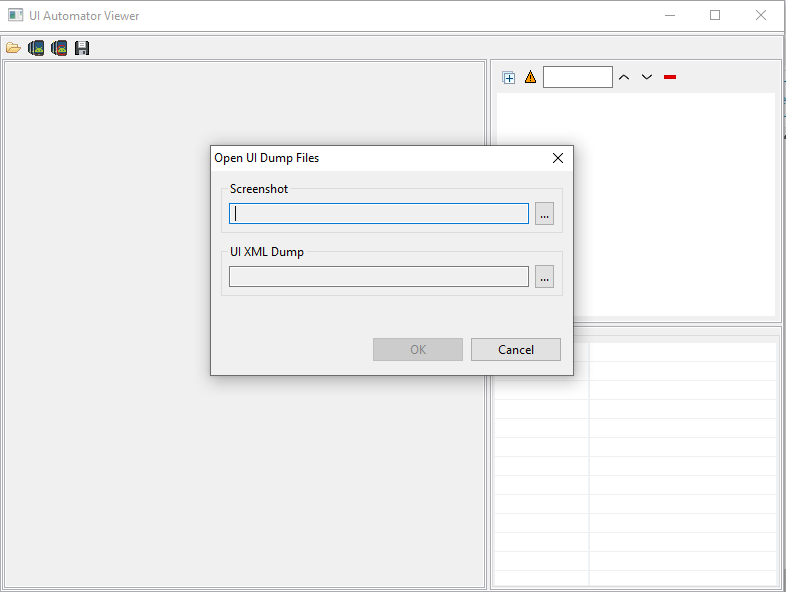
Step 2) click on to browser and give the path of dump file , on the saved location.
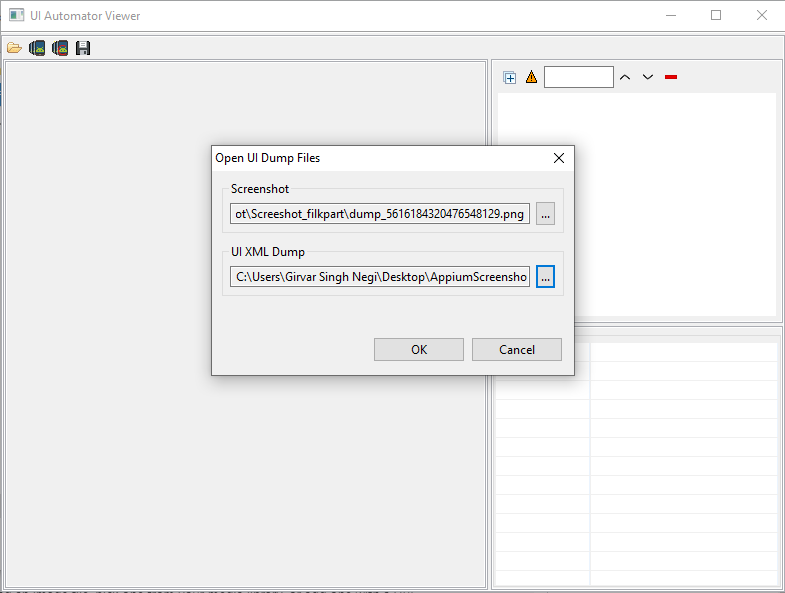
Step 3) Screenshot of flipkart application alon with properties values gets displayed under UI Automator viewer now.
So following the above steps we are now good with locating or identifying the elements of any Android application for Appium automation.
Youtube->https://www.youtube.com/channel/UCJmuzLmF7txuObVRHXYTGZQ?view_as=subscriber
First Appium Test to Launch Flipkart
Previous Topic, In this tutorial we will learn to write our First Appium Test to Launch Flipkart.
How to write First Appium Test to Launch Flipkart?
Before writing script , we need to launch Appium server first, below are the steps to launch server.
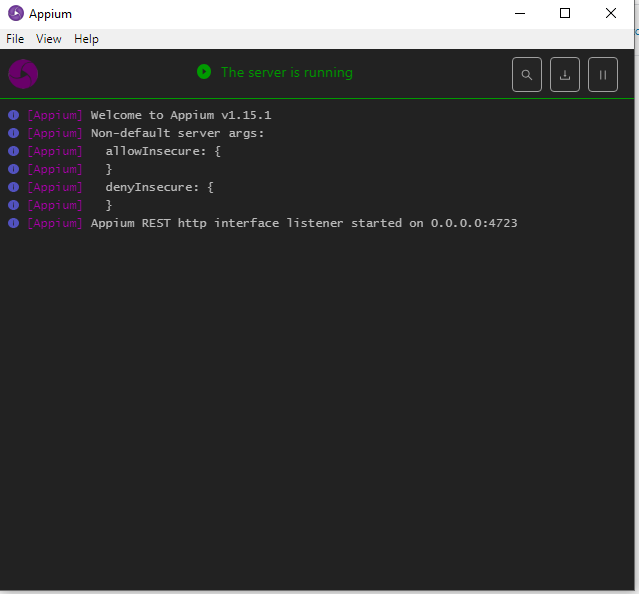
Step 1) Open the Appium server.
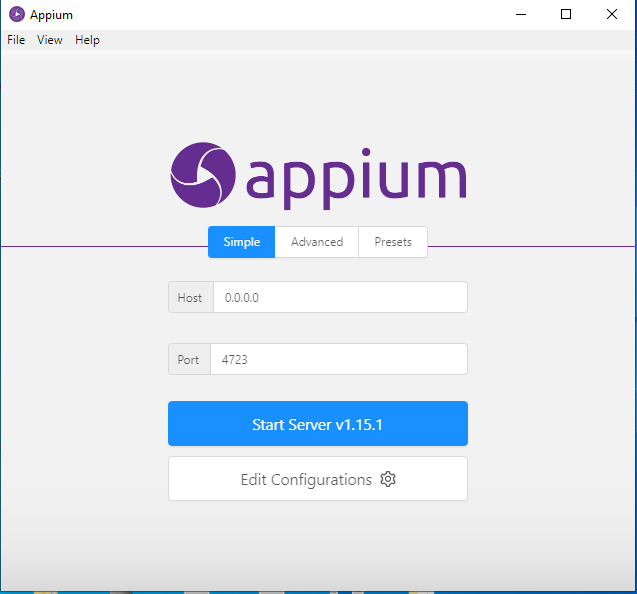
Let keep the host=”0.0.0.0″ and port “4723” as it is( default).
Step 2) Click to Start Server button and the server will get start working with default host number and port number.
Step 3) Now copy the below code and paste in a class inside the eclipse ide.
package code2test.MavenAppiumProject;

import io.appium.java_client.android.AndroidDriver;
import io.appium.java_client.android.AndroidElement;
import java.io.File;
import java.net.MalformedURLException;
import java.net.URL;
import java.util.concurrent.TimeUnit;
import org.openqa.selenium.WebDriver;
import org.openqa.selenium.remote.CapabilityType;
import org.openqa.selenium.remote.DesiredCapabilities;
import org.testng.Assert;

public class Harness {

public AndroidDriver<AndroidElement> adriver;
public void openapp(){

System.out.println("Opening App");
File app =new File(System.getProperty("user.dir")+"\\apks\\Flipkart-7.3.apk");
DesiredCapabilities capabilities =new DesiredCapabilities();
capabilities.setCapability("deviceName","Redmi");
capabilities.setCapability(CapabilityType.BROWSER_NAME,"");
capabilities.setCapability("platformVersion","9 PKQ1.181203.001");
capabilities.setCapability("platformName","Android");
capabilities.setCapability("noReset","true");
capabilities.setCapability("fullReset","false");

capabilities.setCapability("appPackage","com.flipkart.android");
capabilities.setCapability("appActivity","com.flipkart.android.activity.HomeFragmentHolderActivity");
capabilities.setCapability("app", app.getAbsolutePath());

try {
adriver = new AndroidDriver<AndroidElement>(new URL("http://0.0.0.0:4723/wd/hub"), capabilities);
   } catch (MalformedURLException e) {

e.printStackTrace();

Assert.fail("Driver failed to start" + e.getMessage());
	}
adriver.manage().timeouts().implicitlyWait(20, TimeUnit.SECONDS);
		}
public static void main(String[] args) {
Harness flipDriver=new Harness();
flipDriver.openapp();
 }
}
Code Inside Eclipse will look as below:
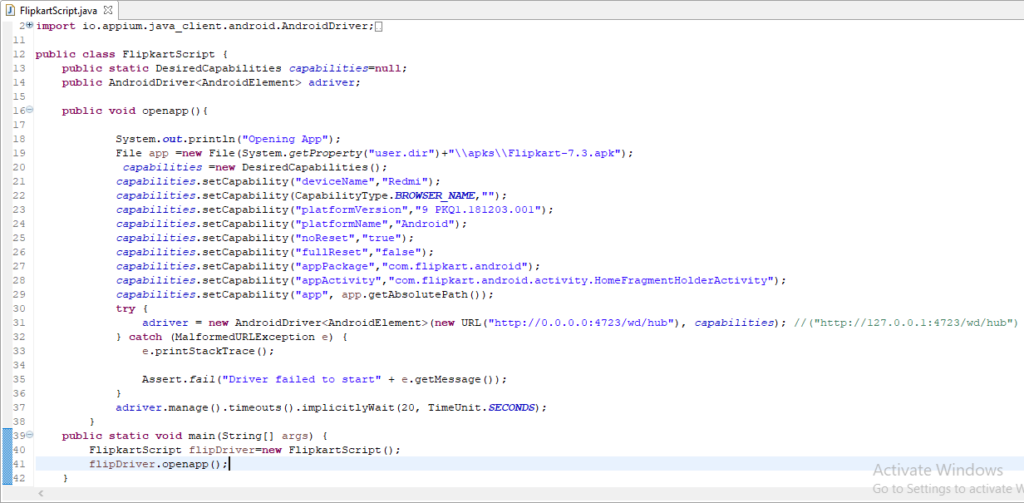
Step 4) Now run the code by right click to code Run->Run As->Java Application.
Step 5) In few minutes of time we see that the flipkart application in mobile gets opened.
Code explanation step by step:
//Code to provide the path of Flipkart APK in system
File app =new File(System.getProperty(“user.dir”)+”\apks\Flipkart-7.3.apk”);
Desired Capabilities:
DesiredCapabilities capabilities =new DesiredCapabilities(); // Creating object for desired capabilities.
// Defining the name of your device
capabilities.setCapability(“deviceName”,”Redmi”);
//Defining the name of mobile browser as empty
capabilities.setCapability(CapabilityType.BROWSER_NAME,””);
// Defining the platform version of the device
capabilities.setCapability(“platformVersion”,”9 PKQ1.181203.001″);
//Defining Name of the platform, as Android
capabilities.setCapability(“platformName”,”Android”);
//defining the mobile to open in noReset
capabilities.setCapability(“noReset”,”true”);
//Defining the capability to not re-install application
capabilities.setCapability(“fullReset”,”false”);
capabilities.setCapability(“appPackage”,”com.flipkart.android”); // defining the application packackage of Flipkart
//Defining application activity of flipkart
capabilities.setCapability(“appActivity”,”com.flipkart.android.activity.HomeFragmentHolderActivity”);
//Defining the file path in one statement and retuning a String
capabilities.setCapability(“app”, app.getAbsolutePath());
try {
// Creating the object of android driver and passing host and port number and capabilities to it
adriver = new AndroidDriver<AndroidElement>(new URL("http://0.0.0.0:4723/wd/hub"), capabilities);
   } catch (MalformedURLException e) {

e.printStackTrace();

Assert.fail("Driver failed to start" + e.getMessage());
	}
So following the below steps, we now able to create and execute the appium script to launch flipkart application and other application too.
Download Appium client library
After Installing PdaNet for Android device, now next step is to Download Appium client library for java.
What is Appium client library?
Appium client library binds selenium library and it provides all the selenium commands along with additional libraries that have commands to control mobile devices.
The commands which are capable to handle multi gesture,actions , orientation along with multiple behaviour like pinch, swipe etc.
How to Download Appium client library for java?
Below are the steps by step way to download library
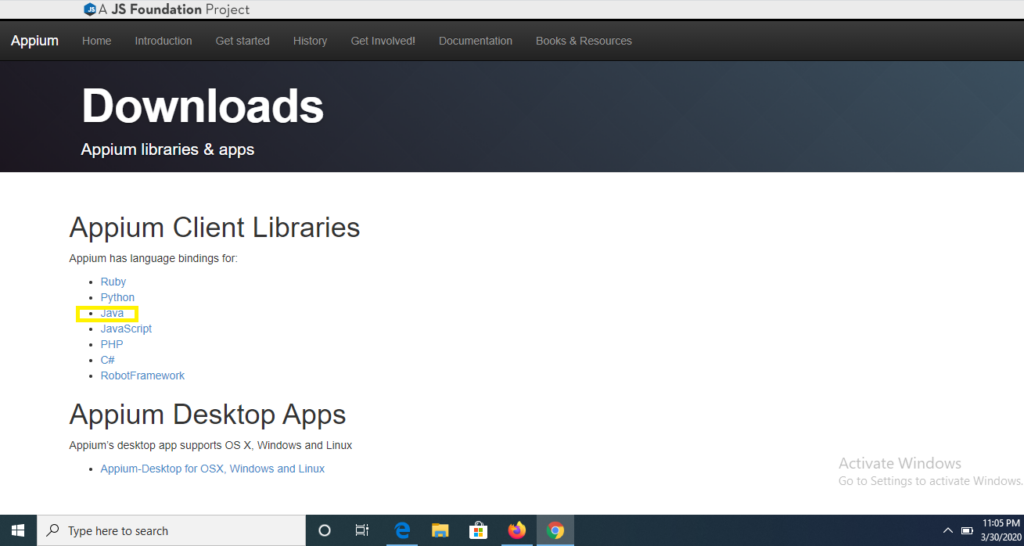
Step 1) Click on the Appium Client Library and select java to install Appium libray for java
Step 2) Now click to downward arrow under Download column.
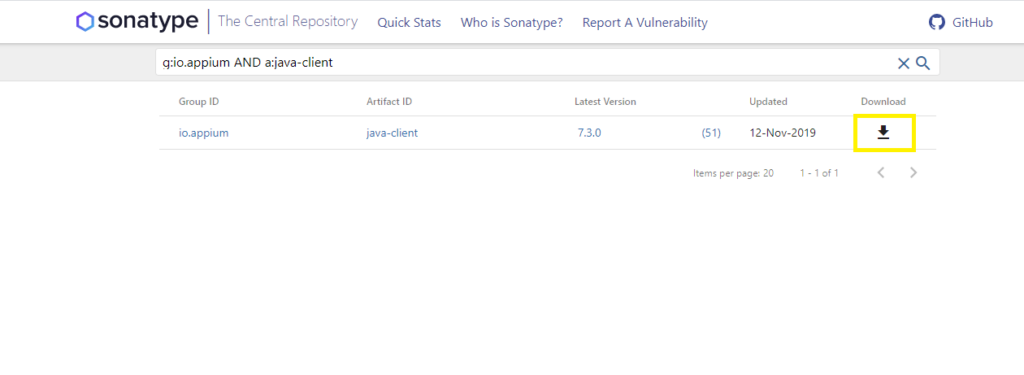
Step 3) Select Jar menu.
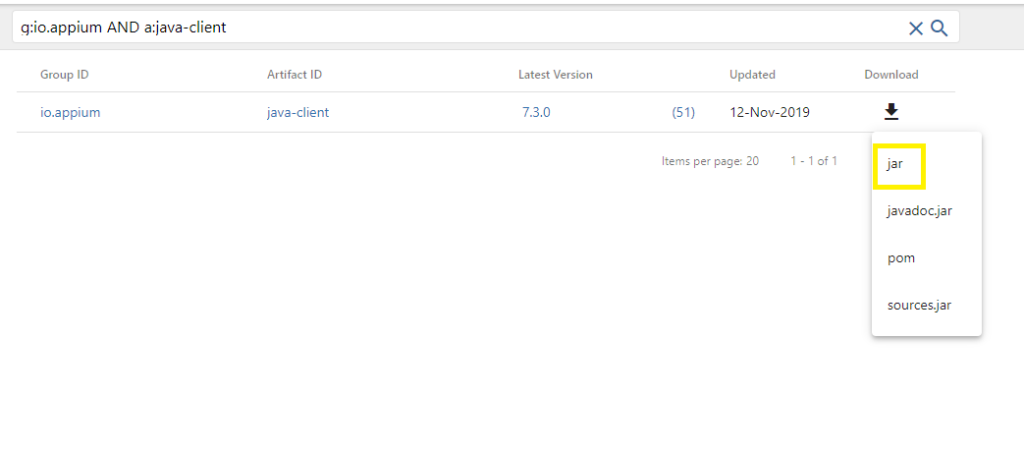
Step 4) A warning pop window will appear, click to Keep button

Step 5) Save the java-client jar to the preferred folder, this jar will further be imported in eclipse for automation.

So following the above steps sequentially we will download the appium java-client and further be import in java project.
Download and Install PdaNet for Android device
After enabling the developer option in Android device now next step is to Download and Install PdaNet for Android device.
About PdaNet
Pdanet helps your connect your phone internet with your computer.
I works same as modem and helps to provide net connection to your system.
Connection between system and android device can be provided by two ways by bluetooth and USB.
How to Download and Install PdaNet for Android device
Below are the steps by step ways for installation:
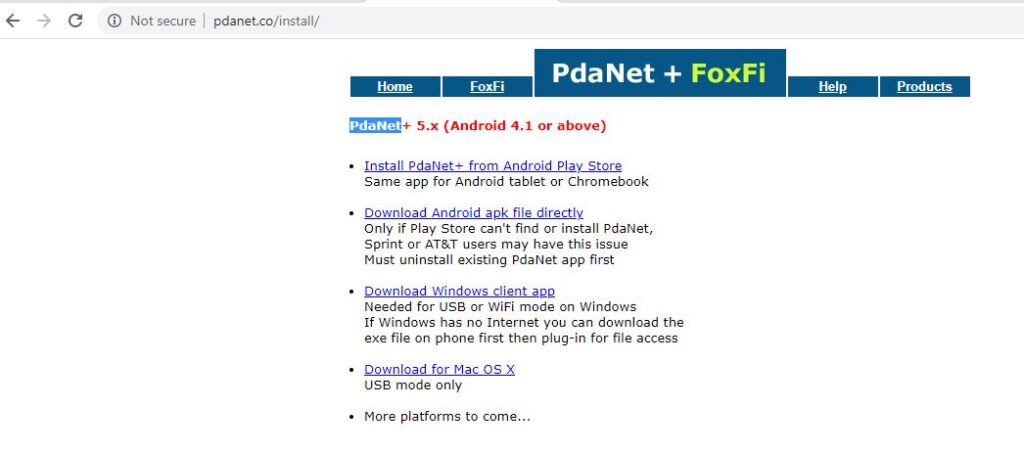
Step 1) Click to PdaNet to re direct to PdaNet official website and click to “Download window click app” for window installation on window
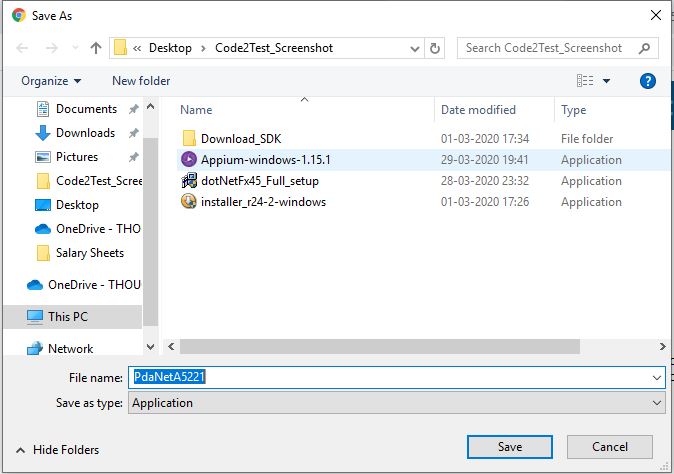
Step 2) Now select folder on your local to save the setup file.
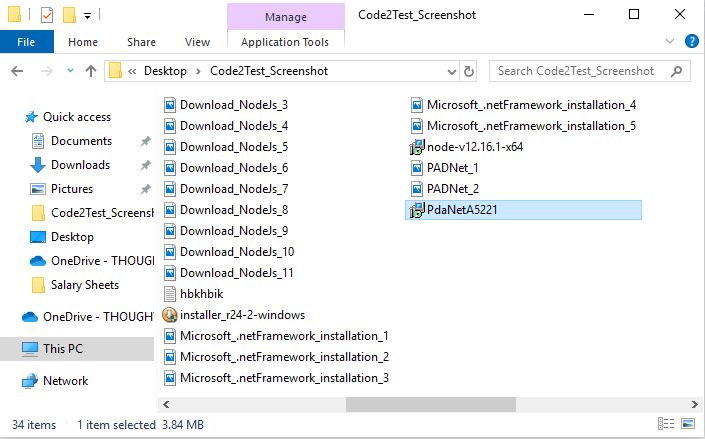
Step 3) Double click to PdaNet installer setup and start the installation.
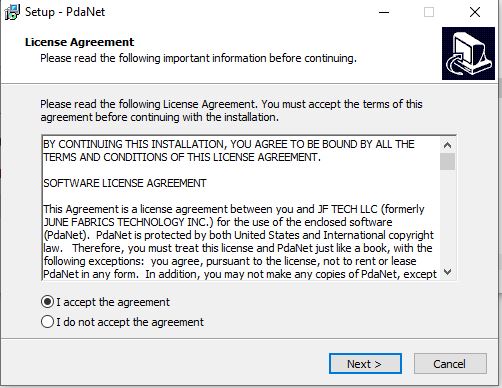
Step 4) Accept the license agreement and click to Next button.
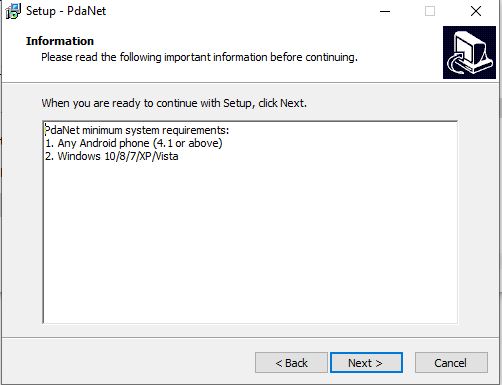
Step 5) Click to Next button under “Information” window.
Step 6) Click to Next button under ‘Select Start Menu Folder’ window

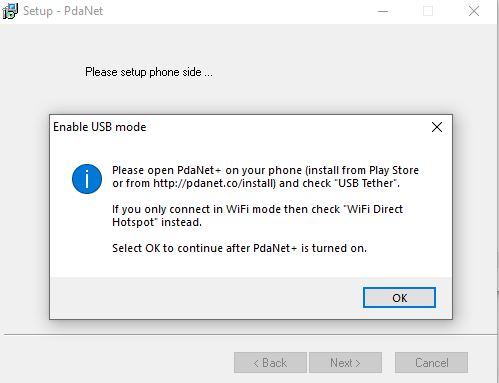
Step 7) Click to OK button to Enable USB mode
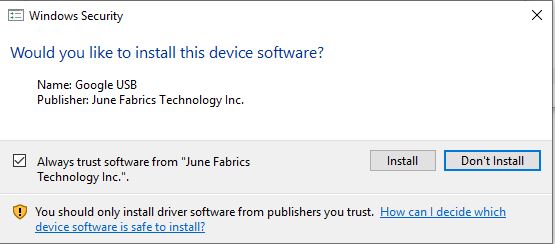
Step 8) click to Install button start installation
Step 9) Once the installation gets succeeded click to Finish button

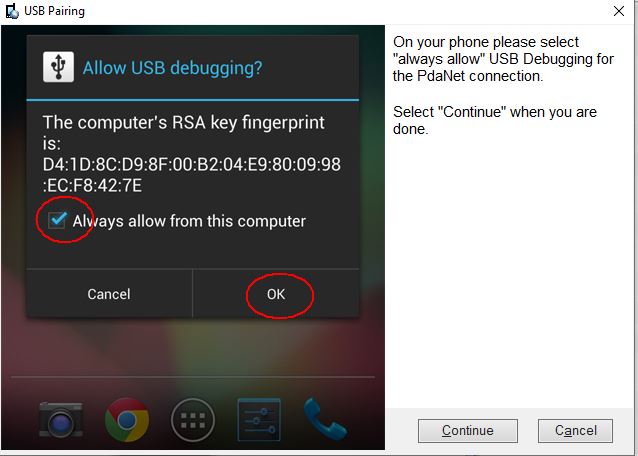
Step 10) Connect your mobile device, now in this step you will get a pop up window on your mobile device to allow USB debugging, click to OK button.
Now following above steps sequentially you have installed the setup on you local system.
Step 10) To check the installation hit the command adb devices on command line, it will show you the device name as below screenshot.
Enable developer mode Android Device
Once Downloading and installing Appium desktop client, now we have to turn on the USB Debugging option under Enable developer mode on Android Device.
How to Enable developer mode on Android Device?
Below are the step by step ways to setup.
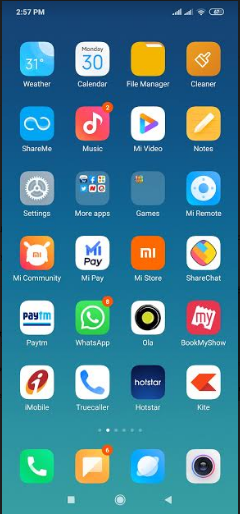
Step 1) Open your mobile home screen and search for setting icon and tap to it.
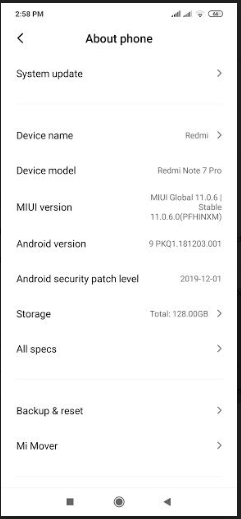
Step 2) Under settings window, tap to About Phone icon
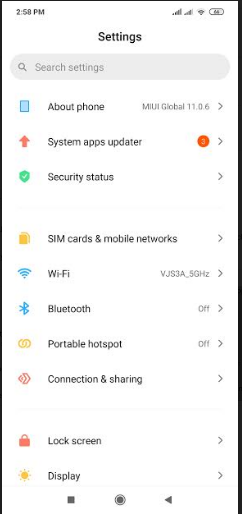
Step 3) Tap on MIUI version 7 times on the icon(we are using mi phone so we have MIUI version) or If you find “Build number” icon on your mobile screen then you tap 7 times on the icon
Step 4) Now your developers options gets enabled on your settings window, open the developers options window.
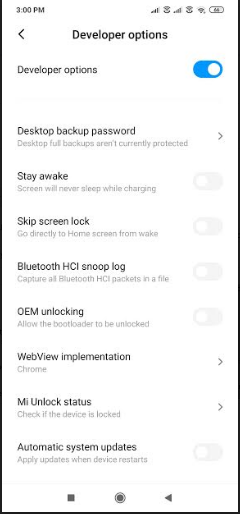
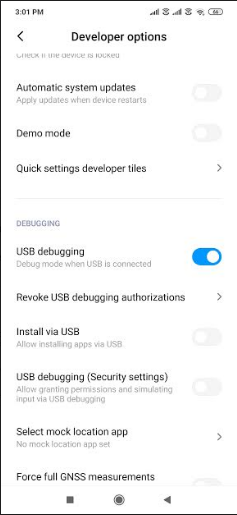
Step 5) Scroll down till you see USB debugging option, turn it on (or right swip)
Step 6) A pop up window will appear, simply select OK.
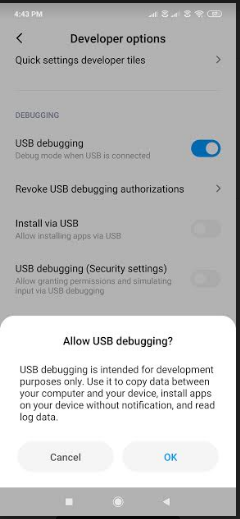
so following the above steps we have now enabled the USB debugging on your device.
Follow Us on Facebook: https://www.facebook.com/code2test/?modal=admin_todo_tour
Download And Install Appium Desktop Application
How to Download And Install Appium Desktop Application
Download And Install Appium Desktop Application .
Why to download Appium desktop application?
After the installation of Microsoft .net framework next step is to download appium application
Step to download and install Appium are below:
Step 1) Click on Appium Website and select the link under Appium desktop apps as per your OS configuration (we going with window)
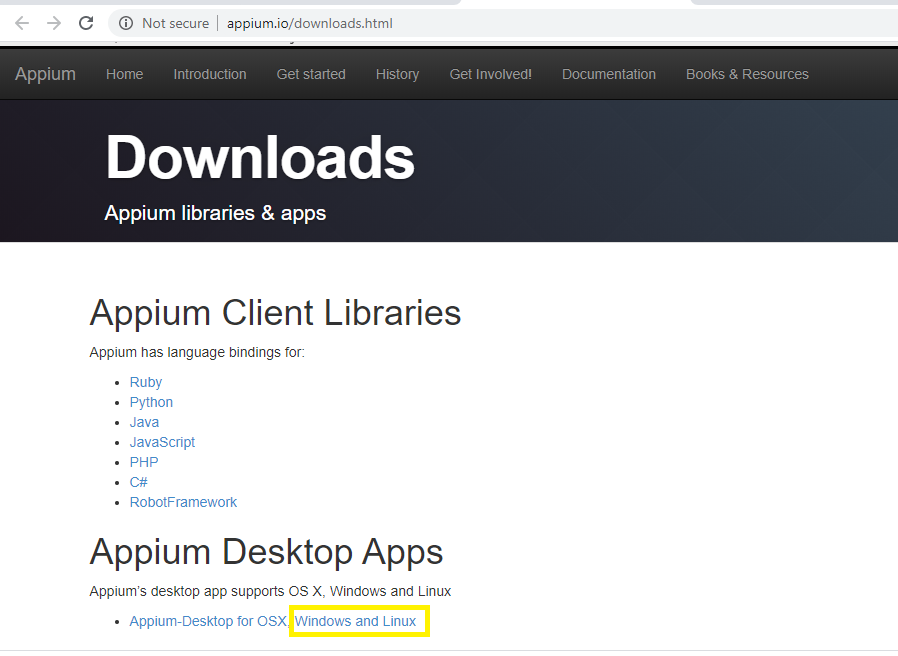
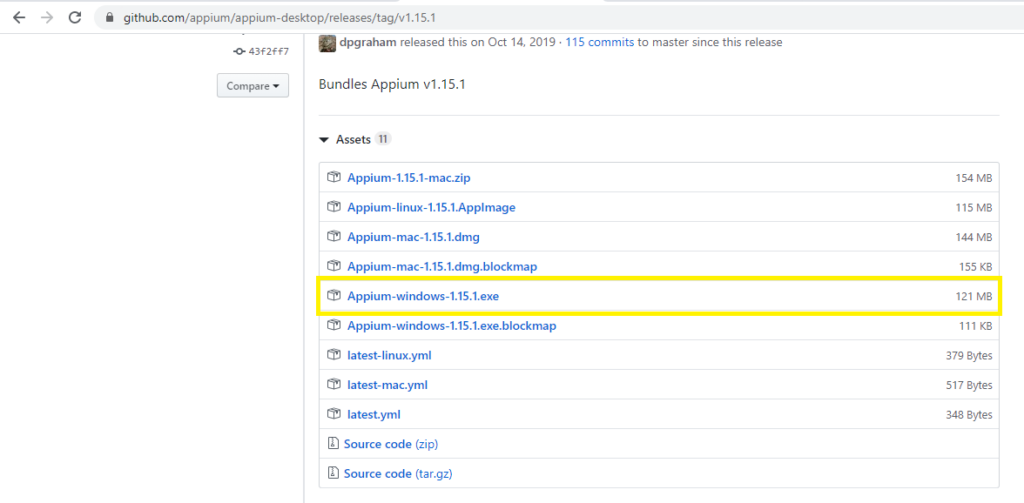
Step 2) Select .exe file for appium installation as per your OS configuration.
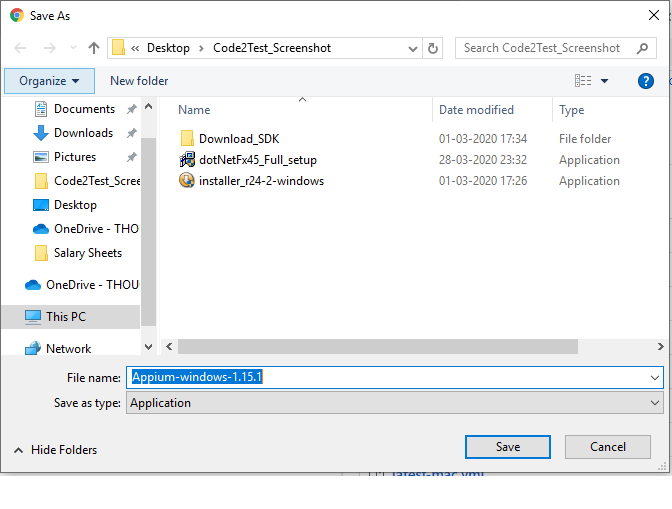
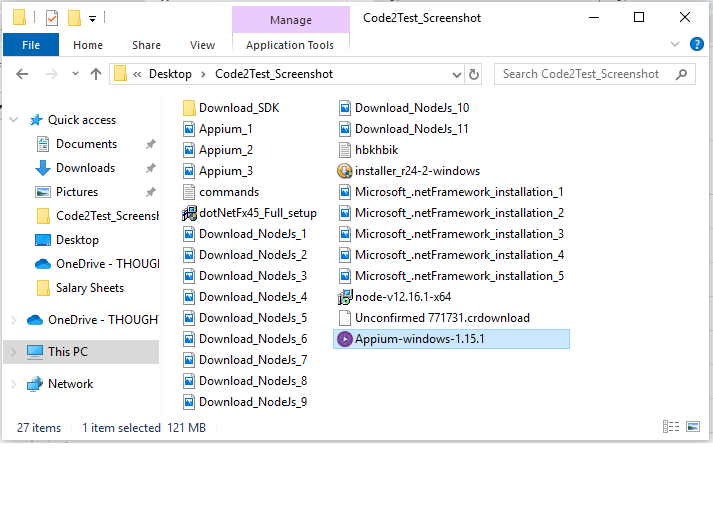
Step3) Choose a folder on your local system to save the Appium installer.
Step 4) Double click to saved Appium installer and continue to install.
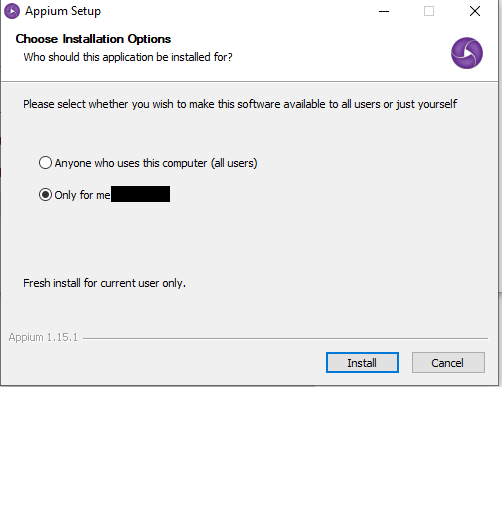
Step 5) Click to Install button under “Choose Installation Options” window
Step 6) Wait once the installation gets done

Step 7) Once the Appium Setup is completed, click to Finish button.
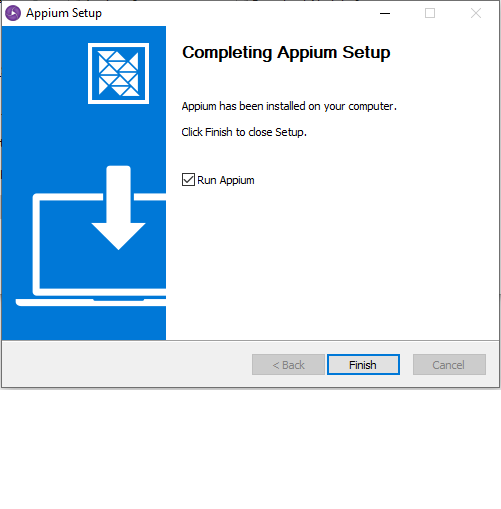
Step 8) Once the installation gets completed , the appium window will look like this as below screenshot.

Once we are restart your local system because it reflects your changes to local system.
Install Microsoft .net framework
How to Install Microsoft .net framework ?
Why we install Microsoft .net framework, the reason is because to create a support to provide a framework that can help in interaction of Appium automation scripts with android.
After the download and installation of NodeJs, now we have to Install Microsoft framework for the Mobile automation setup.
Below are the steps to Install Microsoft framework step by step:
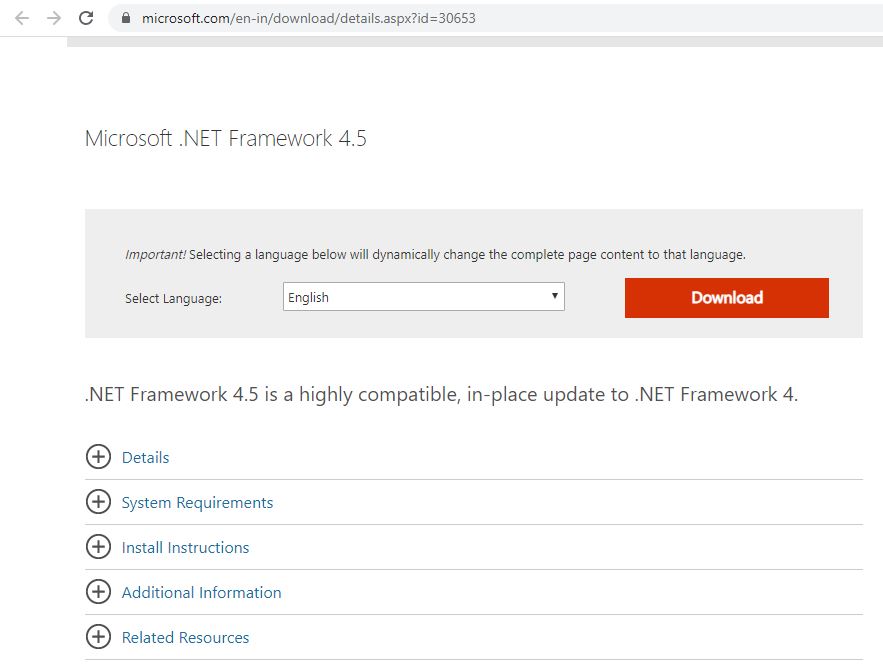
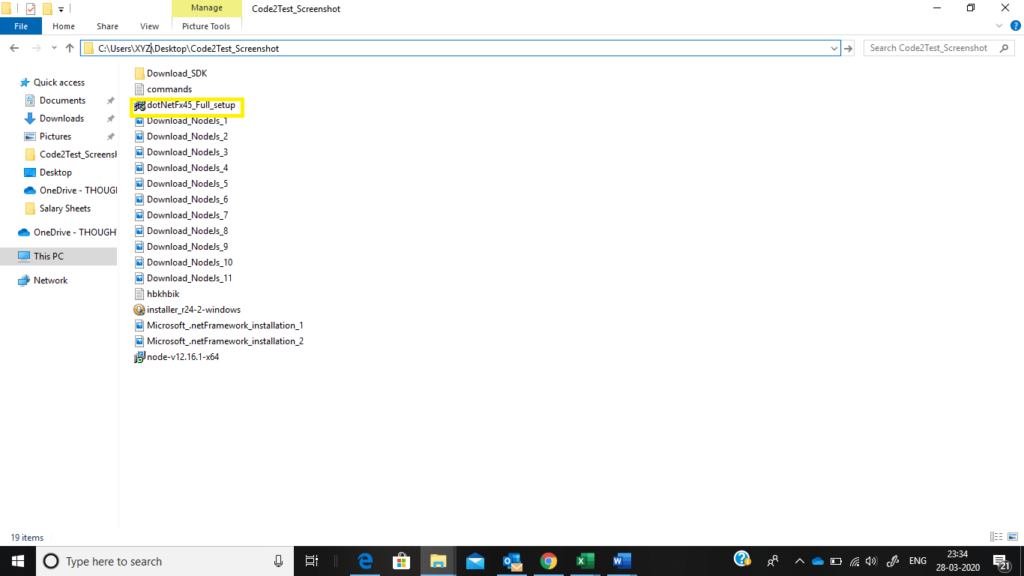
Step 1) Click to Microsoft .net Framework to click to download after selecting language.
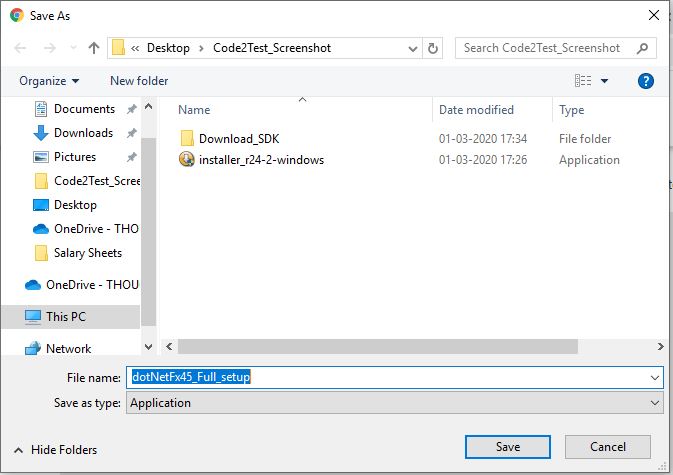
Step 2) Select the folder on your local machine to download the setup.
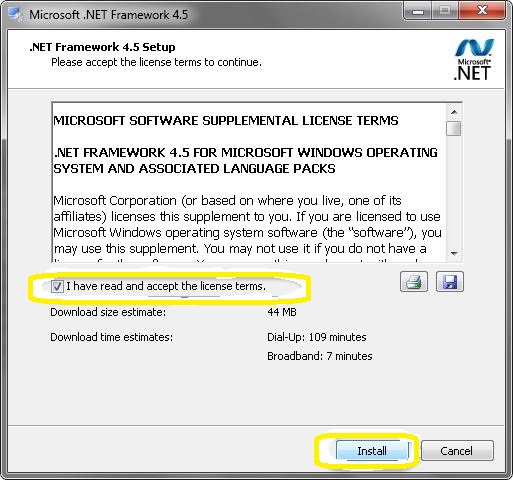
Step 3) Once the download is completed on local folder double click and start installation.
Step 4)
Step 5) Click to Finish button after the installation process is completed.
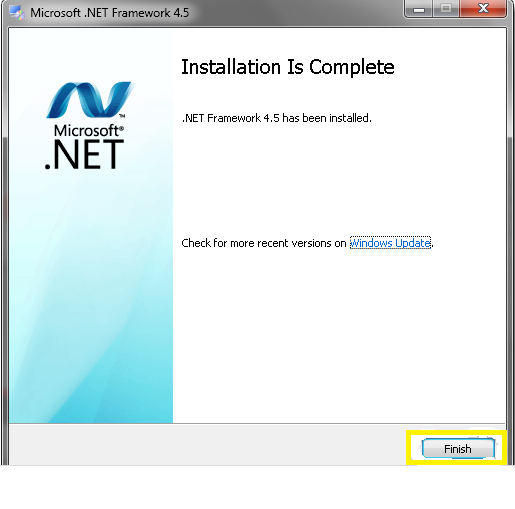
After following the above steps and completed of installation .net framework.
Its recommended to re-start your system
Download & Install Node JS
How to Download & Install Node JS?
Once we done with the setup of ADT plugin now its time to move further for next step for Download & Install Node JS for window
What is Node Js ? and how its use in Appium?
Node Js is an open source environment for server. It uses javascript on the server and runs on various platform like (Window, Linux, Unix etc).
As Appium is a http server which is being developed in node js.
The framework written of test code can be written be any language, The Node JS provides an interaction between Node Js server and selenium client ,that is why its configured with Appium setup.
Below are the steps to Download & Install Node JS:
Step 1) Click on Node JS and select the installer as per the your OS configuration and download.
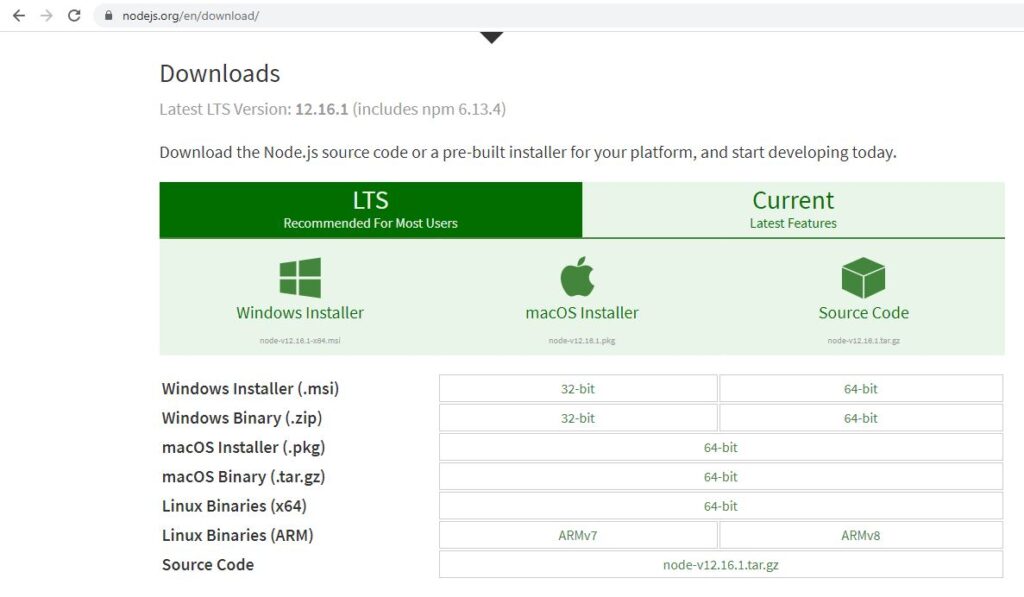
Step 2) Select the path from on local system to download the Node JS installer
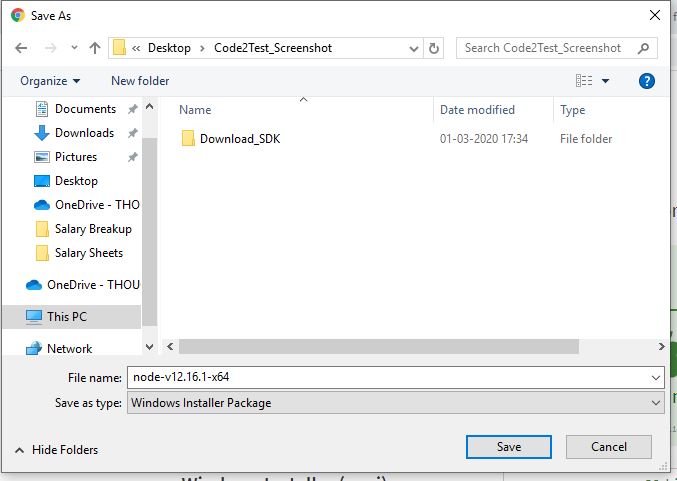
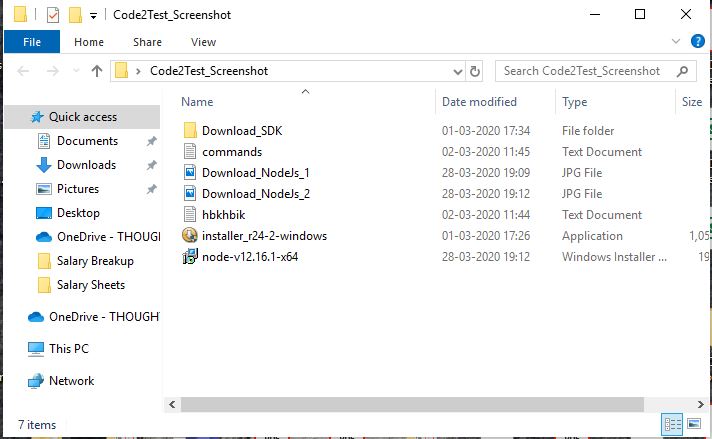
Step 3) Move to the folder location of installer and double click to it.
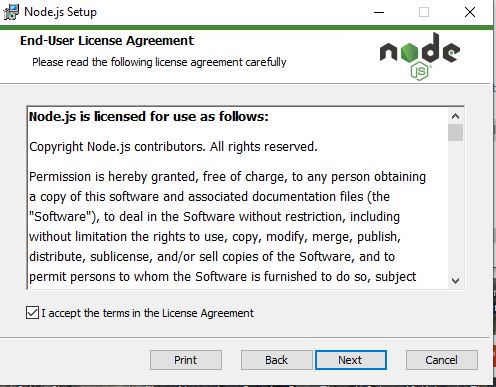
Step 4) As Node Js setup get started click to Next button.

Step 5) Accept the license agreement and click to Next button
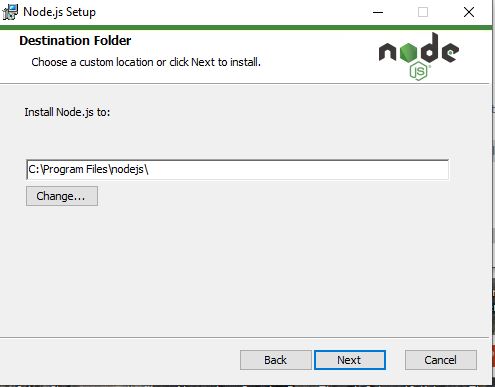
Step 6) Select the designation folder to save the setup files (prefer default location as c:\)
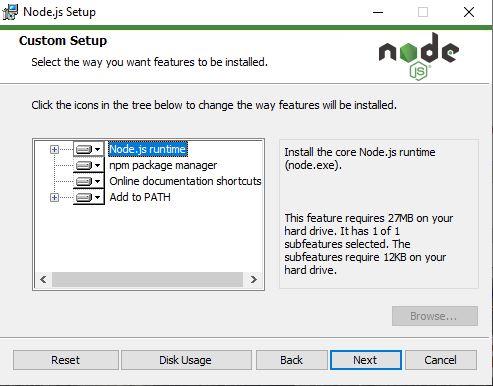
Step 7) Click to Next button under Customer Setup
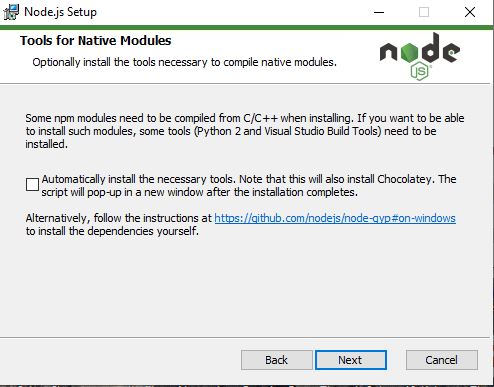
Step 8) Click to Next button under Tools for Native Modules.
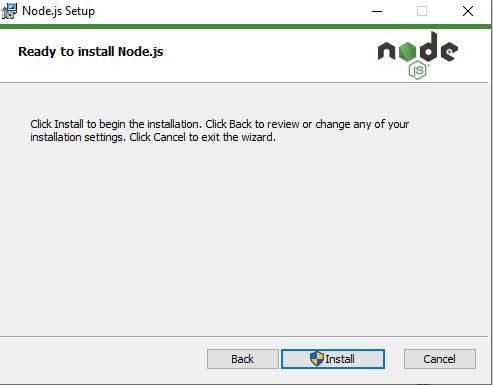
Step 9) Now Click to Install under Ready to install Node.js window
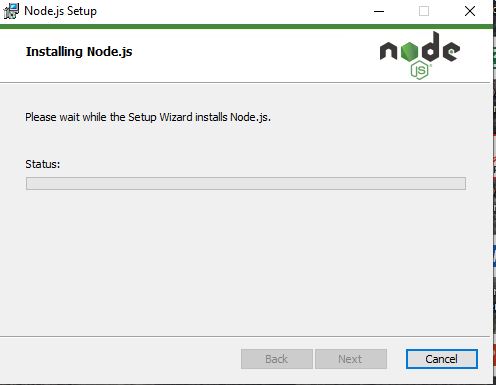
Step 10) Now wait while the setup status is completed.
Step 11) Once the setup is done click to Finish button
Now we are done with the installation of NodeJs

Setup eclipse ADT plugin
How to install and setup eclipse ADT plugin?
After the setup of Android Environment variable, now its time to setup eclipse ADT Plugin.
What is ADT and Use in Android Automation?
Android Development Tool (ADT) is a plugin for the Eclipse IDE.
ADT helps in providing the strong environment to integrate with android application development.
In Android Automation through appium, ADT plays a crucial role it help in the integration of eclipse with mobile device and smooth execution of script on mobile application. Lets understand to setup ADT plugin step by step.
Steps to install and setup ADT in eclipse are below:
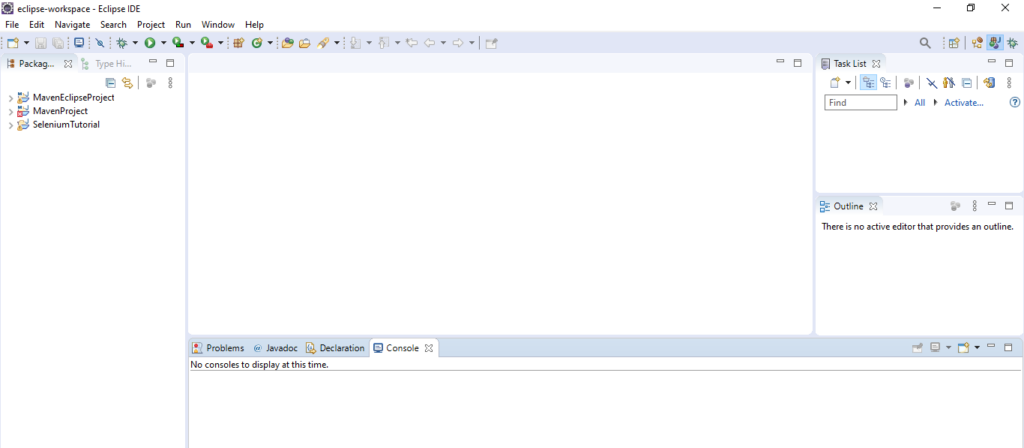
Step1) Open the eclipse IDE to your local system.
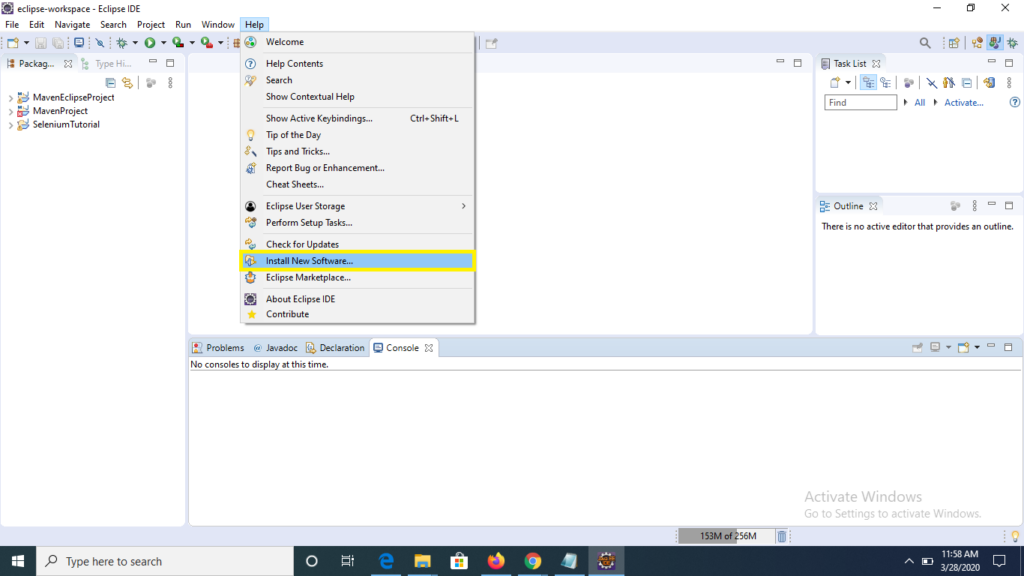
Step 2) Click to Help menu at top on eclipse IDE window and select “Install New Software” option for list.
Step 3) On “Available Software” window, provide the ADT installation url as -> https://dl-ssl.google.com/android/eclipse/ under works with: text field also check the check box for Develops tool and click to Next button
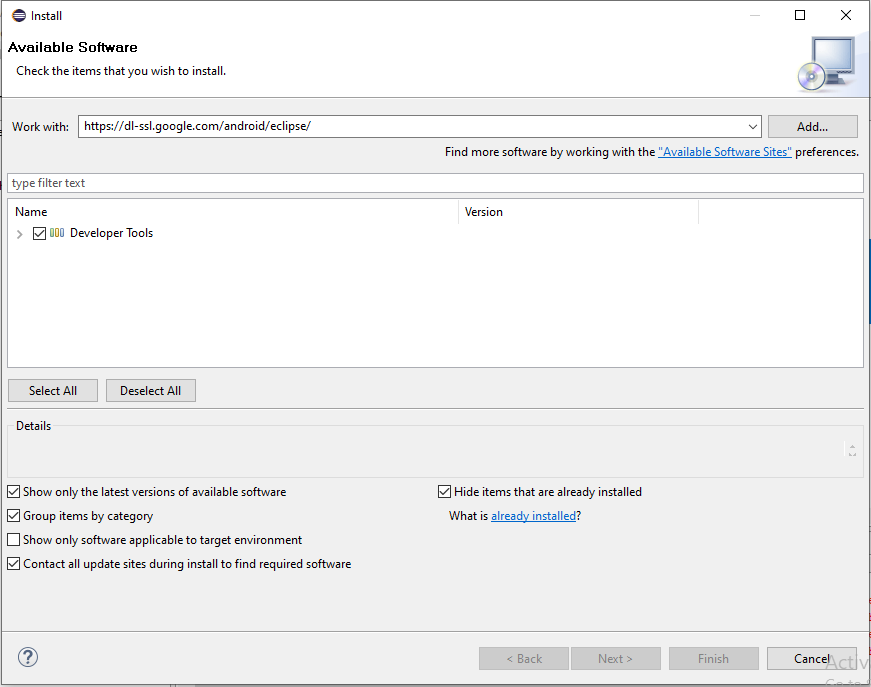
Step 4) Click to Next and Next till the last window and ADT plugin gets installed.
Step 5) Now close your eclipse and re-start your system, so that the changes gets reflected on the system.
Result-> Following the above steps we are now have integrated our eclipse IDE with Android, this will help in the creation and execution of mobile automation scripts.
Connect Us at Facebook-> https://www.facebook.com/code2test/?modal=admin_todo_tour