Home » java-tutorial
Category Archives: java-tutorial
Encapsulation in java
In Java, encapsulation is a mechanism of wrapping data and code together into a single unit, called a class. It is a fundamental principle of object-oriented programming (OOP) and is used to hide the implementation details of a class from its external users.
How to achieve Encapsulation in java
Encapsulation in Java is achieved by declaring the instance variables of a class as private and providing public getter and setter methods to access and modify those variables. This ensures that the state of the object can only be accessed and modified through these methods, which provide a layer of abstraction and control over the data.
Here’s an example of java encapsulation:
public class Person {
    private String name;
    private int age;

    public String getName() {
        return name;
    }

    public void setName(String name) {
        this.name = name;
    }

    public int getAge() {
        return age;
    }

    public void setAge(int age) {
        this.age = age;
    }
}
In this example, the instance variables name and age are declared as private, which means they can only be accessed within the Person class. The public getter and setter methods getName(), setName(), getAge(), and setAge() are provided to access and modify the variables, respectively.
By encapsulating the data in this way, we can ensure that the state of a Person object is only accessed and modified in a controlled way, which makes the class more robust and less prone to errors
Inheritance in java
Inheritance: It is a feature in Oops concept where a class inherits all the features of another class. When a class inherits the methods and global variable of another class it is not able to perform the action on the defined structure of another class.
The reason for introducing the concept of inheritance in java, is re-usability now the same method and field defined in one class can be used by another class and can also add additional methods,variable etc to it.
Important terminology of inheritance in java:
- Sub Class : The class which inherits the methods, fields and variable of another class is known as sub class. Sub class can also create its own methods,variable and fields.
- Super Class : The class from which the sub class inherits all the features and re-use or access the defined methods, fields and variables is Super Class.
- Re-usability : its a approach to re-use the defined methods, fields etc, which we need on current class gets from another class.
Syntax used for inheritance:
class subClass extends superClass {
//methods
}
Download Eclipse and configure
After the installation of Java and environment setup. Next step is how to download eclipse in your local system.
Steps to Download Eclipse are as Below:
- Hit the Url->http://www.eclipse.org/downloads and click to download package link.
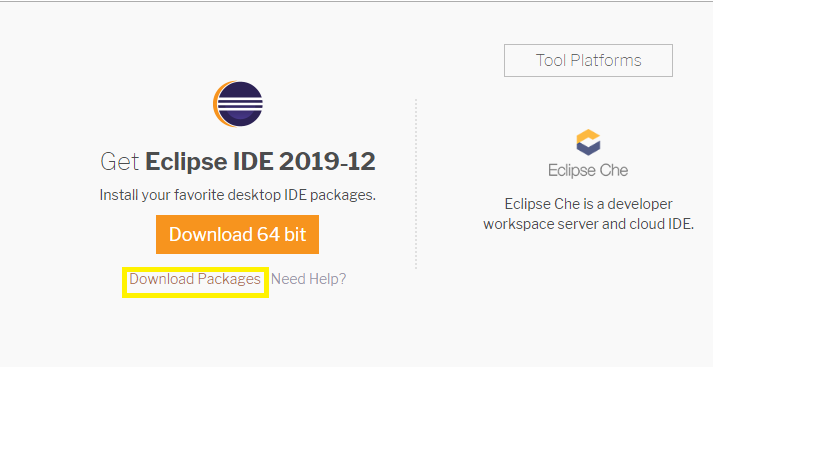
- It will redirect to “Download Package” window. Take the page webpage down and click to ” Eclipse IDE for Java Developers”.

- Click on Window 64-bit (Please select the IDE as per your system configuration)
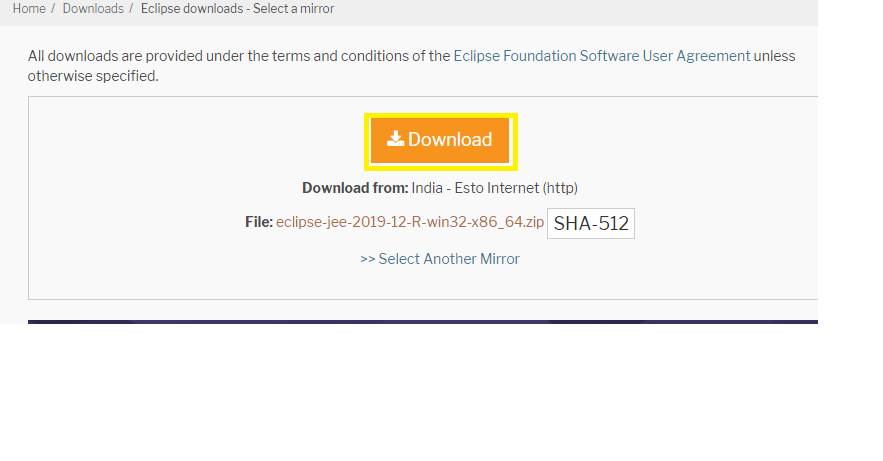
- Now click to Download the zip file to any of your preferred location on you local system and unzip the file.

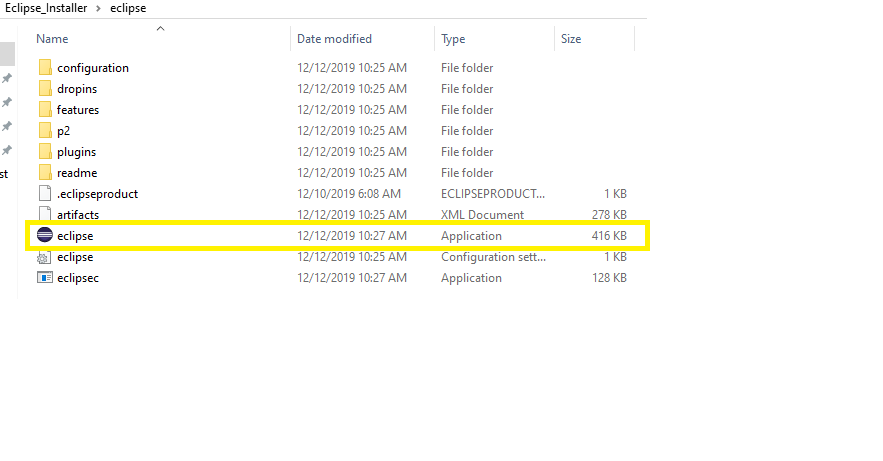
Now open the eclipse .exe file under eclipse folder
Now create a workspace at any of your preferred location and provide the path to eclipse
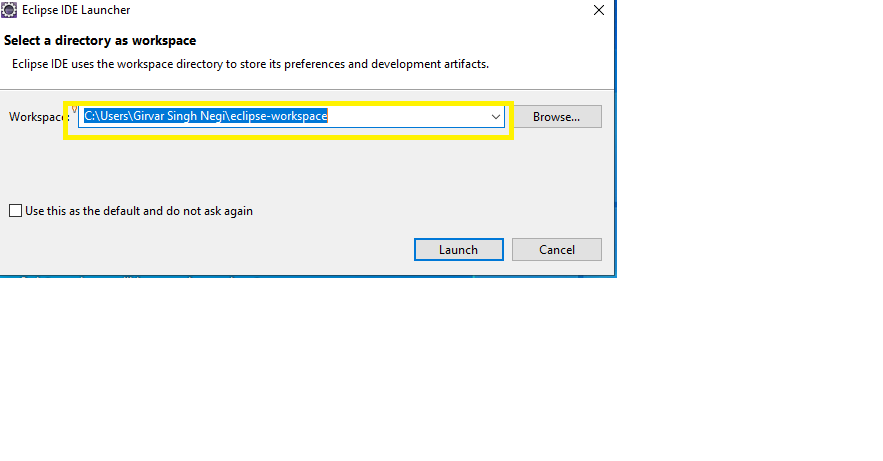
Finally the Eclipse is setup to your system with defined workspace and will display the welcome page for the first time.
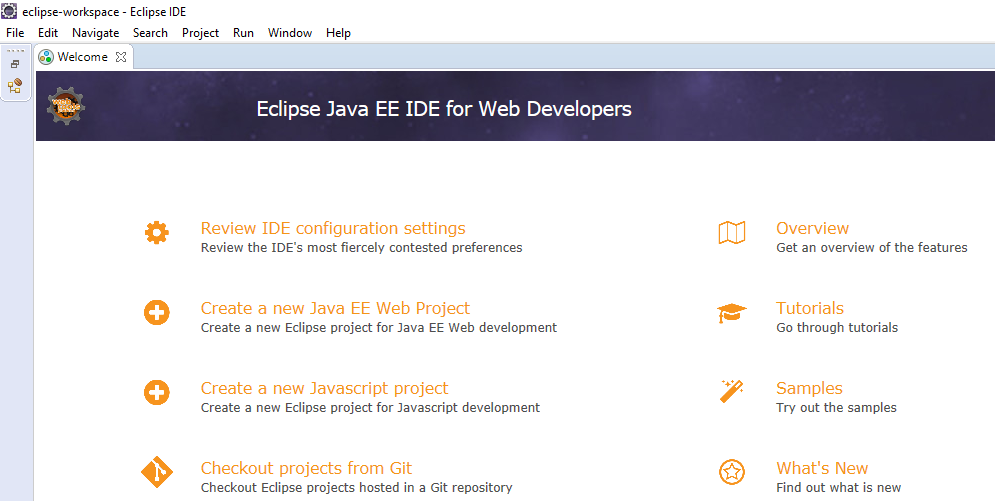
So Learners be we me, we will next learn how to setup selenium webdriver in our local system and run our first selenium test case.
How to Download & Install Java JDK 8 in window
In this tutorial we will learn how to Download & Install Java JDK 8 in window?
Step 1: Download java and setup java
- To install java open the URL->http://www.oracle.com/technetwork/java/javase/downloads/index.html
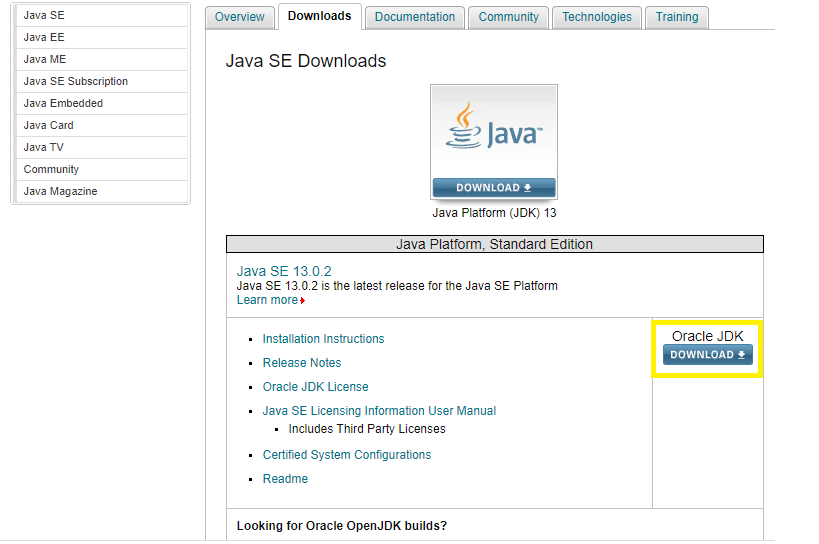
- Now Accept the Licence Agreement, always remember to choose correct JDK as per OS (Window, Mac, Linux)
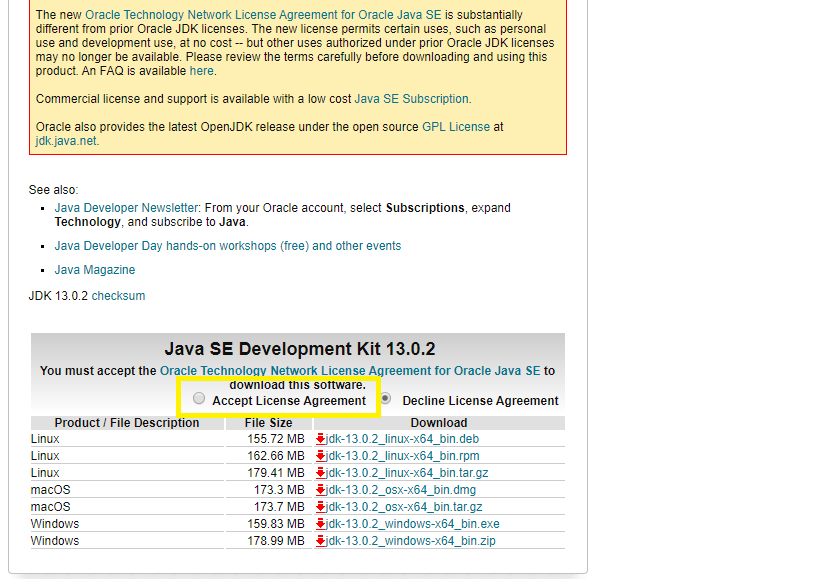
- On click to JDK .exe file,It will start downloading at the bottom(refer screenshot) below

- Now double click to jdk .exe file . The installation will start and click to next button
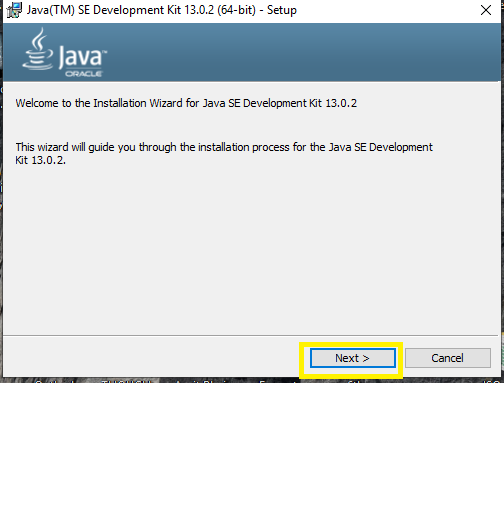
- Installation will start with status of download
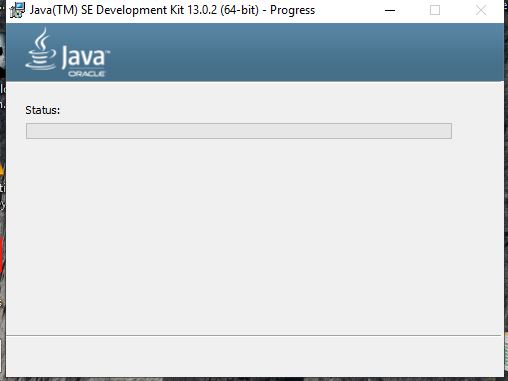
- Once the installation is completed. A last window of installer will open click to Close.
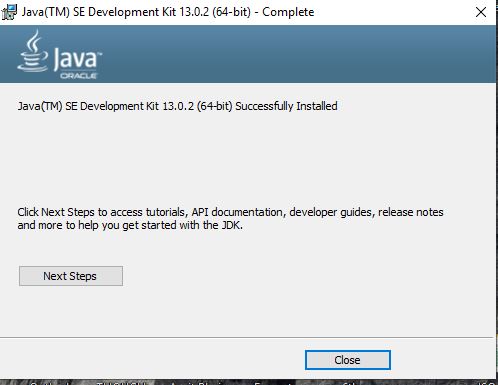
- Now the next step is to install Java path on environment variable
Step->Right click to My computer-> properties->Select Advanced system settings->Click to Environment Variables at the bottom
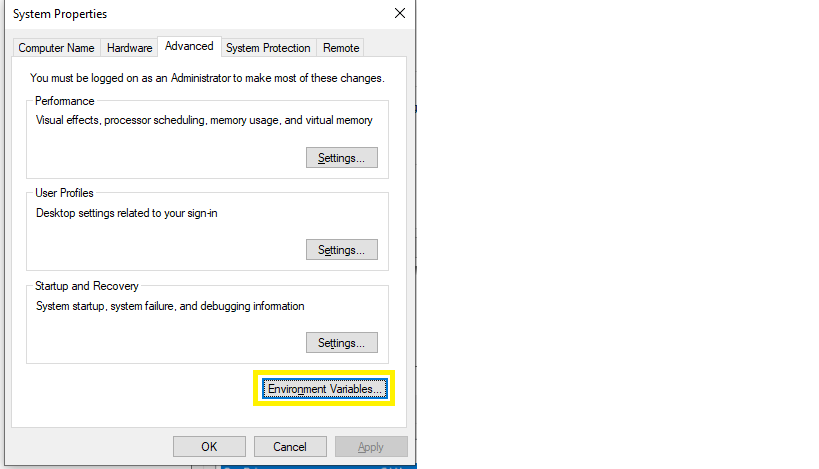
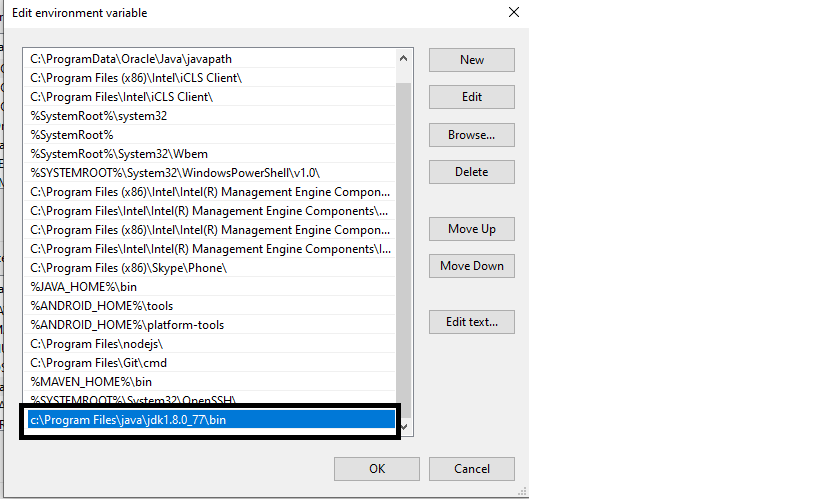
- Under Environment Variable window->Under System variable->Select Path from Grid and click to Edit button(Refer Screenshot)
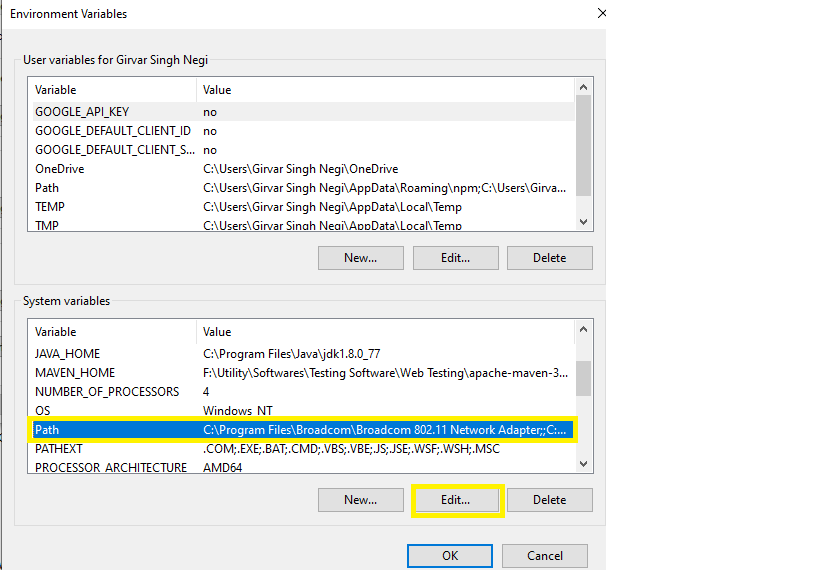
- Under Edit Environement window, Click to new button and add the java path till bin. Suppose you have Installed JDK in path->c:\Program Files\java\jdk1.8.0_77\bin
So in this case provide the jdk path till bin folder and click to OK button(Refer screenshot)
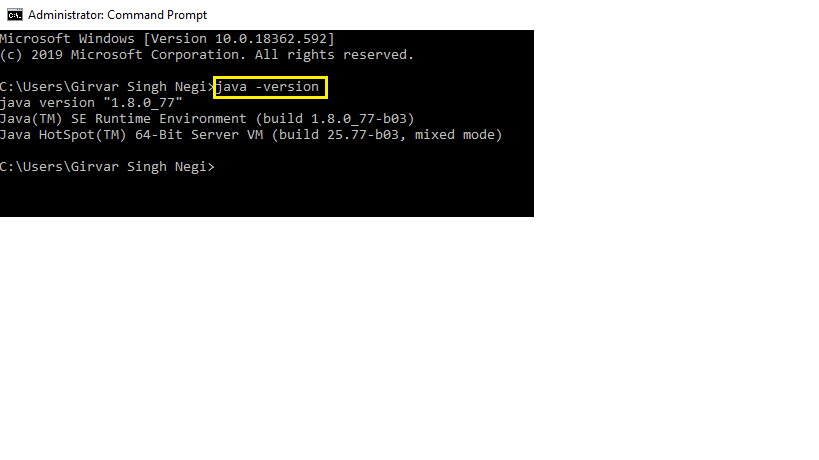
- Now Verify Java Installation
Open Command Prompt and enter java -version and click Enter(Refer Screen shot)
So following the below steps we have learned how to Download & Install Java JDK 8 in window.