In Previous Tutorial we have learned Introduction of Rest Assured, so in current tutorial we will understand how to Configure Eclipse with Rest-Assured API.
How to Configure Eclipse with Rest-Assured API
To configure and setup eclipse with Rest Assured API, we need to follow the below steps step by step:
3) Download the Rest Assured Jars
4) Setup rest assured jars in eclipse
Above steps will help in configuration of Rest assured, Step 1 & 2 are already discussed in previous tutorials (click and walkthrough the tutorial sequentially), we will proceed with 3 & 4 steps to get more in depth.
Download the Rest Assured Jars
1) Click to url Rest assured website for jar download.
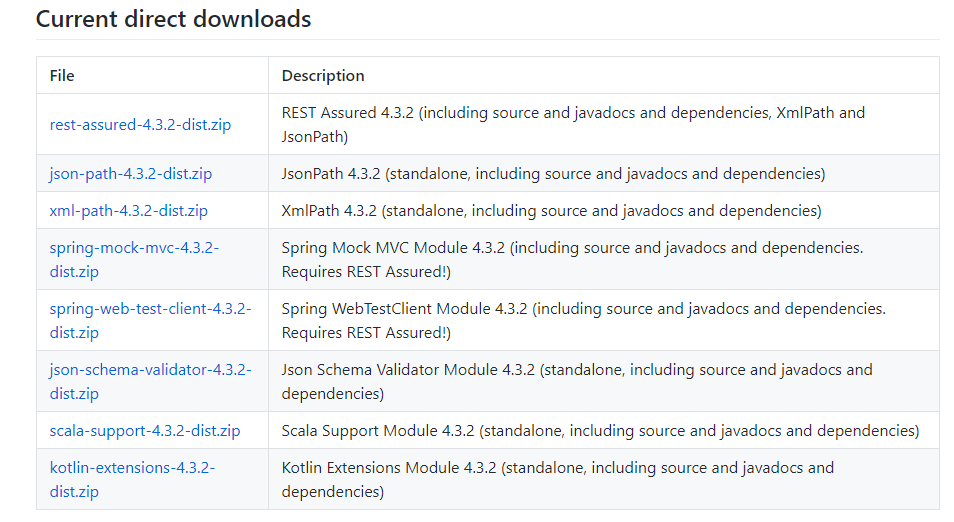
2) Download all the jars below the Files columns.
3) Unzip all the jars and save to your preferred folder, now next step is to setup rest assured jars in eclipse Ide.
Setup Rest assured jars in eclipse
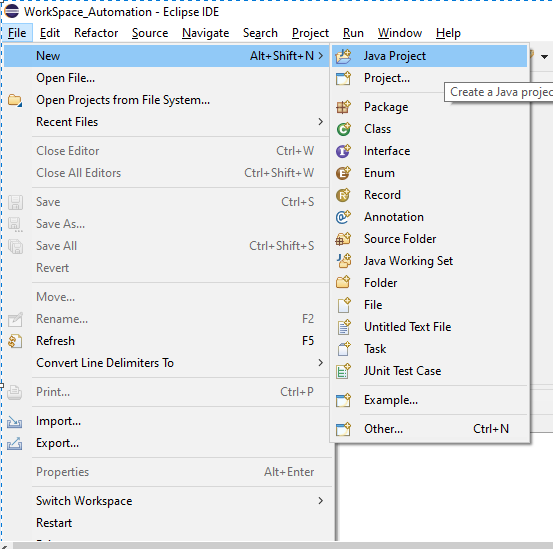
1) Create java project in eclipse by click to File->New-> Java Project , mention the project name and click to Finish button
2) Now create a class inside default package
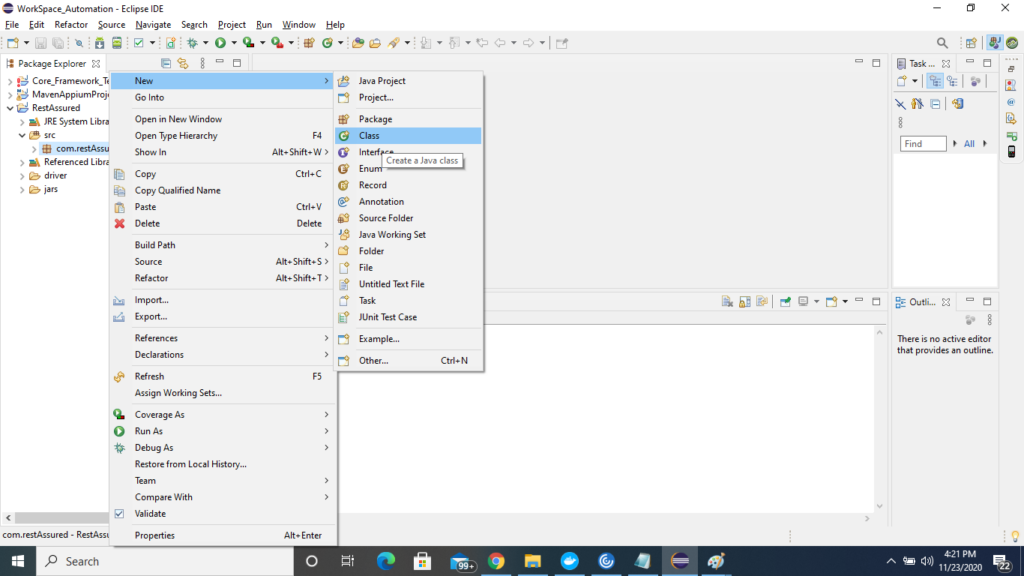
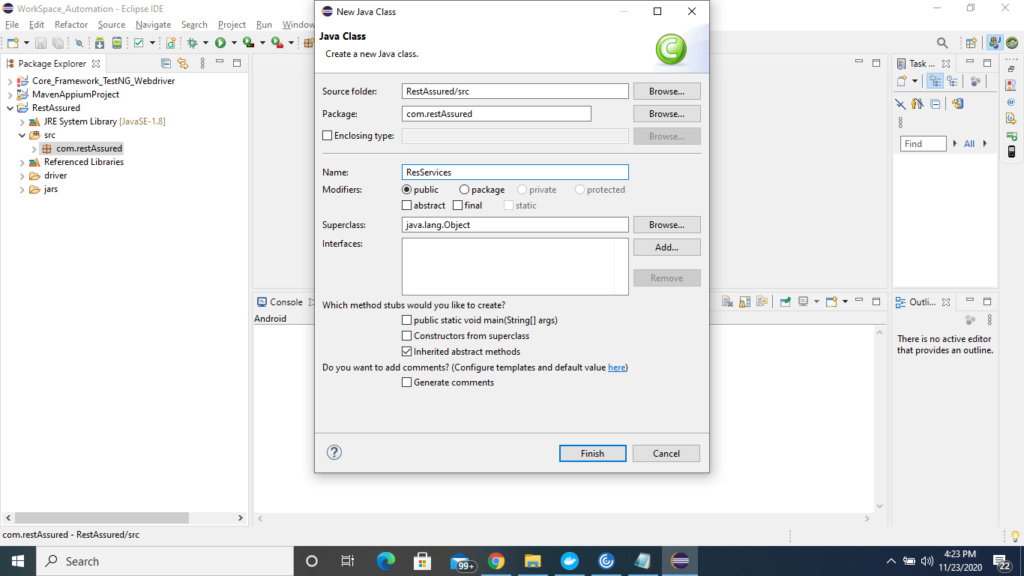
3) Now we need to provide the rest assured jars to the project for this follow the below steps.
Right click to Project -> Select->Build path->Select Build path
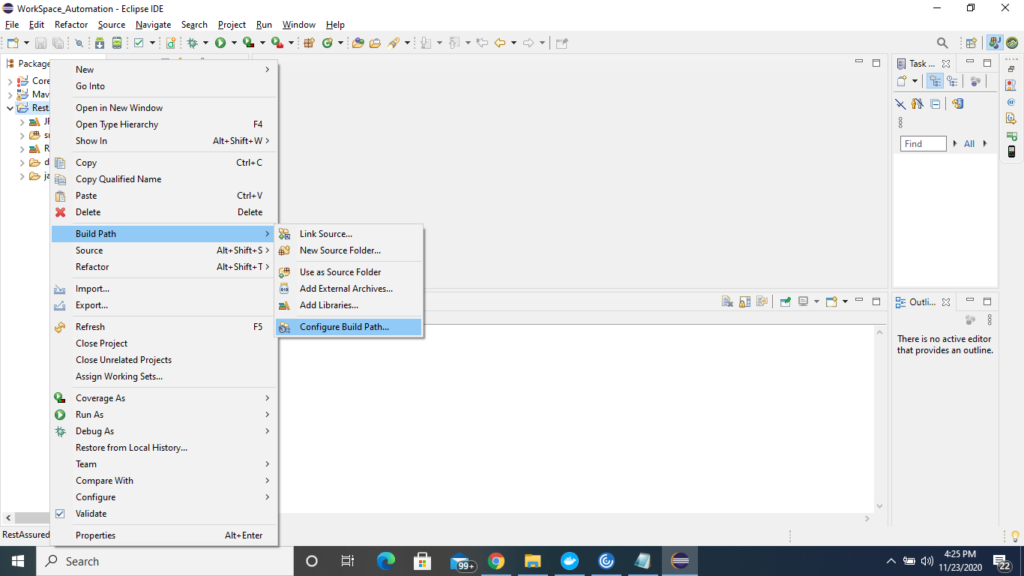
4) Under Java Build Path window-> Click to Libraries->click to Add External jars and now select all the unzip external jars of rest assured and click t apply and close.
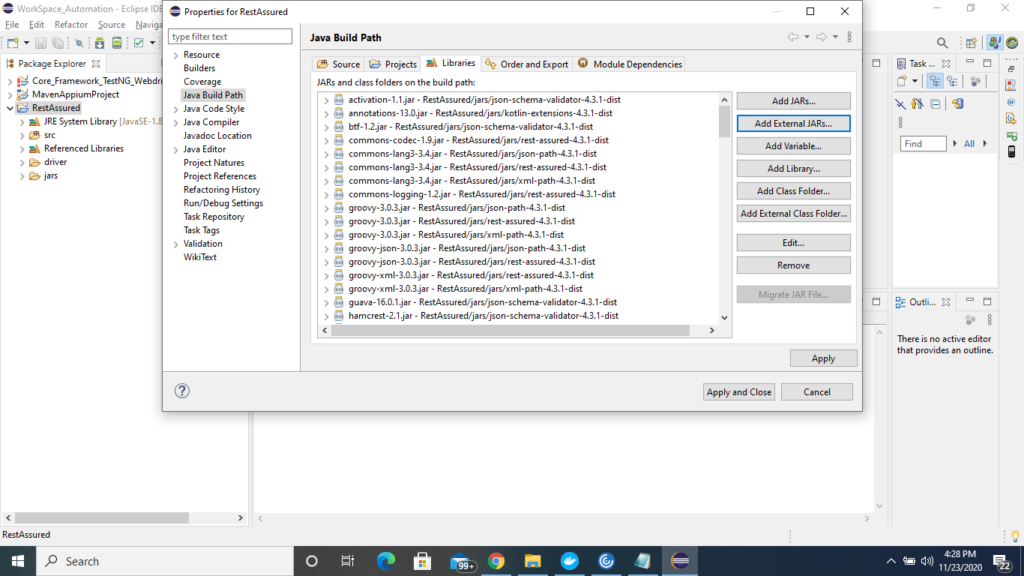
So by following above steps we will successfully install and setup rest assured on eclipse, in further tutorial , we will learn working on rest api and will try to hit rest services using rest assured and validate the output or expected output.
Comment for any feedback regarding the tutorial or any query on tutorial part